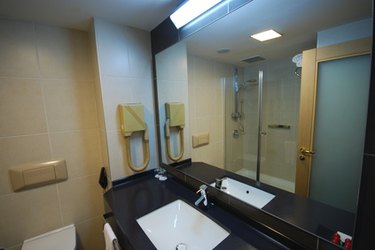
A three-piece tub surround can be a quick and easy solution for a bathroom remodeling project. Tub surrounds are less expensive than tile, take less time to install and require fewer tools and skills than a tile installation. In addition, a three-piece tub surround is a water-tight covering for the walls. It will provide years of moisture control when properly installed and maintained.

Video of the Day
Things You'll Need
Pencil
Allen Wrench
Masking Tape
2 Tubes Of Silicone Caulk
Drop Cloth
Tape Measure
1 Tube Of Latex Caulk
5 Tubes Of Construction Adhesive
Screwdriver
Caulk Gun
Step 1
Place a drop cloth in the tub and on the floor around the tub to prevent damage to the tub or flooring.
Video of the Day
Step 2
Turn off the water to the plumbing for the tub from the access panel behind the tub. Use the valves that shut off water to the bathroom or the main water supply if there are no local valves installed. Open the faucets to be sure the water has been shut off completely. If not, new valves will need to be installed before continuing.
Step 3
Remove the tub spigot by prying it gently off the pipe. Use a screwdriver or Allen wrench to remove the faucet or faucets by removing screws that attach the faucets to the plumbing. The screws are located under caps or on the bottom of the faucet handles.
Step 4
Dry-fit the pieces of the tub surround. Place the back section first and tape into position. Place the section on the end wall without plumbing and tape it into position.
Step 5
Measure the location for plumbing to protrude through the tub surround. Measure the distance from the back wall section to the pipes. Measure up from the top of the tub. Transfer these measurements to the back of the tub surround section that will be behind the plumbing fixtures.
Step 6
Use a drill with an appropriate sized drill bit or an appropriately sized hole saw to cut the holes needed for the plumbing fixtures. Lay the tub surround section on a solid work surface while cutting the plumbing holes.
Step 7
Position the tub surround piece over the plumbing and tape securely into position.
Step 8
Draw a line around the edges of the last piece placed into position to outline the section. Remove the section. Draw a line around the section at the other end of the tub and remove the section. Draw a line around the section on the back wall of the tub and remove the section.
Step 9
Place a tube of silicone caulk in a caulk gun and cut off the tip with a utility knife. Insert a long nail into the end of the tube of caulk to break the inner seal; there may be a pin attached to the caulk gun to use for this purpose. Apply a thick bead of caulk to the edge of the tub where the bottoms of the panels will be located after installation.
Step 10
Apply construction adhesive to the back of the section that will be on the back wall of the tub. Apply a liberal amount in a zigzag pattern. Place the back section according to the lines drawn during dry-fitting. Press the panel securely into position. Apply a bead of silicone caulk to each edge of the panel where the other two panels will overlap.
Step 11
Apply construction adhesive to each of the other two panels and position according to the lines drawn during dry-fitting. Press the panels securely into position and press firmly where they overlap the section on the back wall to seal the panels to the silicone caulk.
Step 12
Put a bead of latex caulk around the edges of the panels and along the bottoms of the panels where the panels meet the top of the tub and around the pipes for the plumbing fixtures. Use a finger dampened with soapy water to smooth the caulk and press it deep into the crevices to prevent moisture from getting behind the panels.
Step 13
Re-install the plumbing fixtures, turn on the water supply and remove drop cloths.
Tip
Replace caulk around the bottom of the three-piece tub surround when there are signs of mold, such as discoloration, or the caulk begins to pull away from the surround or the tub surface.
Warning
Follow all manufacturer recommendations regarding ventilation during use and proper disposal methods for the construction adhesive, silicone and latex caulk.