Things You'll Need
Large cardboard box
Scissors
Marker
Hot glue gun
Glue sticks
Packing tape
Round plastic gallon tub
Acrylic paint (optional)
Stickers (optional)
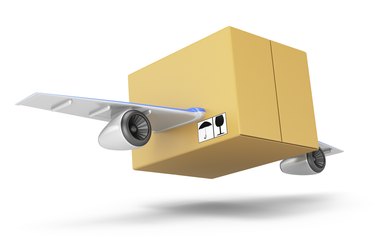
Kids can keep themselves entertained for hours with cardboard boxes, especially when they get to take flight in their own cardboard box airplane. Half the fun is creating the plane. The other half is sitting in their own kid-sized plane for those fabulous flights of imagination.
Step 1
Cut the four flaps off of one side of the box. You will use these flaps for different parts of the plane.
Video of the Day
Step 2
Separate the two longer flaps that you cut off of the box. Cut one end of each flap into a half-moon curved shape.
Step 3
Make horizontal slits the width of each of the longer flaps in two opposing walls of the cardboard box. Slide the flat end of each flap into each slit. Push the flaps in a few inches so that some of the flap is inside the box. Fold this small section down so that it is flat against the inside of the box. Tape in place to secure.
Step 4
Cover the plastic tub – an empty margarine container works well – with duct tape. Silver duct tape will give the tub the appearance of metal for the plane rotor.
Step 5
Create a plane propeller from one of the short flaps you removed from the cardboard box. Draw two elongated opposing teardrop shapes on the short flap. Create a 1-inch strip where the two teardrop points would touch. Cut out the propeller in one piece.
Step 6
Cut out a circle from some of the remaining cardboard using the top of the plastic tub as a template.
Step 7
Hot glue the plastic tub to the front of your cardboard box. Place the top of the plastic tub against the cardboard box. Glue the narrow center of the propeller to the bottom of the plastic tub. Top this off by gluing the round cutout you made over the center of the propellers.
Step 8
Cut the two short flaps out of the bottom of the cardboard box. Tape the two long flaps still attached to the plane together to secure them in place. This will serve as the inside bottom of the toy plane.
Step 9
Cut a slit halfway through the center of both flaps. Slide the two flaps together at the slits to create a "plus" sign symbol.
Step 10
Cut one side of the "plus" symbol short to create a T-shape. Turn upside down, cut the other side of the flap in half diagonally to make it into the tail section of the plane. Hot glue this tail section to the back of the cardboard plane.
Step 11
Paint the plane, if desired, with acrylic paint in fun colors. Stickers and other embellishments could also be added.
Warning
Hot glue guns reach high temperatures and can cause burns. Use caution and keep out of reach of children.
Video of the Day