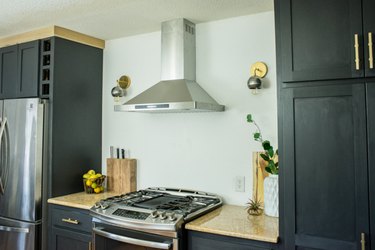
When you are thinking about upgrade options for your kitchen, consider installing a ductless range hood. Range hoods immediately add vertical interest and give your kitchen a modern, updated feel. Since they are ductless they can be easily installed in the place where the overhead cabinet or microwave used to sit and do not require that you cut vent holes in your ceiling and roofline. Check your local building code before installing a ductless unit to ensure that they are allowed.
A ductless range hood will require an electrical outlet that is dedicated to the range hood. For our purposes, we are assuming that you have had an electrician run electrical circuit wires from the circuit breaker box to the location where the outlet will be installed, behind the vertical "chimney" of the range hood. If you're not certain of your wire connection skills, you should also have the electrician connect the outlet.
Video of the Day
Video of the Day
Things You'll Need
Range Hood
Tape measure
Pencil
Level
2-inch drywall screws
'Old work' box
Electrical outlet (duplex 15-amp)
Cardboard
Electrical circuit tester
Drywall saw
Mallet
Screwdrivers (Phillips-head and slot-head)
Wire stripper
Tracing paper
1/8-inch drill bit
Drill
Stud finder
Tip
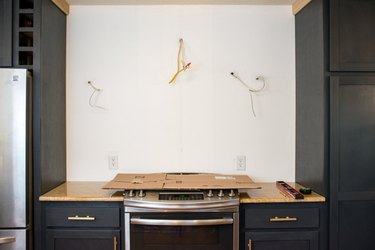
Take precautions to protect your range by adding cardboard over the top of it.
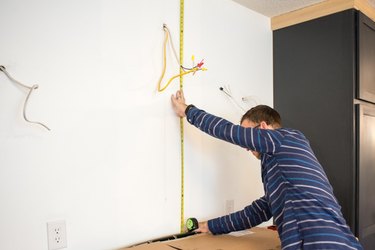
Step 1: Find the Center Point on the Wall
Using a tape measure, find the center point on your wall. If you are working between two upper cabinets, then measure and mark the half-way between those cabinets. Double-check your center point to make sure it is centered above your cooking range. Once you have found the center point, use a level and draw a vertical line from your range to the ceiling.
Step 2: Check Your Measurements
All range hoods come with recommendations for how far above the range they can be placed; most can be mounted from 29" to 34" above the range. Measure from your range top to your ceiling to find out how much available space you have for the range hood. Now you will need to determine where to place the range hood and chimney assembly within the available space, positioning it so that the range hood matches the recommended height above the range.
Set the chimney on top of the range hood and measure from the bottom of the range hood to the top of the chimney with the chimney at its shortest length. Make sure that this distance is less than the distance from the bottom of the range hood to the ceiling. If not, you will need to mount your range hood lower on the wall. Make sure that the electrical wire drop for the outlet fits between the top of the range hood and the ceiling.
The goal of all of these measurements is to mark where the bottom of the range hood will sit as well as where the top of the range hood will lie.
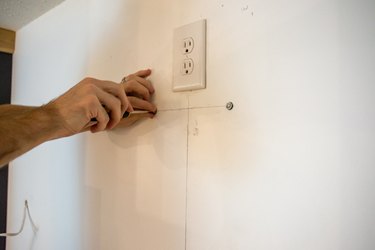
Step 3: Install an Electrical Box in the Drywall
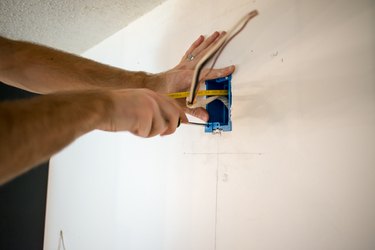
Position the 'old work' box face-first against the wall where your wires emerge. Trace around the edges of the box to mark the opening where the box will fit. The outlet needs to be somewhere along the center line and within the area that the range hood chimney will cover.
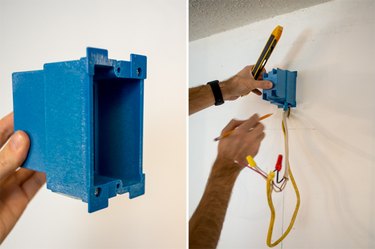
Using an electrical circuit tester, check to make sure you have the correct breaker off. Always double-check the electrical tester against a circuit that you know is live to make sure the tester is working. If the wires are live, find the circuit breaker controlling the circuit and switch it off.
Once the circuit is off, use a drywall saw to cut along your pre-marked box line. It's safest to start with a small hole and look for wires or other obstructions as you go.
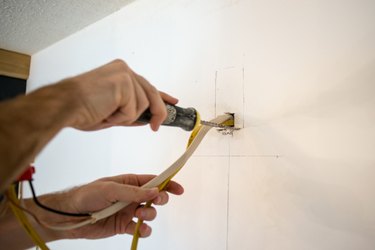
Tap the drywall out with a mallet. Pry open the holes on the back of the 'old work' box and thread the circuit wires through it. Once the wires are threaded into the box, insert the box into the wall opening. Tighten the screws on the box to secure it in place.
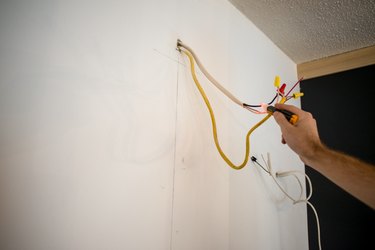
Step 4: Connect the Electrical Outlet
Prepare each insulated wire by stripping away 1/2" of insulation, using a wire stripper. Then, bend the exposed end of each wire into a tight 'J' shape. Loosen one of the brass-colored screws on the electrical receptacle, then loop the "J" on the black wire around the brass (hot) screw in a clockwise direction. Tighten the screw firmly. Now, attach the white wire to one of the silver (neutral) screws in the same manner. Finally, attach the bare copper ground wire to the green (grounding) screw, located on the bottom of the receptacle. Carefully tuck the wires into the box, taking care not to loosen any of the connections. Connect the straps of the electrical outlet to the box using the mounting screws. Turn on the power running to the outlet and test that it works. Troubleshoot, if needed, and then attach the cover plate.

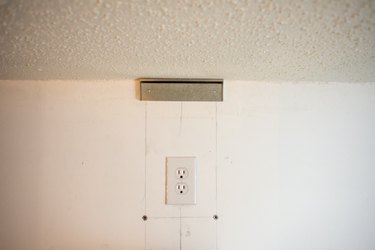
Step 5: Mark Wall for the Bracket
Hold a large piece of tracing paper up to the back of the range hood (where the mounting bracket holes are located) and trace the holes onto the paper. Double-check your measurements from Step 1 by holding the paper in place on the wall. Mark the wall to show where the drywall screws will go.

Using a drill and 1/8-inch bit, drill pilot holes at the marked location, then drive the drywall screws in and tighten until they are just barely protruding. The range hood will hang from these screws as you find wall studs and anchor the range hood firmly.
Step 6: Add the Chimney Bracket
Directly on your center line and at the ceiling, add your chimney bracket, using drywall screws.
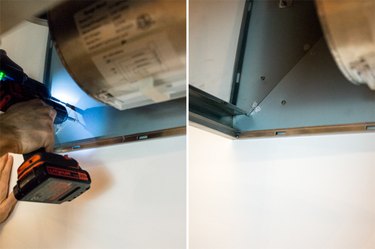
Step 7: Attach the Range Hood and Secure
Slip the range hood over your mounting screws, then tighten the screws. Now, use a stud finder to find two studs that run behind the range hood. Once found, mark the studs. Then, from underneath the range hood, anchor the range hood to the studs at the marked lines. These marks will be underneath the hood and will not be noticeable.
Step 8: Attach the Chimney and Secure
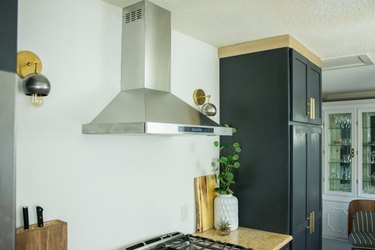
Before you attach the chimney, plug the range hood into the electrical outlet. Turn the range hood on and check that everything is working as it should. Slip the chimney in over the mounting hardware of the range hood. You do not need to add anything inside the chimney. Install the filters for re-circulating air. This range hood is ductless, and it recirculates the air and pushes it out through vents in the chimney.
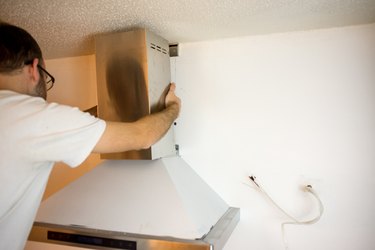
Secure the chimney to the body of the range hood with the provided screws.
Tip
When doing electrical work, it's important to make sure you are following local building codes and it's always a good idea to have an electrician check your work.