Things You'll Need
Seam ripper
Tweezers
Magnifying glass
Lint brush
Duct or packing tape
Removing embroidery can be tricky -- care must be taken to remove the stitches so the fabric is not harmed. Hand embroidery is often found on vintage pieces made of silk and thin cotton. A meticulous hand should be used for this work, as each stitch is fragile. The removal of machine embroidery isn't so tedious; however, the machines build the designs with many more layers of stitches, so there are more to remove. With the right tools, and much patience, you can salvage the shirt or other garment.
Removing Hand Embroidery
Step 1
Turn the shirt inside out so the back of the embroidered section is exposed. Slide your hand inside the shirt so the section of stitches is lying on your palm.
Video of the Day
Step 2
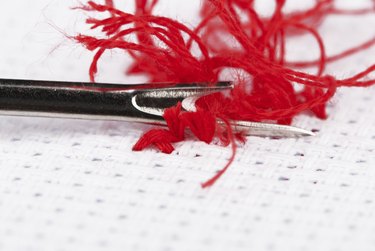
Take the seam ripper and gently slide it under a small section of stitches (five to six). Gently push the seam ripper forward so it cuts the stitches.
Step 3
Turn the shirt right-side out and use the tweezers to pull each thread out. Stop pulling if there is any resistance.
Step 4
Repeat steps 1-3, working in small sections. Use the magnifying glass if you get to a detailed section and need to define where the stitches overlap.
Step 5
Run the lint brush over the front of the shirt to catch all of the stray threads after you have removed the embroidery stitches.
Removing Machine Embroidery
Step 1
Turn the shirt inside out so the back of the embroidered section is exposed. Slide your hand inside the shirt so the section of stitches is lying on your palm.
Step 2
Look for the white bobbin thread. Insert the seam ripper under the bobbin stitches and push it forward to cut a section of stitches (30-40). There should be a layer of stabilizer in between the stitches and the shirt. Cut all of the layers stitches so the stabilizer is exposed. Do not cut through the stabilizer, as it will protect the shirt.
Step 3
Turn the shirt right-side out and use the tweezers to pull out the sections of thread. Stop pulling if there is any resistance.
Step 4
Repeat Steps 1-3 until the stitches have all been removed.
Step 5
Brush the threads off the shirt. Remove the stray threads from the shirt with a piece of duct tape or packing tape.
Tip
You can often mend any accidental damage from the removal process by covering it with a machine embroidery design. As the stitches go over it, the hole is sewn together and backed by the stabilizer. You can also use a needle and thread to darn a small hole created by a seam ripper.
Use a pair of tweezers with an attached magnifying glass to help you see clearly.
If you are often removing machine embroidery from projects, you can invest in an electric stitch remover. It will make the job much less time consuming.
Warning
Wash your hands before working with silk so you do not transfer any oils onto the fabric.
Do not use the tape to remove threads from nappy fabrics such as terry cloth, velour or velvet, as the tape may damage these fabrics.
Video of the Day