Things You'll Need
Paper
Pen or pencil
Something to color it in with (optional)

Have you ever wanted to draw a rose but didn't know where to begin? Or you wanted to draw a classic tattoo style rose, but it seemed too difficult? Here is a step by step way to do it to make it very simple. By the end of this article, you will be drawing roses everywhere!
How to Draw a Classic Tattoo Style Rose
Step 1
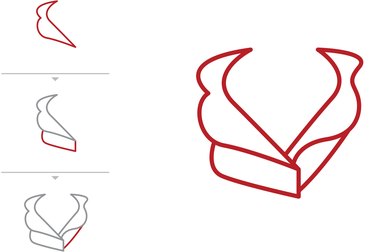
First you will draw the bud. Just follow the picture exactly for this first one. Very simple lines.
Video of the Day
Step 2

Finish the bid by drawing the inside and center of the flower. Draw it exactly as in the diagram. Keep in mind that a rose's center will wrap around-like a scroll.
Step 3

Drawing the petals. Now the fun begins, and also the part which frustrate many people. Let's keep it simple. Use only 2 petal shapes. In the diagram, these are red--one is like a soft leaf shape with one point outward, the other is like the top part of a heart, two soft rounded edges. Try to imagine these as having that velvety rose texture. Repeat the 2 patters, one after the other all the way around.
Step 4
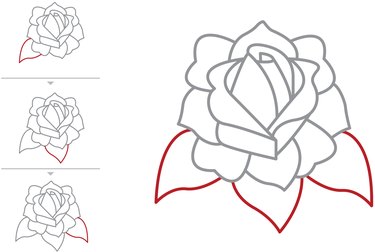
Adding leaves. Don't add too many, this is also a mistake that is made. Follow the diagram and start with 3 leaves.
Step 5
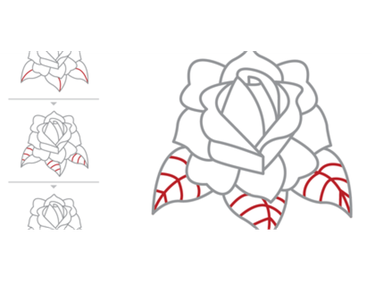
Leaf texture. Draw a line down the center of each leaf. Then draw the veins symmetrically as in the diagram
Tip
Keep it simple! You can add color! Photoshop is great for this.
Video of the Day