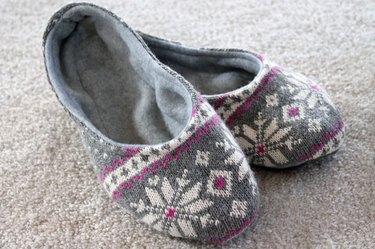
When it's cold outside, it's nice to slip into a comfy pair of slippers. Create your own pair from an old sweater for added coziness. Designed for indoor use, these are sure to keep your feet toasty warm.
Watch the video tutorial here.
Video of the Day
Video of the Day
Things You'll Need
- Slipper pattern or a pen and paper to make your own pattern
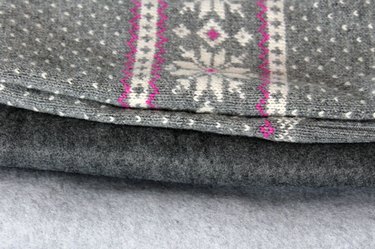
- Two old sweater sleeves or a 1/2 yard of knit sweater material
- Fleece, 1/2 yard
- Heavy felt, 1/4 yard
- Sharp sewing scissors
- Paper scissors
- Pins
- Sewing machine
- 90/14 medium-weight ball-point sewing machine needle
- Coordinating thread
- Iron
- Measuring tape
- Hand-sewing needle
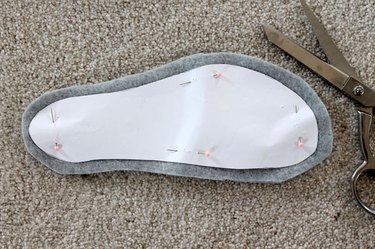
Step 1: Create a Slipper Pattern
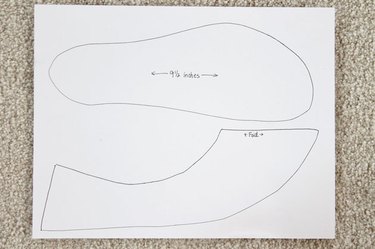
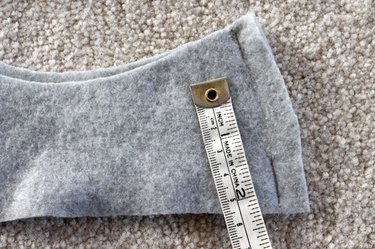
Download a slipper pattern (in your shoe size) or create your own. Drawing your own pattern allows you to make custom slippers for a child or an adult. To make the bottom pattern, trace your foot onto a piece of blank paper; then draw a top pattern like the shape pictured that is the same length as your foot. Cut out your pattern pieces with paper scissors.
Step 2: Pin the Pattern Into Place
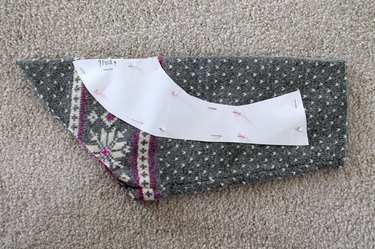
If you are using an old sweater to make your slippers, cut off both of the sleeves at the shoulder seam. If you are using sweater fabric, fold it in half lengthwise. Place the top pattern over the part of the fabric design that you would like to appear on the top and sides of your slippers. Align the top pattern piece onto the fold of the sweater sleeve or sweater fabric and pin into place.
Step 3: Cut the Pattern Out

Use sharp sewing scissors to cut around the pattern; add a 1/2-inch seam allowance all around the pattern except on the fold side. Remove the pattern piece and repeat the process on the other sweater sleeve (or folded sweater fabric if you're not using sweater sleeves). Remove the pattern piece to repeat the process on the fleece -- fold the fleece in half lengthwise, align the pattern on the fold, pin the pattern onto the fleece, and cut out the pattern leaving a 1/2-inch seam allowance around the fleece except on the fold side. Do this twice on the fleece so you'll have two fleece pieces.
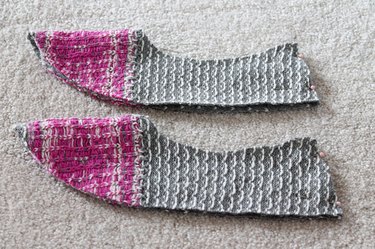
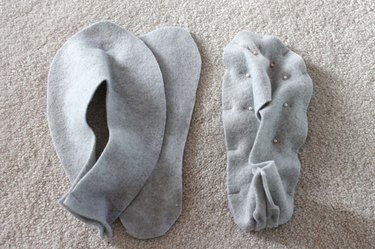
Step 4: Set Aside the Four Top Pieces
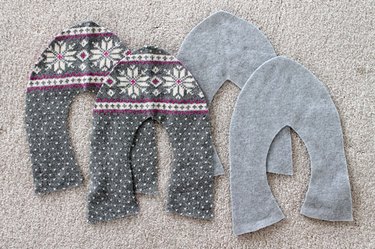
You now have four identical top pieces that look like the picture when you unfold them. Two pieces come from the sweater fabric, and two pieces come from the fleece fabric. The sweater pieces become the top of the slippers, while the fleece pieces become the top lining of the slippers. Set these pieces aside to use later.
Step 5: Cut the Bottom Pattern Out of Fleece
Fold the fleece fabric in half lengthwise and pin the bottom pattern piece onto the fabric (not on the fold). Use sharp sewing scissors to cut around the bottom pattern piece, adding a 1/2-inch seam allowance all around. Unpin the pattern piece and repeat so that when you finish cutting, you have four identical pieces of fleece.
Step 6: Cut the Bottom Pattern Out of Felt

Fold the heavy felt in half and pin the bottom pattern piece onto the felt (not on the fold). Cut the felt directly around the pattern. Do not add a 1/2-inch seam allowance around the felt pieces. These felt pieces will become the bottom soles of your slippers.
Step 7: Lay Out the Bottom Pieces
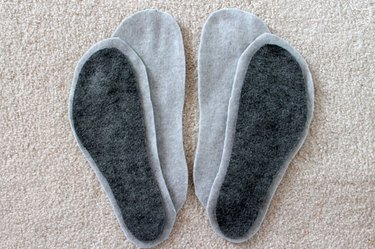
When you finish cutting, you will have four bottom fleece pieces and two bottom heavy felt pieces. Lay them out like the picture so you don't end up with two left feet.
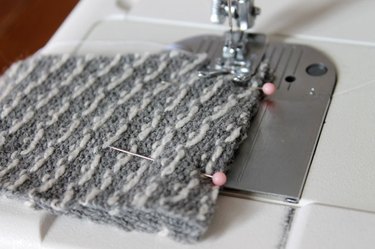
Step 8: Pin the Felt to the Fleece
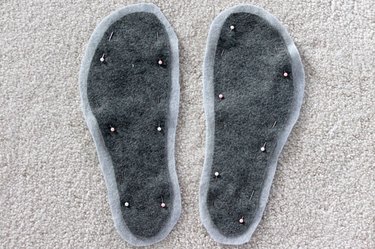
Pin the two heavy felt bottom pieces to the center of two of the fleece bottom pieces. Make sure you have both a right and a left foot. Set aside the two remaining bottom fleece pieces for later.
Step 9: Sew the Felt to the Fleece
Sew the heavy felt pieces to the fleece pieces with a sewing machine, using a 1/4-inch seam allowance. Remove the pins as you sew. Set these pieces aside to use later.
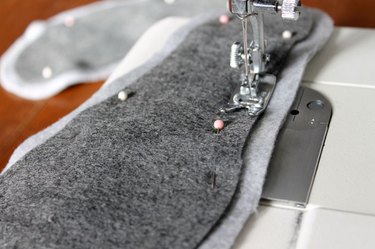
Step 10: Pin the Back Edge of the Top Pieces
Fold the top sweater pieces in half with the right sides together. Pin the back raw edges together as shown.
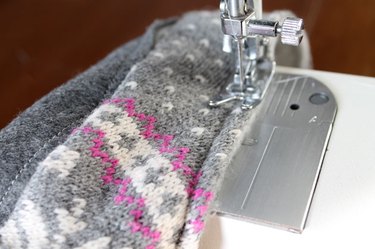
Step 11: Sew the Back Edge of the Top Pieces
Sew the back raw edges together, using a 1/2-inch seam allowance. Be sure to remove the pins as you sew.
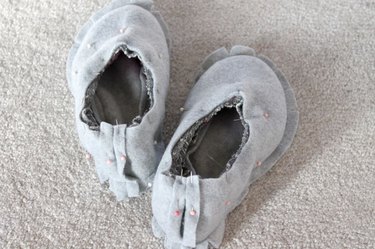
Step 12: Pin the Top and Bottom Pieces Together
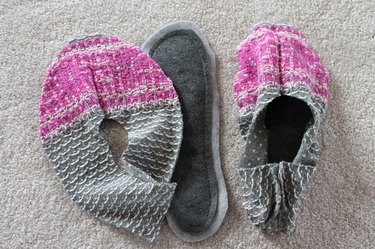
Place the right sides of the top and bottom pieces together. The right side of the bottom piece is the side with the heavy felt. Pin all the way around the bottom edges. The photo shows one top/bottom piece pinned together (right) and one top/bottom piece unpinned (left).
Step 13: Sew the Top and Bottom Pieces Together
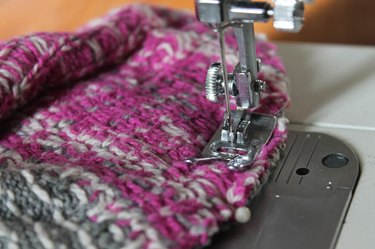
Sew the tops to the bottoms, using a 1/2-inch seam allowance. Remove the pins as you sew.
Step 14: Cut Notches in the Curves
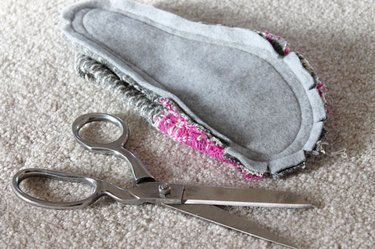
Cut out a notch, about every inch, in the curves of the seam allowance, cutting through the fleece and sweater fabric. Be very careful not to clip into your stitching. This will help the slipper seams lie flat when you turn them right-side-out by removing some of the bulk in the seam.
Step 15: Press the Seams with a Hot Iron
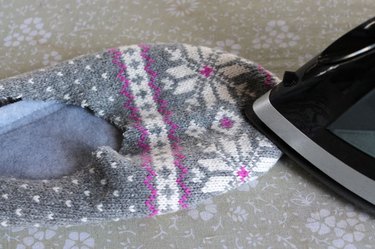
Turn the slipper pieces right-side-out and press around the seam with the iron. Set aside to use later.
Step 16: Pin the Back Edge of the Fleece Lining Pieces
Fold the fleece lining top pieces in half and pin the back seam.
Step 17: Sew the Back Edge of the Fleece Lining Pieces
Sew the back seam on both lining pieces and leave a 1 1/2-inch opening in the center of each seam. This is important; you will use the opening to turn the slippers right-side-out later.
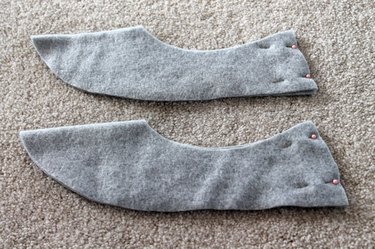
Step 18: Pin & Sew the Lining Pieces Together
Pin the top fleece lining pieces to the bottom fleece lining pieces, pinning all the way around the bottom edges. The photo shows one top/bottom piece pinned together (right) and one top/bottom piece unpinned (left). Sew the tops and bottoms together, using a 1/2-inch seam allowance. Remove the pins as you sew.
Step 19: Cut Notches in the Curves

Cut out a notch, about every inch, in the curve of the lining seam allowance. Be very careful not to clip into the stitching.
Step 20: Sew the Sweater and Lining Pieces Together
Leave the lining pieces inside-out and keep the outside sweater pieces right-side-out. Insert the outside sweater pieces into the lining pieces so the right sides are together. Pin the top raw edges of the slipper pieces together together. Sew the top raw edges of the slippers together with a 1/2-inch seam allowance. Remove the pins as you sew.
Step 21: Pull the Sweater Pieces Through the Lining
To turn the slippers right-side-out, pull them through the opening in the back of the lining pieces.
Step 22: Hand Sew the Lining Closed

After you have turned the slippers right-side-out, hand-sew the lining opening closed using a whip-stitch.
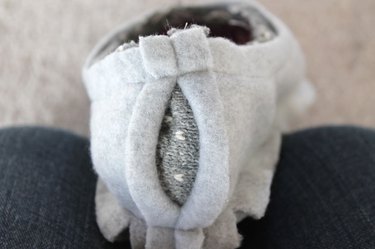
Step 23: Top Stitch the Top Edge of the Slippers
Tuck the lining inside the slippers and top-stitch all the way around the top edge of the slippers. This will create a finished edge around the top of the slippers and keep the lining from slipping out.