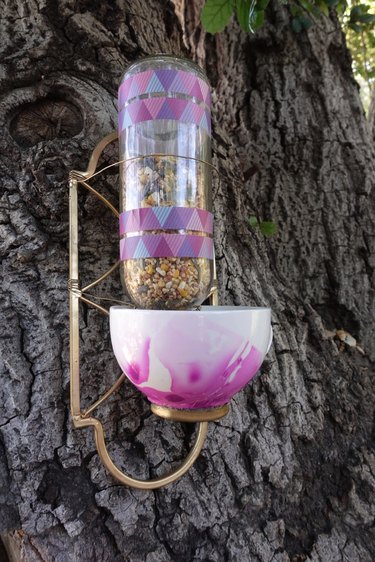
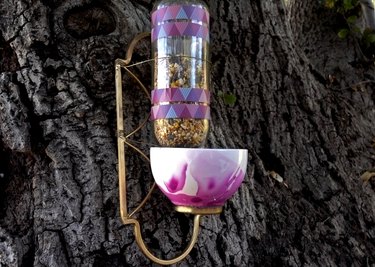
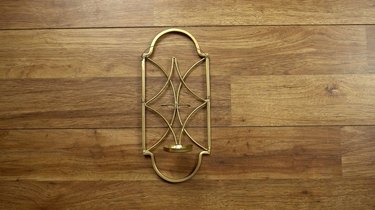
Have an old wrought iron candle sconce that no longer jibes with your current style? Here's an idea: grab a used bottle and teacup, and turn that unwanted sconce into a cute bird feeder! Though this project would best suit a metal sconce with a decorative open pattern, it can also be done with a solid metal or wooden sconce (see the tip in step 4 below to see how).
Video of the Day
Things You'll Need
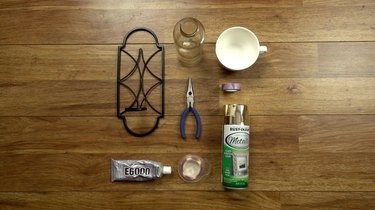
Candle wall sconce, preferably wrought iron/metal with an open design.
Empty glass or plastic bottle
Wide-brimmed teacup, mug, or small bowl
Craft wire
Wire cutting pliers
Industrial strength glue (like E6000)
Spray paint (optional)
Washi tape (optional)
Electric drill (if using a sold metal or wooden candle sconce)
Funnel
Wild bird seed
Tip
The teacup used here features a DIY marble design using nail polish! If you'd like to make your own marbled mugs, check out the easy tutorial.
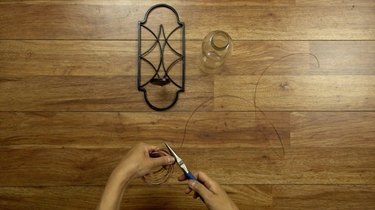
Step 1
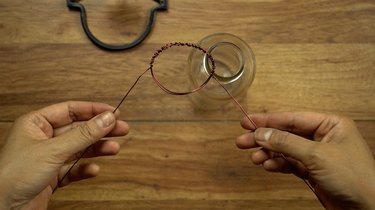
Use your pliers to cut a piece of wire about two feet long.
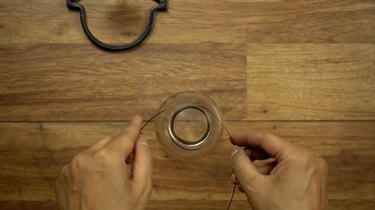
Step 2
Wrap the wire very loosely around the bottle opening twice, to create a ring with equal lengths on both ends. The narrower neck of the bottle should easily slip in and out of the ring, though not the body of the bottle.
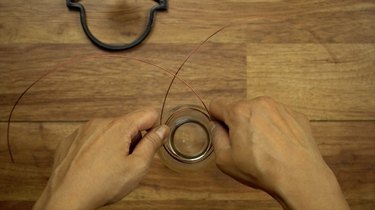
Step 3
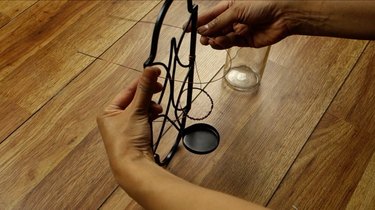
Secure the ring by wrapping one loose end of wire tightly around 1/4 of the ring's circumference, as shown below.
Repeat with the other loose end.

Half of the ring should now be wrapped with the loose ends, like shown.
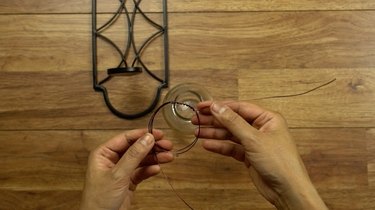
Step 4
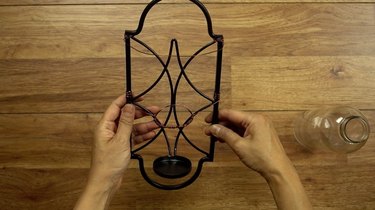
Connect the wire ring to the candle sconce by wrapping one loose end around the left side of the sconce, and the around the right. Find a hole in the decorative open pattern that will allow you to insert the wire and wrap it through and around several times to secure.
Tip
If your candle sconce is solid and doesn't have any openings allowing you to insert wire through, use an electric drill to create small holes on the left and right sides of the sconce. You'll also need to create two additional holes approximately 3 inches directly above the first holes in order to attach another length of wire to the sconce (see step 6) -- so that's four holes in total.
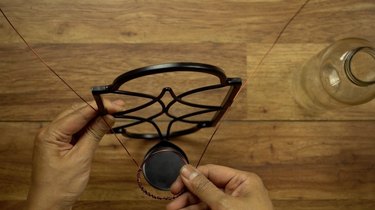
The ring should sit approximately three - four inches above the candle holder plate.
Step 5
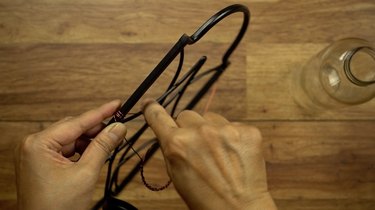
Cut a second piece of wire about one foot long.
Step 6
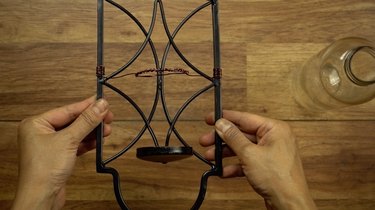
Wrap the wire around the sconce approximately three inches above the wire ring as shown below. This will hold the body of the bottle in place, so make sure there's enough room between the wire and the sconce to easily insert the bottle.
As in step 4, wrap the loose ends of the upper piece of wire around the left and right sides of the sconce. It should now look like the photo below.
Step 7
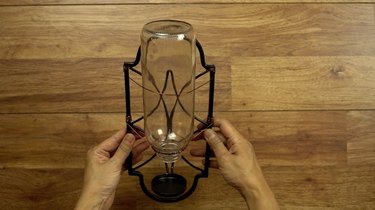
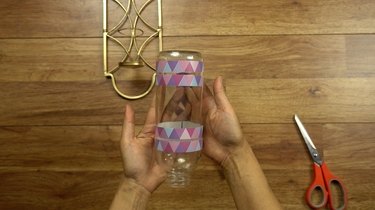
Insert your bottle as shown to check for fit. You should be able to insert and remove it easily. Adjust if necessary.
Step 8
If you're not into the original color of your sconce, why not spray paint it?
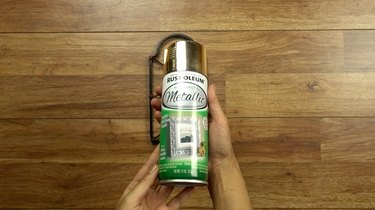
Check out how this gold paint completely transforms the look of the sconce!
Step 9
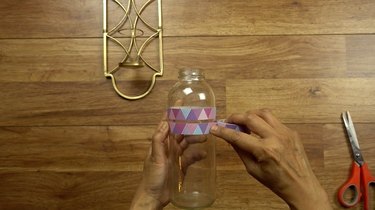
If you'd like, you can also add strips of washi tape to your bottle for a colorful look.
Tip
To protect your decorated bottle from the elements, we recommend coating it with outdoor decoupage medium.
Step 10
Apply glue to the bottom of your teacup.
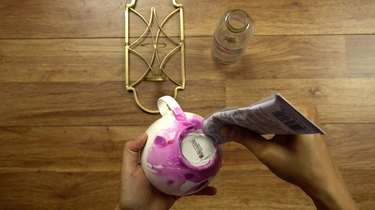
Affix it onto the candle holder plate.
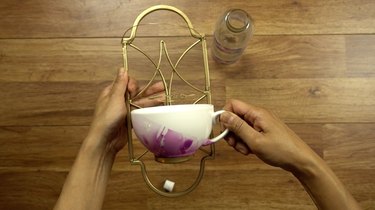
Now hang your bird feeder up vertically to allow the glue to dry completely.
Tip
Choose a wide-mouthed teacup or mug that will allow the birds room to perch on your feeder. If you can't find one, you can also opt to attach a saucer underneath the teacup.
Step 11
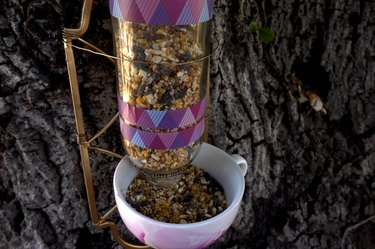
Once the glue is completely cured (and no longer smells of fumes) your bird feeder is ready to fill with wild bird seed.
Use a funnel to fill your bottle up to the top.
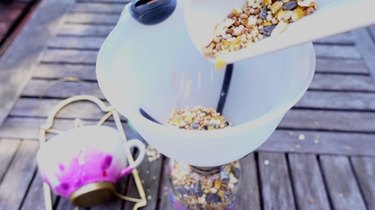
Hold the sconce upside-down and insert the bottle into the wire holders from underneath.
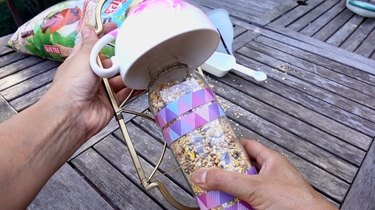
Taking care not to spill the seeds, invert the entire bird feeder right side up.
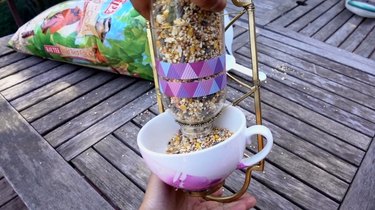
All done! Time to hang your styling new bird feeder up in a prime spot in the garden.