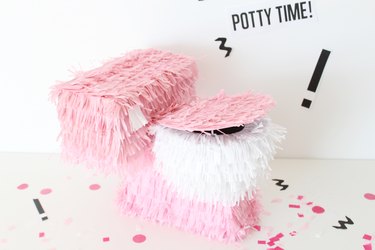
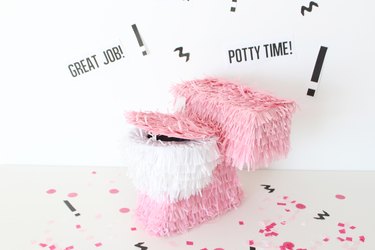
As a parent of a toddler, there may be one job on your to-do list that seems especially daunting: potty training. Are you worried that your little one may not take to the task easily? Then this themed treasure chest is just for you! Take some stress out of the learning process by creating a reward system from a piñata-like potty. Choose your child's favorite color for the exterior, and then fill the inside with exciting treats and toys. Every time your child follows your directions correctly, let him or her choose a prize. Then, when you feel like your kid is officially trained, string up the piñata and let the lil' champ break it open. It'll be one last prize to celebrate a big victory.
Video of the Day
Things You'll Need
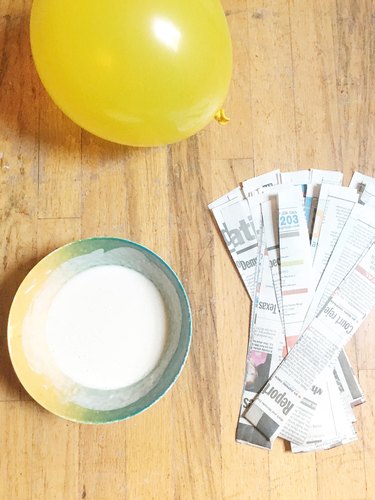
Balloon
Newspaper
Flour
Water
Cardboard
Tissue or crepe paper
Scissors
Hot glue
Tape
Step 1: Make a Paper Maché Ball
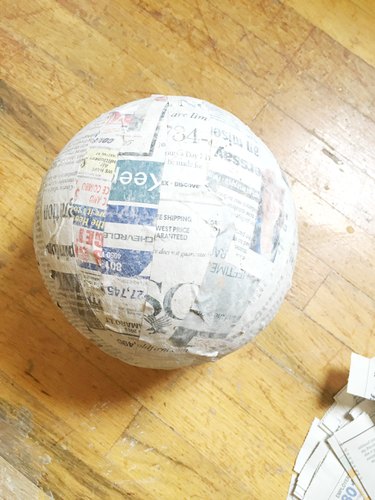
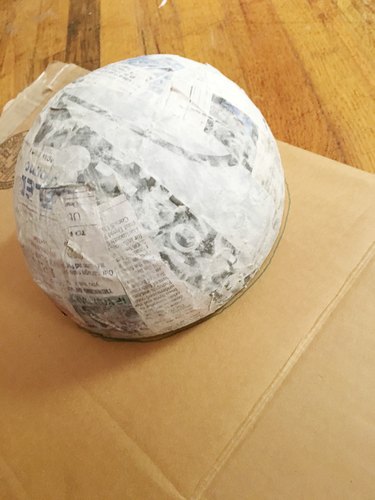
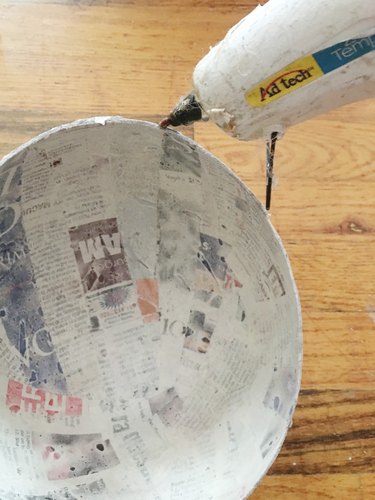
First, you need to get a round shape to make the "bowl" part of the toilet. Blow a balloon up to the size you want the bowl to be. This project's bowl is 7 inches at its longest point. Then, cut medium-sized strips of newspaper. Make a mixture of one part white flour to one part water (each layer will need about 1/3 cup). Coat each piece of newspaper in the mixture, scraping off excess, and then lay it across your balloon. Slightly overlap each piece and cover the balloon completely, leaving the knot exposed.
Video of the Day
Allow this to dry for at least 15 hours. Then, add a second coat using the same process. After another 15 hours or so, add a third coat of newspaper and allow that to dry as well.
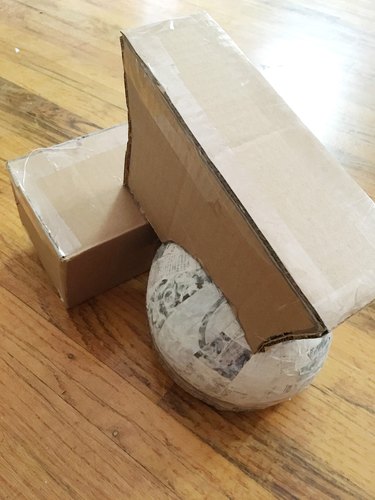
Step 2: Make the Toilet Bowl
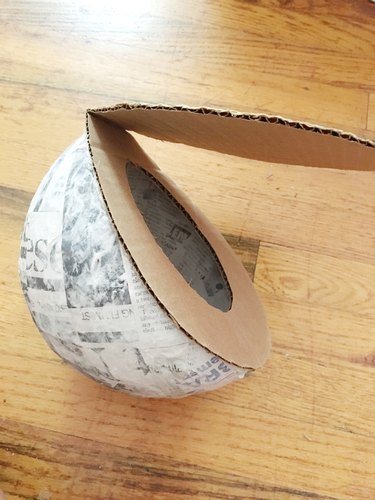
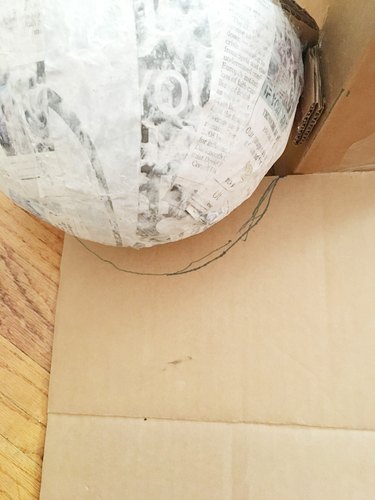
When your final layer of paper maché is dry, deflate the balloon by poking it at the exposed part near the knot. Then, cut around the paper bowl, but be careful! You don't want to cut right down the middle, since you want this to take the shape of a toilet. Make one side smaller than the other and cut lengthwise. The two bowls should be shallow and oval-shaped.
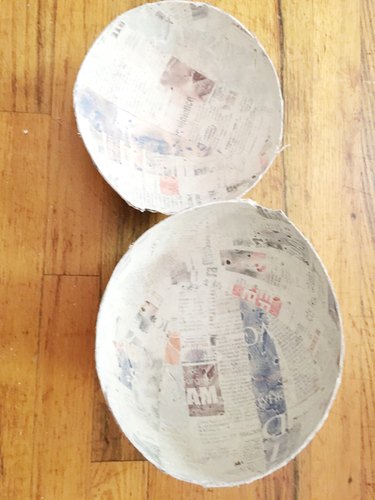
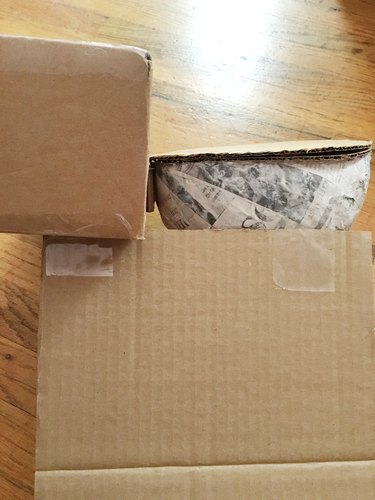
Use the smaller bowl for another project or discard. Lay the larger bowl upside down on a folded piece of cardboard, almost up to the edge.
Trace around the bowl, and then cut through both layers of cardboard. Make sure not to cut through the fold.
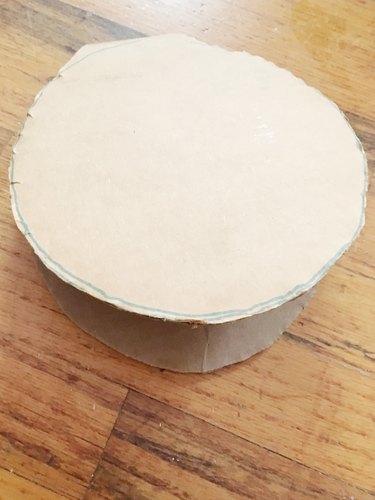
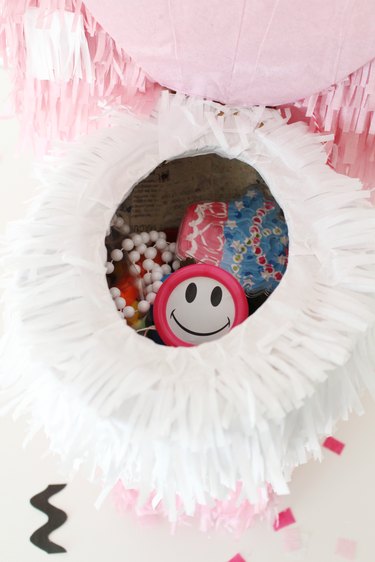
Now, open up the cardboard and mark a circle where your child can reach in and grab a prize. Two inches should be enough. Cut this inner circle out using scissors or a craft knife.
Step 3: Attach the Lid to the Bowl
Using hot glue, attach the cardboard lid to the paper maché bowl.
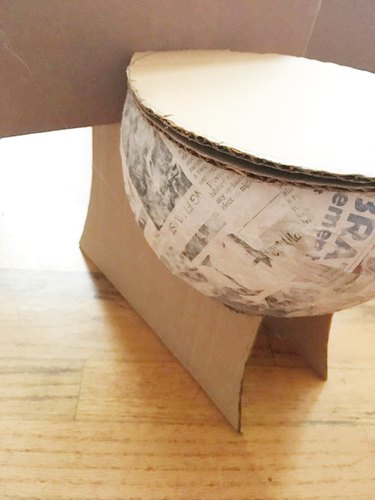
Step 4: Make the "Tank"
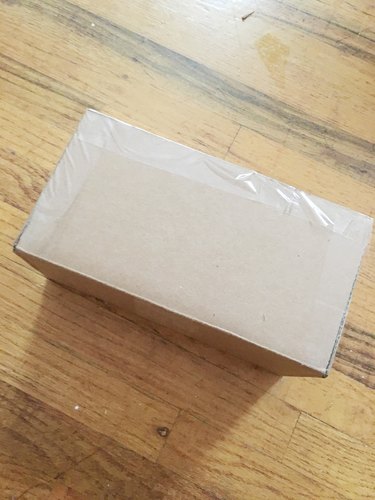
Cut pieces from the remaining cardboard to make a rectangular box for the toilet's "tank." This box should be the same height as the bowl but about 4 inches longer on each side.
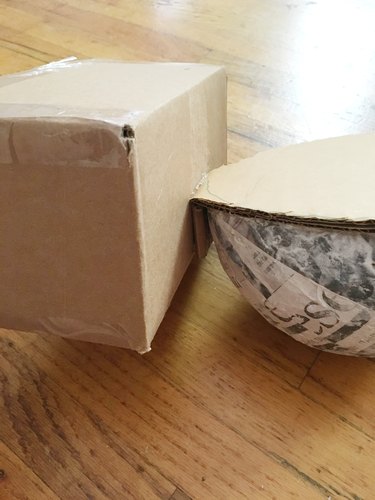
After taping up the box, secure it to the bowl width-wise with hot glue. The bowl should be attached to the bottom third of the box, just like a standard toilet.
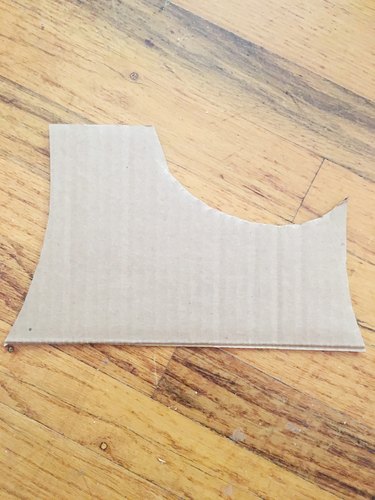
Step 5: Create the Base
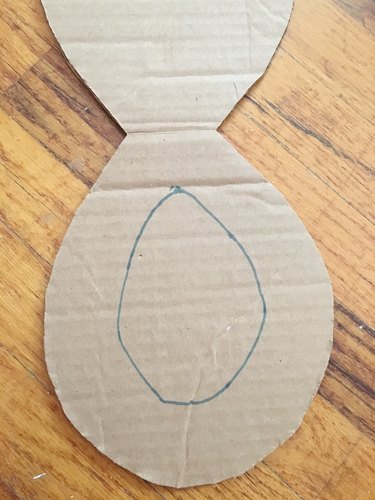
To make your base, cut a square piece of cardboard out that is about 10 inches x 10 inches. Temporarily tape this to the side of the bowl and underneath the tank.
Flip the square over and use a marker to trace the shape of the bowl onto the inside of the cardboard.
Remove that piece and cut along the marked line. Then, cut the piece to the height you want and flare out the sides a bit. The finished dimensions of this piece are 10 inches x 6 inches at the highest point and it goes down to 4 inches toward the front of the bowl. Lastly, cut an identical piece and attach both to the bowl and tank with hot glue.
Trace the bottom and back sides onto cardboard and cut those shapes out, then adhere with tape or glue.
Step 6: Add a String for Hanging
If you plan to hang the piñata, attach a rope now by stringing it through a sturdy part of the structure.

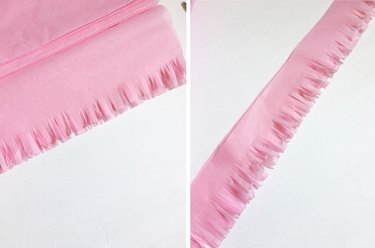
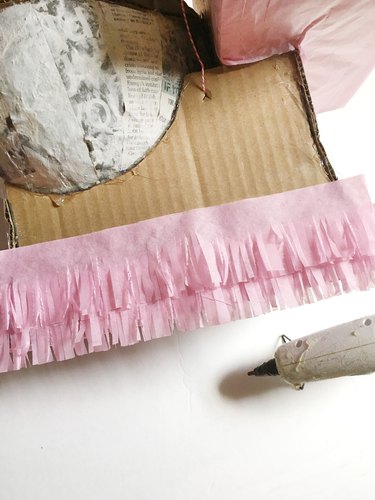
Step 7: Add Fringe to the Exterior
While this project uses pink fringe, you can choose whichever colors you like! To make fringe, use tissue or crepe paper and cut small indents along the bottom of a long strip. You can use fringe scissors for this step to make it easier.
Attach the strips to your piñata from the bottom up — starting under the tank and around the base — using hot glue. Overlap the fringe so no straight edges show.
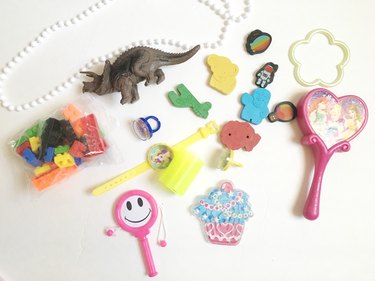
Step 8: Fill the Toilet With Prizes
Fill the piñata with treats and prizes of your choosing. You could fill it with fruit snacks, stickers or candy found at your grocery or discount stores!
Step 9: Start Potty Training With Prizes
Not only will your kid enjoy picking a small present, but you'll have reinforcements to help make the process a little more fun.