Things You'll Need
Needle
Thread
Ruler
Cotton
2 shirts
6-inch zipper
2 socks
Scissors
3 buttons
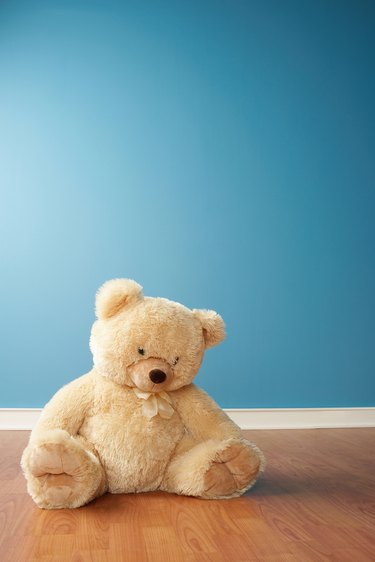
A memorial teddy bear is a stuffed animal with a small compartment for keepsakes. You can put news clippings, photos and other small trinkets into the built-in pouch, which acts as the heart of the bear. Craft the bear from a sentimental shirt to add more significance to your creation. Using a shirt also makes the project easier since the bear's body and arms are pre-formed in the design of the shirt.
Pouch
Step 1
Cut a 6-inch vertical line into the back of the shirt with a pair of scissors to make an attachment point and opening for the zipper.
Video of the Day
Step 2
Cut an 8-inch circle of cloth out of a different shirt. This will act as the pouch in the back of the bear.
Step 3
Thread a needle with a thread color that matches the shirt you are using to make the bear.
Step 4
Place the left side of your zipper to the left side of the vertical cut line. Place the needle through the underside of the shirt and through the zipper attachment fabric at the upper right corner. Work your way around the perimeter counterclockwise of the zipper at 1-millimeter intervals by weaving the needle out from the inside of the shirt across the fabric and back to the inside of the shirt. Create a small knot in the thread when you reach the bottom left corner, and cut the thread. Repeat this procedure with the right-side zipper attachment, but start in the upper left-hand corner and work clockwise to the bottom left corner.
Step 5
Place and center the circular cut piece of shirt cloth on the cut open vertical line from the inside of the shirt.
Step 6
Pull the needle with thread through the top portion of the circular cloth and the shirt, and weave in and out of the shirt in 1-millimeter intervals until you have gone around the perimeter of the circular cloth. Create a knot between the end of the stitching and beginning of the stitching, and then cut the thread to complete the bear's pouch.
Body
Step 1
Cut out another circular piece of cloth from your second shirt at a size equal to the neck hole of your primary shirt. Place the cut cloth on the neck hole and secure it in place with a 1-millimeter weave stitch between the cut cloth and primary shirt. Knot the thread when the perimeter of the cloth has been secured.
Step 2
Stuff the bear with cotton balls or other fluffy material until the body has the volume you desire.
Step 3
Pull together the waist end of the primary shirt. Thread the needle through one side of the shirt to the opposite side; weave in and out of the shirt 1 millimeter clockwise and then pull the needle through the opposite end of the shirt. Continue with this pattern until the waist hole is completely closed. Knot the thread to ensure the waist hole of the bear stays closed.
Step 4
Stuff one arm hole of the primary shirt with cotton balls for desired fullness. Thread the needle through one side of the end of the arm sleeve to the opposite side; weave in and out of the shirt 1-millimeter clockwise and then pull the needle through the opposite end of the shirt. Continue with this pattern until the arm hole is completely closed. Knot the thread to ensure the arm hole of the bear stays closed. Stuff the other arm and repeat the closing procedure to complete the arms and body of the bear.
Head
Step 1
Cut out a rectangular piece of cloth with rounded edges on the secondary shirt to a size that will look proportionate to the body size of the bear.
Step 2
Place a tennis ball in the cut cloth to semi-form a head for the bear.
Step 3
Sew together the "head" cloth to the area of the bear where you closed the neck hole. Use a 1-millimeter weave stitch between the cut cloth and the body of the bear. Remove the tennis ball when you are halfway around the perimeter, and then continue looping around until you have a 1-inch gap around the perimeter.
Step 4
Stuff the bear with cotton balls until you form the size and fullness of the bear's head. Finish sewing the head onto the body and knot the thread to secure the bear's head to the body.
Step 5
Cut out two semi-circular pieces of cloth for the bear's ears. Sew them in place on the top of the head with a 1-millimeter weave stitch between the straight-line portion of the semi-circled cut cloth pieces and the top of the bear's head.
Step 6
Place the bear on a table flat on its back and line up buttons on its face to create two eyes and a nose. Pass the needle with thread through each button hole and the fabric of the bear's head in a clockwise fashion until the button presses firmly against the bear's head. Knot in place and then cut the thread. Repeat this procedure with the other two buttons to complete the head.
Legs
Step 1
Stuff a sock full of cotton balls to create fullness for the legs.
Step 2
Place one leg against the bottom of the bear's body offset to one side. Attach the leg to the bear, weaving thread in and out between the open end of the sock and the bear's body. Move around the perimeter in 1-millimeter intervals until the sock hole is buttressed against the bear's body. Create a knot between the bear's body and sock to hold the sock in place.
Step 3
Repeat the stuffing and fastening procedure with the second sock to finish crafting your memorial teddy bear.
Tip
To make a mouth, you can use a semi-circular piece of cloth and sew it to the bear's face below the nose.
Video of the Day