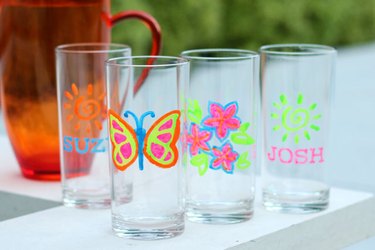
For outdoor gatherings, plastic tumblers are a smart alternative to glassware because you don't have to worry about breakage. And by using acrylic paint markers, they are also fun and easy to paint so that everyone at the party can have a tumbler personalized just for them. So before you paint the town, paint the plastic tumblers.
Video of the Day
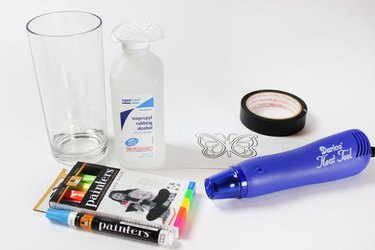
Things You'll Need
Plastic tumblers
Rubbing alcohol
Cotton wipes
Design printed on paper
Masking tape
Acrylic paint markers
Heat tool
Step 1: Prepare the Tumbler
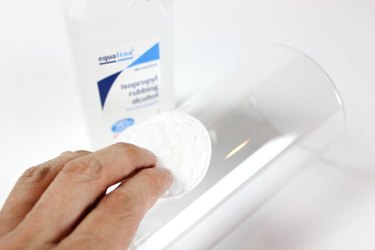
After washing the tumbler with soap and water, prepare the surface for painting with rubbing alcohol and a cotton wipe. The alcohol will remove any residual oils that might be on the plastic, allowing the paint to adhere better to the surface.
Video of the Day
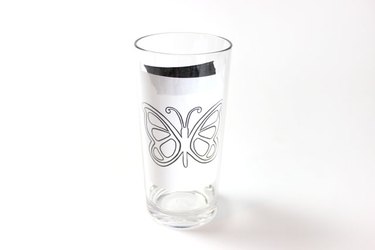
Step 2: Position a Design for Tracing
Although you can paint freehand on the tumbler, most people find it easier to trace a design. Print or draw a design on a piece of paper, and adhere the design with masking tape to the inside of the tumbler facing out.
Step 3: Prepare the Paint Markers
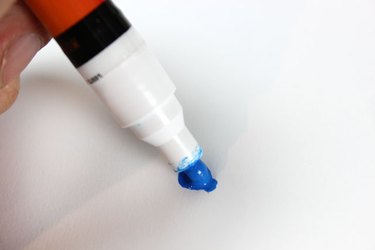
Acrylic paint markers are ideal for painting on plastic tumblers because they are easy to use, especially for people who are intimidated by paint brushes. Like a pen, they are easy to control, and the fine tips allow you to create vivid details. And unlike ink markers, these pens are filled with actual acrylic paint, which provides excellent opaque coverage. The paint is also permanent. Before using, allow the paint to flow to the tip of the marker by pressing the tip firmly on a piece of paper until the tip is saturated. Whenever the tip dries out, press the tip down again until the paint flows freely.
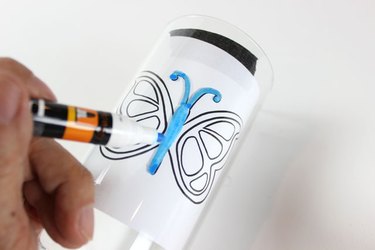
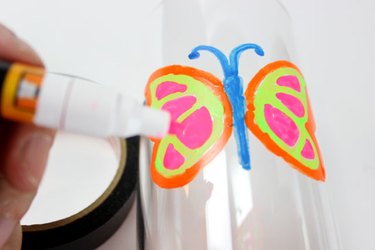
Step 4: Trace the Design
With the tip of the marker saturated with paint, trace the design on the surface of the tumbler. Keep pressing down on the tip of the marker to release paint as you draw. Work one section at a time.
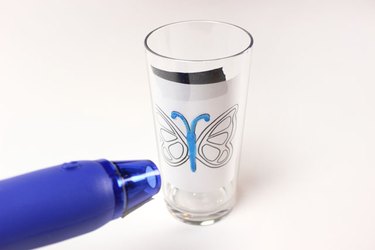
Step 5: Heat Set the Paint
After you are finished with one section or color, apply heat to the paint to help it dry so that subsequent colors will not blend with the first. You can use either a heat tool, which you can find at a crafts store, or a hair dryer. Applying heat also sets the paint to make it permanent.
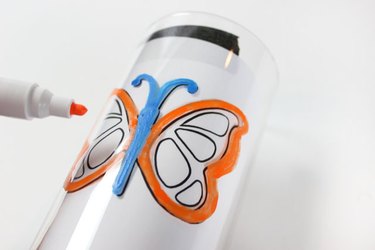
Step 6: Continue Painting
After the first color is dry, paint the next section using another color. Again, after you are through with each section, heat set the paint. It's a good idea to apply heat continually, even when you're not switching colors, because it will help prevent the paint from dripping. When you're finished with your design, heat set one last time and allow the paint to dry thoroughly on its own for 24 hours before using the tumbler.
Personalize With Names
If you want to personalize the tumblers with names, printing the names on paper and tracing them is an easy way to make sure they are straight and evenly spaced.
