Things You'll Need
Drawing materials
Fiberboard or other base material
Craft knife or saw
Square-section balsa wood rod
Cyanoacrylate glue
Craft sticks or tongue depressors
Empty metal or cardboard can
Thin card
Scissors
PVA glue
Plastic rod or drinking straw
Acrylic paints and brushes
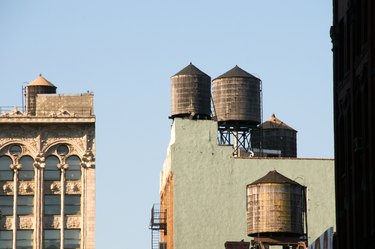
A water tower is an iconic addition to any scenic layout. Water towers provided the supplies for steam engines, and are thus a vital part of any model railroad based on the steam era. They were also an important feature of many American towns. For wargamers, a water tower can provide cover, elevation and visual interest. Building a model tower is a straightforward modeling project that requires a few simple materials.
Step 1
Sketch a plan for your water tower. During this stage, decide what scale you intend to use for your water tower, how tall you need it to be, and what features it will have. Most water towers consist of an open tower supporting a square or circular platform. A cylindrical tank with a conical or flat roof rests on the platform, with a pipe which can dispense water.
Video of the Day
Step 2
Cut a base from fiberboard or another suitable basing material using a craft knife or saw. The base should be slightly larger than you intend the footprint of your tower to be. It should also be relatively heavy to balance the tall, top-heavy model.
Step 3
Construct a frame for the tower using balsa wood. The traditional water tower support consists of four, six or eight uprights with X-shaped supports between them. Secure the uprights firmly to the base using cyanoacrylate glue.
Step 4
Build a square platform on top of the uprights. Build the frame of this from balsa wood and the crossbeams from craft sticks or tongue depressors with the ends trimmed square.
Step 5
Cut an empty can or cardboard tube to scale using a craft knife or saw. This will form the body of your tank.
Step 6
Cover your tank with textured material. Use thin card to represent sheet metal or craft sticks to represent vertical wooden staves.
Step 7
Cut a circle from thin card using scissors. Cut a slit from the edge to the center of the circle and fold the card into a cone. Cut off the excess and glue the cone into place with PVA glue. This will form the shape of your roof. Glue it to the top of the tower body.
Step 8
Decorate the roof of your tower. Use more card to represent metal plates or cut small pieces of thin card to create wooden shingles. Glue these to the roof with PVA glue in an overlapping pattern.
Step 9
Cut a short length of plastic rod or drinking straw to represent the spigot and glue it into place at the bottom of the tower.
Step 10
Paint your water tower in appropriate colors using acrylic paints.
Warning
Always be careful when using a craft knife. Cut on a safe surface and make all cuts away from your body.
Video of the Day