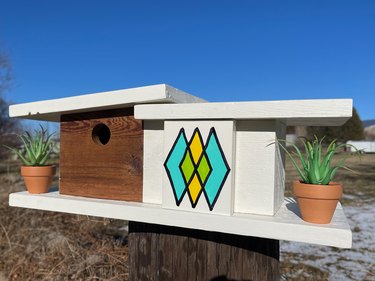
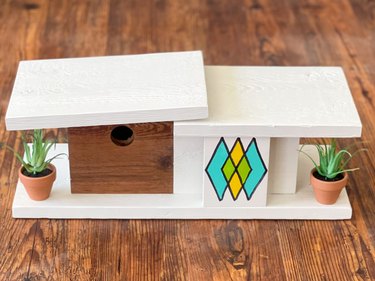
It's no secret that midcentury modern design is beloved among interior decorators of all ages—but why keep all that retro goodness inside the house when you can spread minimalist love to the backyard? Enter our DIY midcentury modern nesting box, which looks so high end that you might consider packing up and moving in with your feathered friends.
This birdhouse design will bring a bit of modern architecture (on a small scale, of course) into your yard. Similar midcentury modern-inspired birdhouses can go for a "wing and a leg" on Etsy and social media sites, which might have dashed hopes for adding one to your yard. With our how-to tutorial (complete with a downloadable pattern, diagram and cut list), though, you can get crafty and make your own.
Video of the Day
When you're ready to create a midcentury modern birdhouse that will be the talk of the flock, read on. Your fun and functional birdhouse would make Frank Lloyd Wright proud...or should we say Frank Lloyd "Wren"?
Video: A Midcentury Modern Birdhouse All the Birds Will Flock To
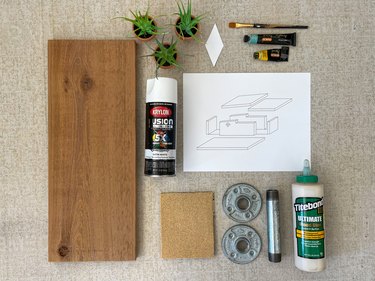
Things You'll Need
8-foot piece of 1-in. by 8-in. tight knot cedar
Saw
120-grit sandpaper
Exterior paint
Paintbrush
Exterior wood glue
Drill with 1/16-in. drill bit
1 5/8-in. corrugated panel nails
4-in. by 1 1/2-in. diamond-shaped pattern
Pencil
Black marker
Yellow, lime green and turquoise paint
Small faux succulents
Hot glue gun
Galvanized floor flanges and pipe nipples
Part 1: Build Birdhouse
1. Download and print cut list and patterns
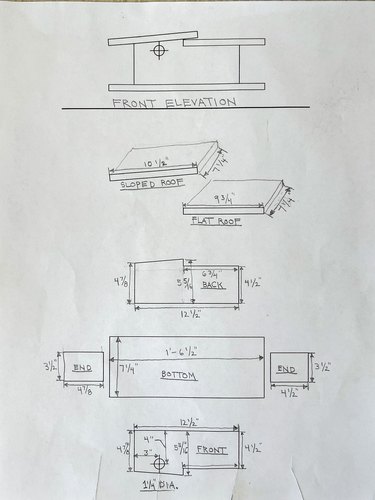
We've done all the guesswork for you by drawing a diagram of each wood piece you'll need to cut for this midcentury modern birdhouse. In addition, we've drawn a pattern for the front and back of the birdhouse, so no measuring will be required. Just download (see "Things You'll Need" box above for the links), print, trace and cut!
2. Measure and cut wood pieces
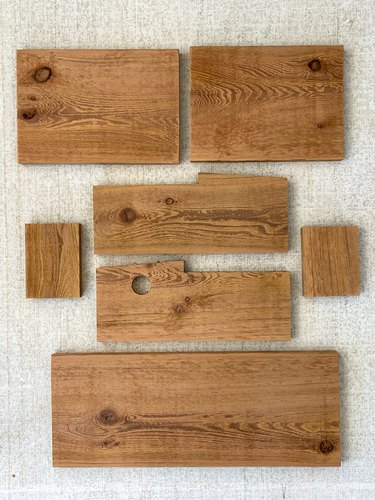
Using the saw of your choice, the cut list and pattern, measure and cut two roof pieces, two side pieces, front and back pieces and base.
Tip
The diameter of the hole for your birdhouse will depend on which type of bird you'd like to attract.
Chickadees, nuthatches, warblers, woodpeckers and wrens all prefer a hole measuring 1.25 in. in diameter. Bluebirds and tree swallows will move into a birdhouse with a 1.5-in. hole. House sparrows prefer a 1.75-in. opening. Make the hole 2 inches in diameter and a house finch might move in. Flickers and purple martins love a 2.5-in. opening, while kestrels need a 3-in. hole. If you're trying to attract an owl, you'll need to size up and include a 6-in. hole.
3. Sand wood pieces
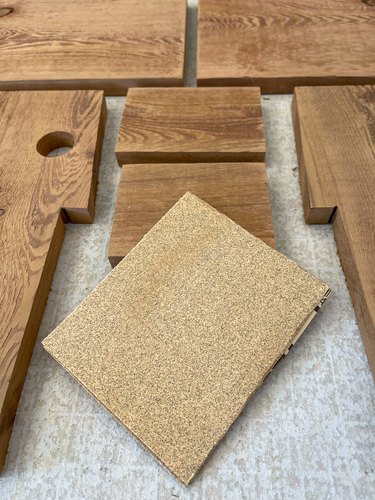
To ensure your birdhouse has a smooth finish that will look nice when painted, sand each piece with 120-grit sandpaper.
4. Paint each piece
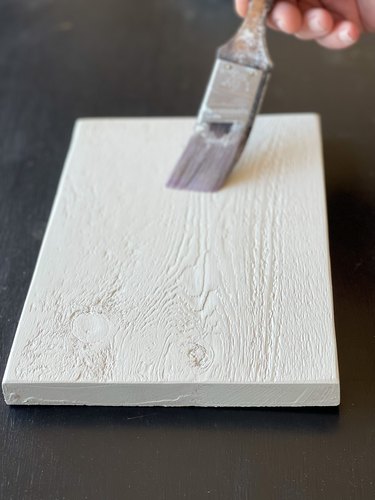
Use outdoor paint in the color of your choice to paint the outside of each wood piece. Since midcentury modern design often incorporates contradicting materials and textures, you might choose to leave some of the wood exposed. If you do, be sure to protect the wood by staining or adding finish.
5. Download and print birdhouse diagram
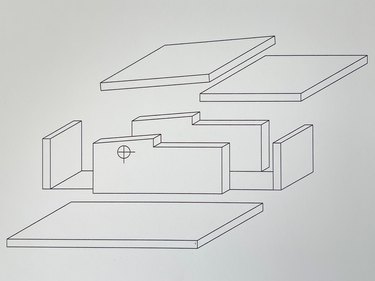
Use the printed diagram to determine where to place each piece of the birdhouse.
6. Glue, drill and nail each piece together
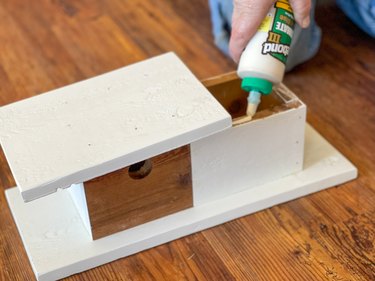
Spread exterior wood glue on each of the joints and then place each piece together. Drill a small pilot hole with a 1/16-in. drill bit everywhere you plan on driving a nail. This will help keep the wood from splitting.
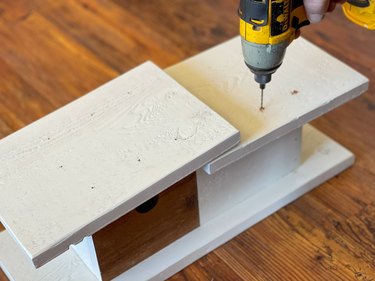
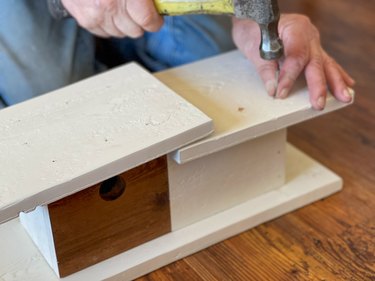
Carefully drive a 1 5/8-in. corrugated panel nail in each drilled pilot hole.
7. Touch up nail holes
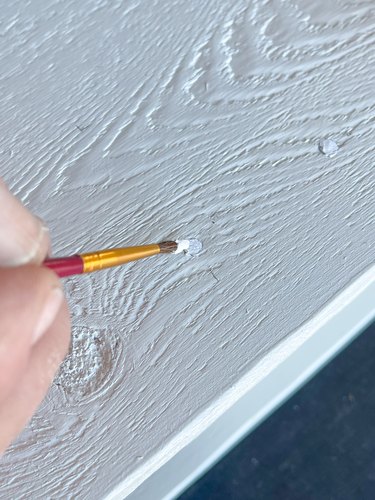
Use a small paintbrush to paint over each nail head with the same paint color used for the birdhouse.
Part 2: Add Midcentury Design Elements
1. Determine design
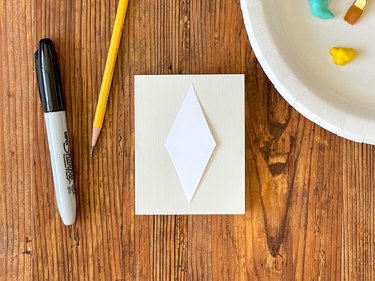
Geometric shapes are a defining characteristic of midcentury modern design. Though you can choose any design you'd like, we chose to overlap three diamond shapes on the front of our birdhouse. After painting a 3 1/2-in. by 4 1/2-in. piece of wood, we traced a 4-in. by 1 1/2-in. diamond-shaped pattern onto the center of the wood and then overlapped and traced the shape on either side of the first diamond.
2. Paint design
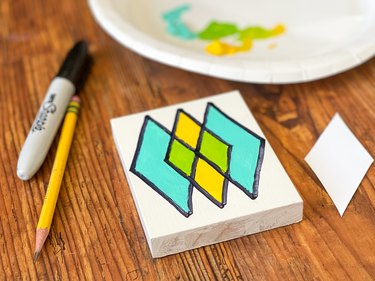
Trace over the pencil lines with black permanent marker. Since pops of bright color can be an integral part of midcentury modern design, we chose to use bright turquoise, yellow and lime green paint. After the paint dries, repeat the outlines with black marker to create a crisp line.
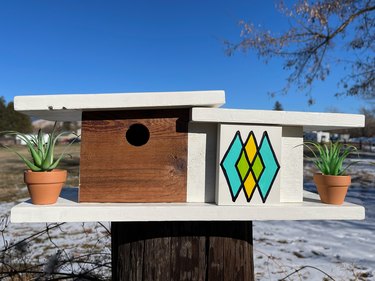
3. Place design on front of birdhouse
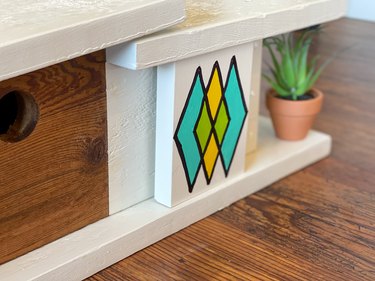
In keeping with the idea that midcentury modern homes contain sleek lines juxtaposed with organic attributes, we placed our design on the house's front to complement natural cedar.
4. Add natural elements
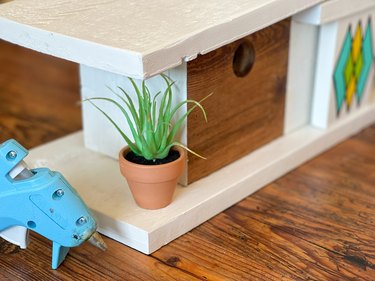
In addition to clean lines and graphic shapes, bring in some natural elements with mini faux succulents.
Simply hot glue the bottom of each pot to the floor on both sides of the birdhouse.
5. Attach mounting brackets
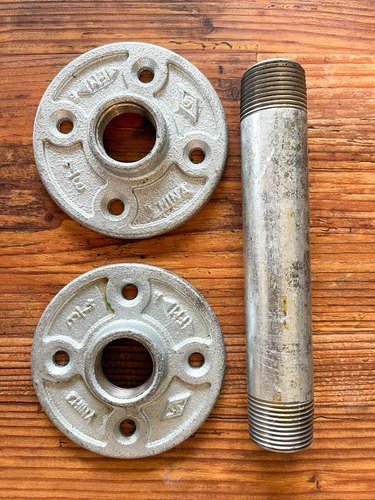
If you don't have a large, flat surface for mounting, galvanized floor flanges and pipe nipples will do the trick. You will need:
- Two 3/4-in. galvanized floor flange brackets for mounting
- One 3/4-in. by 6-in. galvanized pipe nipple for mounting
- Four 3/16-in. by 2-in. all-weather flathead screws for base
- Four 3/16-in. by 3/4-in. all-weather flathead screws for birdhouse platform
Mount floor flange brackets to the bottom of the birdhouse and center of the post you'd like to attach to the birdhouse. Connect them with the pipe nipple.
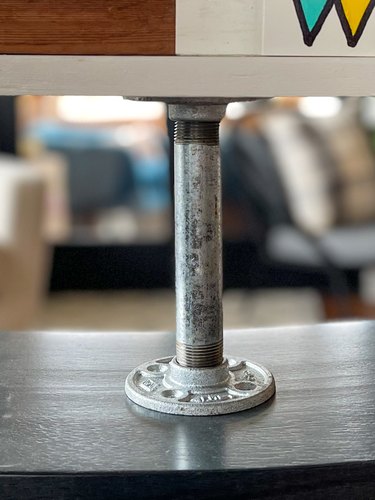
This mounting technique will allow you to use a smaller surface.
With that, you've created a marvelous midcentury modern birdhouse! It's time to sit back, relax and watch new feathered friends flock to your yard to dwell in style.