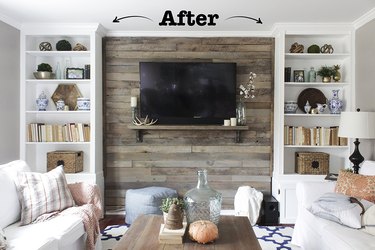
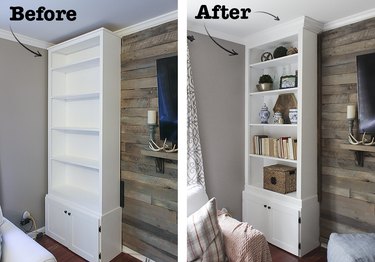
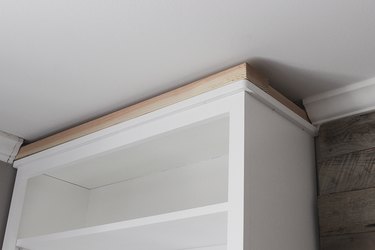
Custom built-in bookcases look fantastic, but it's very expensive to hire a carpenter to build them. Prefabricated bookcases are a more affordable option, but they often look temporary and cheap. However, by adding inexpensive molding and anchoring the bookcases to the wall, you can achieve a high-end, built-in look for a fraction of the cost.
Video of the Day
Things You'll Need
Measuring tape
Oscillating multi-tool with standard end saw blade attachment, 1 3/8 inches wide
Stiff metal paint scraper or metal trowel
Stud finder
1-inch-by-3-inch pine furring strip, 12 feet (optional)
Wood screws, 2 1/2 inch
Cordless drill
Pine two-by-four board, 5 feet
Cordless brad nailer or pneumatic nail gun
1 3/4-inch nails, 18 gauge
Compound miter saw
Primed crown molding, 9/16-inch-by-3 5/8-inch, approx 5 feet
Coping saw
Primed base molding, 9/16-inch-by-3 1/4-inch, approx 5 feet
Fluted pine door casing, 2 1/4 inches wide, approx 12 feet
White all-purpose acrylic latex caulk
White semi-gloss latex paint
Tip
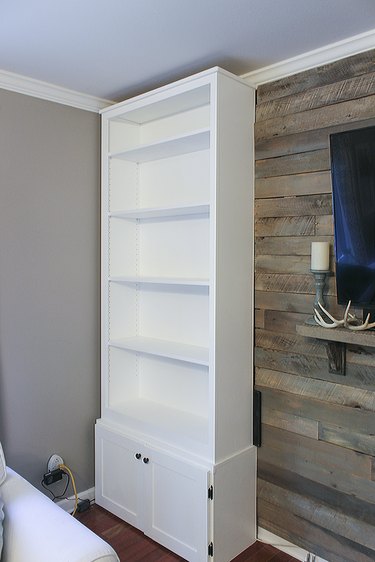
Prefab bookcase heights vary, but for this tutorial, a standard 6-foot high bookcase was used with a 21-inch-high cabinet base, making the total height 93 inches, and the bookcase was 3-feet wide by 1-feet deep. For taller ceilings, a taller cabinet base can be used, and wider crown molding can be used.
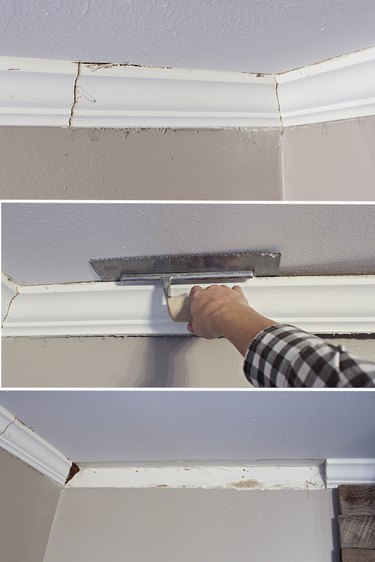
Step 1: Measure and Cut Crown and Base Moldings
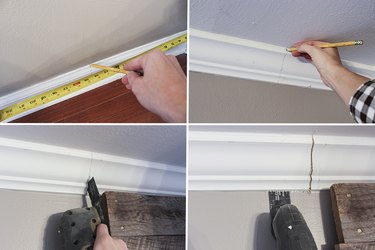
Measure the depth and width of the bookcase. Mark the same measurements on the base molding and crown molding, drawing a line from top to bottom. If the bookcase is sitting on a cabinet base that is wider or deeper than the bookcase (similar to the cabinet base in this tutorial), mark the base and crown moldings according to the cabinet base measurements.
Video of the Day
Using the oscillating multi-tool with the 1 3/8-inch wide saw blade attachment, cut along the lines drawn on the crown molding and base molding. Then slide the blade along the edge of the molding to loosen it from the wall and ceiling (for the crown) and the wall and floor (for the base).
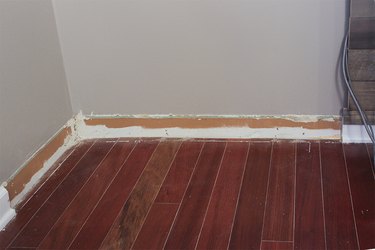
Step 2: Remove Crown and Base Moldings
Once the edges are loosened between the cut lines on the crown and base moldings, pry them from the wall using a stiff metal paint scraper or metal trowel. Using a trowel or wide metal scraper instead of a hammer allows you to slide the tool along the edge and pry the molding loose by pulling down (if loosening from the ceiling) or up (if loosening from the wall), and it lessens the risk of making a hole.
Tip
To make sure the bookcase fits snugly between the cut-out portions of the base molding and crown molding, slide the empty bookcase into place. The bookcase should easily fit just inside the cut-outs without much effort. If adjustments need to be made, mark how much more needs to be cut from the base and crown moldings, then remove the bookcase and cut where the marks were made with the oscillating multi-tool.
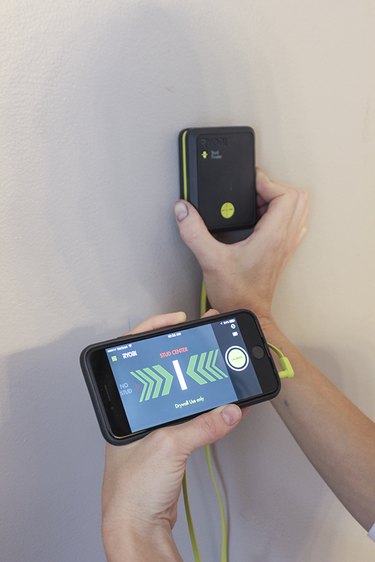
Step 3: Find the Studs
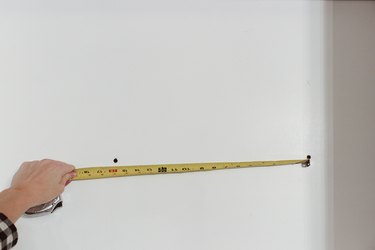
With a stud finder, mark where the studs are located on the wall where the back of the bookcase will sit. Measure the distance between the adjacent wall and the first marked stud, and also the distance between the studs. Write these measurements down. Note: Standard distance between wall studs is 16 inches, from center to center.
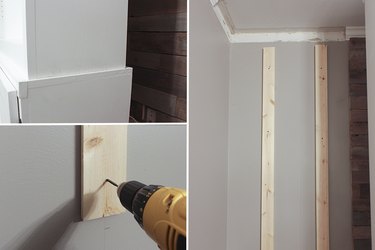
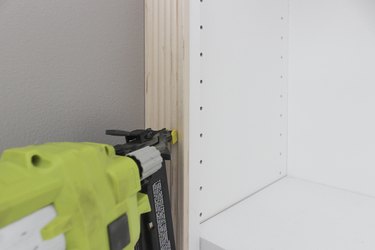
Step 4: Attach Furring Strips to Studs (Optional)
If there is a gap between the back of the bookcase and the back of the cabinet base, as pictured below, or if you have wires from electronic devices that need to be hidden behind the bookcase, then two 1-inch-by-3-inch furring strips will need to be attached to the marked studs in the wall, before attaching the bookcase to the wall.
Step 5: Attach Bookcase to Studs
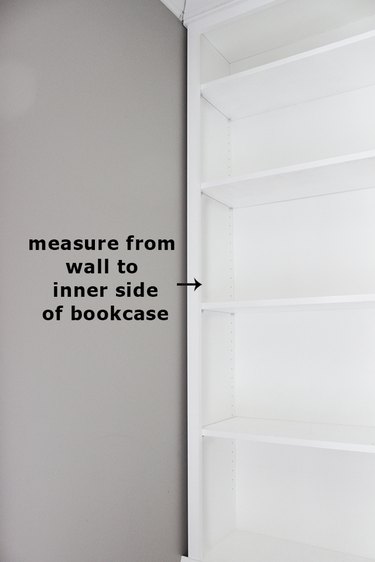
Slide the bookcase into place again, to ensure a snug fit without further adjustments. Note the gap that is between the wall and the outer side of the bookcase unit. You'll need to account for this gap when attaching the bookcase to the studs, since when it is in place against the wall, you can only measure from the inside of the bookcase, not the wall directly.
Measure the distance from the wall to the inner side of the bookcase, then subtract this distance from the distance previously measured from the wall to the first stud (found in Step 3). Remove one of the shelves and mark this new distance on the back of the bookcase. Also mark on the bookcase the distance between the first stud and the second stud (found in Step 3).
Attach the bookcase to the marks using 2 1/2-inch wood screws, to anchor it against the wall. Then, replace the shelf to hide the screws.
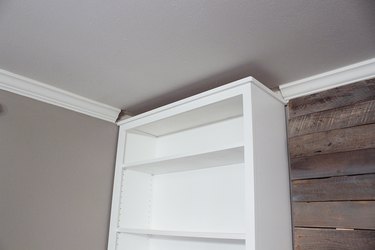
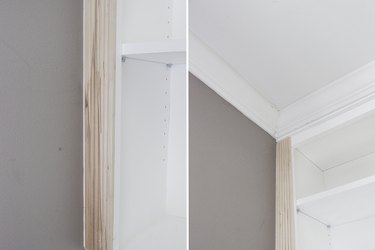
Step 6: Cut and Attach Crown Molding Anchor
Since there is a gap between the top of the bookcase and the ceiling, an anchor is needed to attaching the crown molding.
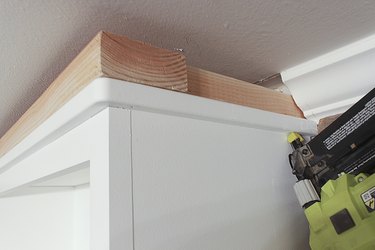
For a 3-foot-wide-by-1-foot-deep bookcase, cut a 3-foot long two-by-four board and two 8 1/2-inch long two-by-four boards. For a larger or different size bookcase, cut the front board the same width as the bookcase, and the side pieces the same depth as the bookcase minus 3 1/2 inches (the actual width of a two-by-four).

Place the shorter boards on either side of the bookcase (on top), with the long board in front, butted up against the two shorter boards. Secure the boards to the bookcase using 1 3/4-inch nails with the electric brad nailer.
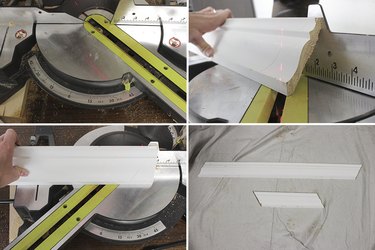
Step 7: Measure and Cut Crown Molding
Measure the distance from the base of the existing crown molding on the wall and the corner of the bookcase on both sides of the bookcase. When the right side of the new crown molding butts up to the existing crown molding at a 90-degree angle (so the short side of the bookcase), the miter saw needs to be set to a 45-degrees angle to the right. To cut this piece, place the crown molding upside down and against the miter saw fence, just like it would sit against a wall and ceiling.
Once the initial cut is made, measure from the bottom of the crown molding, the same distance as the short side of the bookcase. Cut that measurement, making sure both cuts are parallel. For the front of the bookcase, the left side of the new crown molding butts up to the existing crown molding at a 90-degree angle, so the miter saw needs to be set to 45 degrees to the left. Make sure to always cut the crown molding upside down.
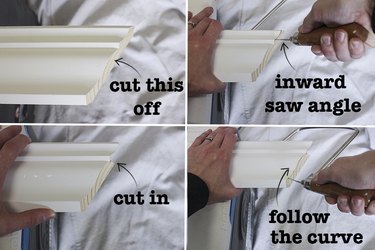
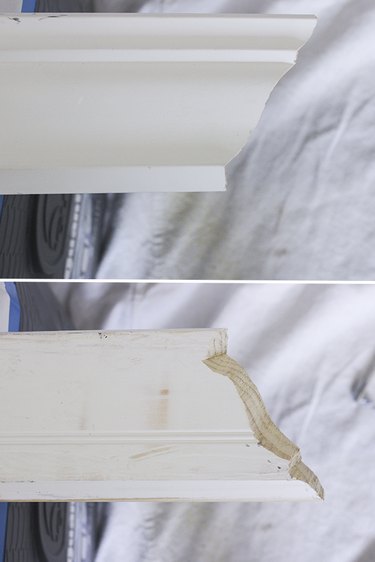
Step 8: Cope the Crown Molding
In order for the new crown molding to fit against the existing crown molding, the exposed wood portion of the crown molding (on the right side for the short piece and on the left side for the long piece), which were just cut at 45 degrees, will need to be cut off or "coped." To do this, simply hold the crown molding against a bench or table with one hand, extended about 4 to 6 inches, and with the other hand holding the coping saw, cut the wood at an inward angle, along the primed edge of the molding.
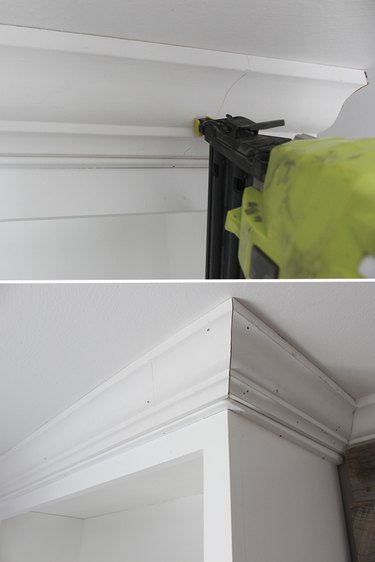
Step 9: Attach Crown Molding to Bookcase
Using an electric brad nailer and 1 3/4-inch nails, attach the crown molding to the top of the bookcase so that both 45-degree angles are flush and both coped ends are flush against the existing crown molding on the wall.
Step 10: Install Base Molding to Base of Bookcase
Measure from the wall to the corner of the front of the bookcase on both the long and short sides. Cut two pieces of base molding that correspond to the front and side measurements of the bookcase so that one side is a straight cut (0 degrees) and the other side is a 45-degree angle miter cut. The shortest (inside) length of the base molding should be the same distance as the side of the bookcase to which it will be attached. Staple the base molding into place with the brad nailer and 1 3/4-inch nails.

Step 11: Install Door Casing to Sides of Bookcase
Measure the distance from the bottom of the crown molding to the top of the base molding. Using that measurement, cut two of the fluted door casing for either side of the bookcase. Attach the casing to the bookcase with the electric brad nailer and 1 3/4-inch nails, making sure the outer edge is flush with the corner of the bookcase, and the inner edge is flush with the wall.
Step 12: Fill Gaps and Holes with Caulk and Paint
Using caulk and a caulk gun, fill in seams, gaps and holes along all parts of molding and trim. Smooth out caulk with your finger, wiping off and removing excess with a damp rag. Let dry and then paint with semi-gloss white latex paint.
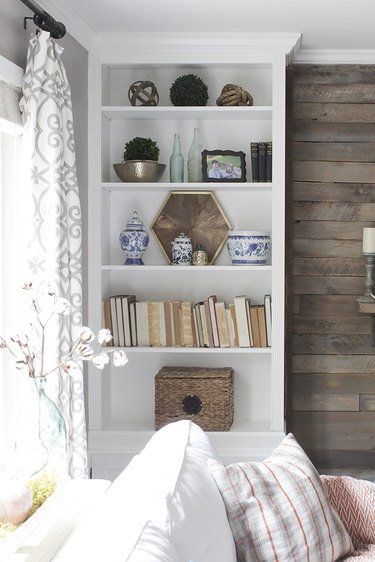
Repeat this same process for a twin bookcase on the opposite side of the wall. Once the paint is dry, replace all your decorative items back on the bookcase, and admire the look of custom-looking built-ins. Find out how to create a reclaimed wood pallet accent wall like the one pictured below.