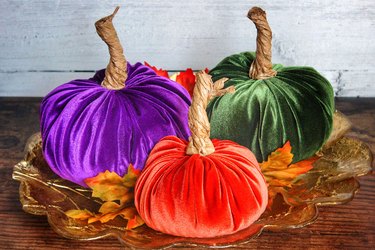
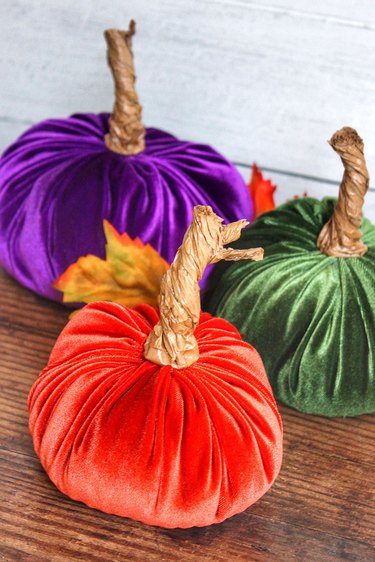
Pumpkins are a decorating staple throughout the fall season, and you can never seem to have enough around the house. But of all the different types of pumpkins to display, these pumpkins made of velvet might be the ultimate in fall decor. With their soft touch and luxurious fabric shimmering in the light, they beautifully adorn entryways, tabletops and mantels. They're so easy to make, you may want to create an entire velvet pumpkin patch (and you won't believe what the stems are made of).
Video of the Day
eHow may earn compensation through affiliate links in this tutorial.
Video of the Day
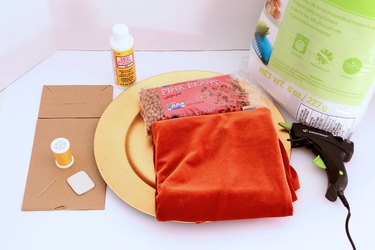
Things You'll Need
Velvet fabric
Large platter
Scissors
Needle
Thread
Dried beans or uncooked rice
Quarter
Brush
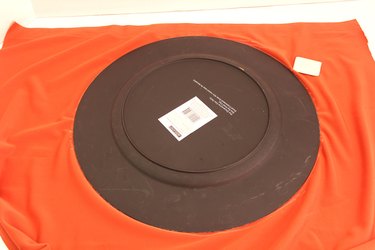
Step 1: Cut the Velvet
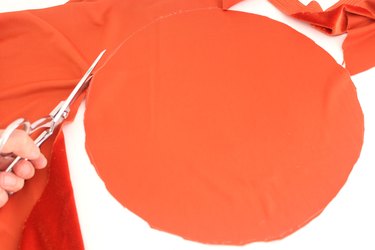
Place a large platter on top of the back side of the velvet, and trace a circle with a piece of tailor's chalk The platter for this example has a 13-inch diameter.
Cut along the tracing with scissors. This 13-inch circle makes a pumpkin that is approximately 5 inches in diameter. A 15-inch circle makes a 6-inch pumpkin, and a 17-inch circle makes a 7-inch pumpkin.
Step 2: Sew a Basting Stitch
Thread a needle so you have a double strand of thread that is about 36 inches long, and tie a knot at the end. Try to use the longest needle you can find. I used a 2-inch needle.
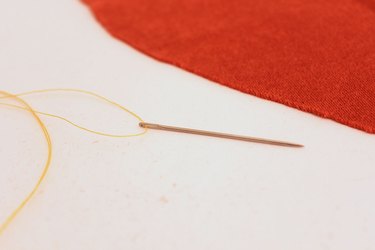
With the velvet side facing down, hand sew a basting stitch about 1/4-inch from the edge of the fabric with stitches about every 1/2 inch.
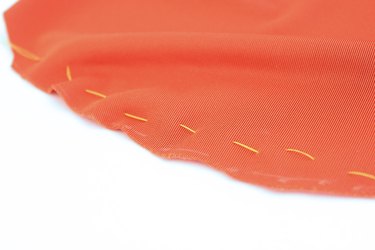
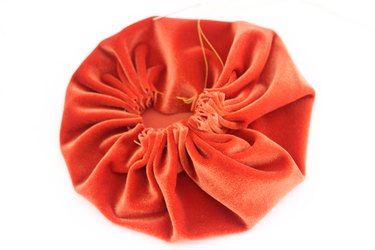
After you've stitched around the entire circle, pull the thread to gather the fabric into a pouch. Do not cut the thread yet.
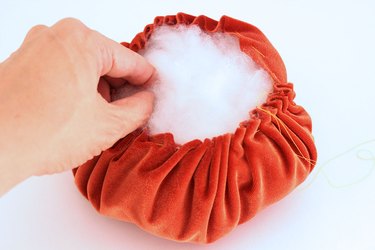
Step 3: Stuff the Pumpkin
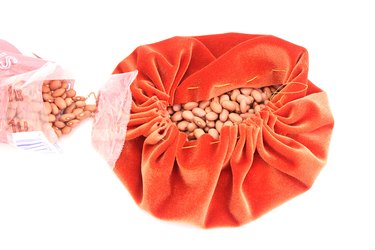
Place about 1/2 cup of dried beans or rice into the velvet pouch. The beans help weigh down the pumpkin.
Stuff the remainder of the pumpkin with polyester filling. You will need a lot more than you think. Remember that the goal is to create a pumpkin shape with its characteristic bumps, not a perfect sphere.
Step 4: Sew Up the Opening
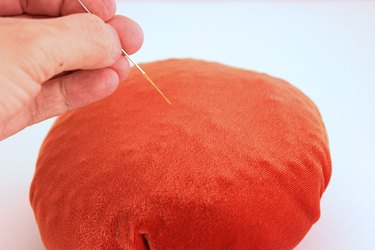
Pull the thread tightly to close the opening at the top.
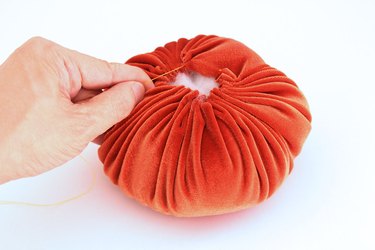
Pull the needle and thread back and forth across the top until the opening is sewn completely shut. Don't worry if your stitches are uneven and unsightly. They will be covered up by the stem. Again, do not cut the thread yet.
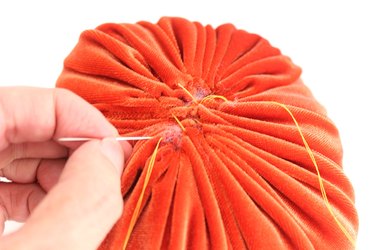
Step 5: Sew the Dimple
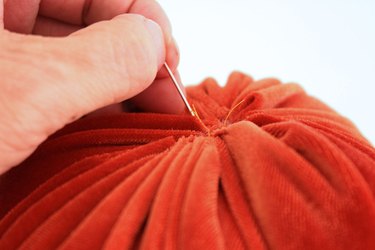
We want to create a dimple on the bottom of the pumpkin. This indentation not only contributes to the pumpkin shape, but also helps the pumpkin sit steady. Start by inserting the needle straight down into the middle of the pumpkin.
Have the needle come out of the bottom of the pumpkin. Most likely your needle will not be as long as the pumpkin is tall, so just squish down the pumpkin until the needle comes out the other side.
Insert the needle back into the bottom of the pumpkin and have the needle go back up toward the top.

Pull the thread tightly at the top, and you'll create the dimple or, as some people call it, the belly button.

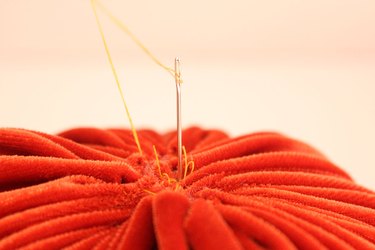
Step 6: Secure the Thread
At the top of the pumpkin, tie a knot with the thread to secure it. Now you can cut off the excess thread.
Step 7: Make the Stem
The stem for our pumpkins will be made of brown paper lunch bags. First, crumple the lunch bag repeatedly until the paper is soft and pliable. Of course, instead of a paper bag, you can make a stem out of a cut tree branch or re-use an old pumpkin stem. But most people have easier access to a paper bag, and the bag creates a gnarled stem that looks very realistic.
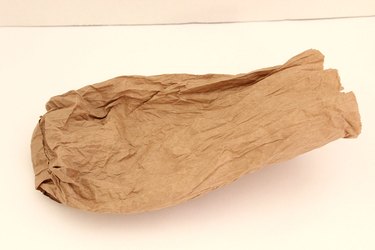
Place a quarter inside the bottom of the bag. Then twist the bag to create a narrow column. The quarter acts as the base of the stem. You can also use a metal washer.
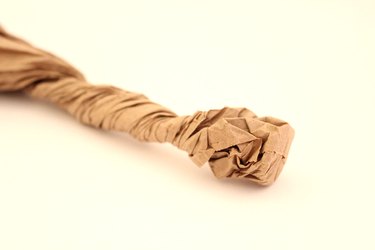
Apply two to three coats of Mod Podge decoupage medium to the stem to stiffen and protect the paper. You only need to go up about 5 inches with the Mod Podge, as the stem won't be longer than that.

Leave to dry, then cut the stem to your desired length.
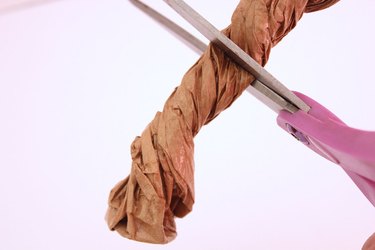
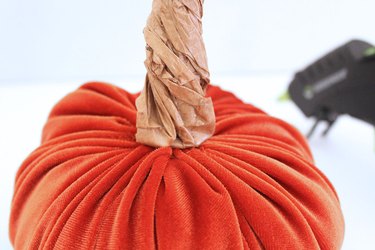
Step 8: Adhere the Stem
Apply hot glue to the bottom of the stem, and press the stem down onto the center of the pumpkin until the glue sets. The quarter inside the base helps the stem sit flat against the pumpkin.
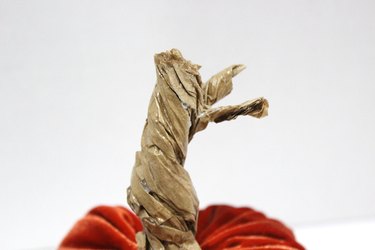
Step 9: Distress the Stem
To add a little realism to the stem, tear along the cut edge to create tendrils and twigs coming out at the top. Apply another coat of Mod Podge to further seal the paper, if necessary.
Fluff up the finished pumpkins to accentuate the pleats, and make your velvet pumpkins in a variety of colors to showcase the jewel tones of autumn.
Buy materials for this tutorial: