Things You'll Need
Cleaning cloth
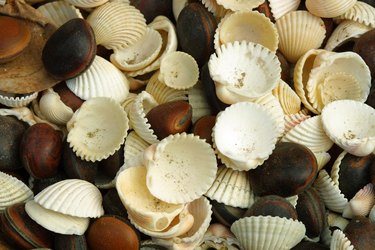
Flat shells
Epoxy glue
Small wooden craft stick
Measuring tape
Pencil
With the right method, seashells can become wall decorations. Seashells as decor give a room the feeling of a lazy day on the ocean or a romantic evening on the beach. The small homes of sea creatures are an affordable piece of decoration for those looking to decorate on a budget. Often the biggest problem is figuring out to get the shells on the wall. Use the right materials to create a lasting decoration.
Basic Process
Step 1
Clean the wall before starting the project. Wipe off dust and dirt to ensure a smooth surface for the seashells.
Video of the Day
Step 2
Open a tube of epoxy glue and apply a small amount to the tip of a wood craft stick.
Step 3
Apply the epoxy glue to the rim of the seashell. Use the wooden stick and apply to the inside edge. Most seashell edges are not smooth, so the excess glue placed around the edge needs to be on the inside of the shell.
Step 4
Press the seashell to the selected spot on the wall. Hold the shell in place for up to a minute to allow a slight drying time. The size of the shell determines the hold time. For a small shell, a minute is sufficient. For a large, heavier shell, several minutes are needed.
Creating Borders with Seashells
Step 1
Measure the width of the wall and mark the center with a pencil.
Step 2
Use the basic process to attach three large, flat shells onto the wall. Place one in each corner and one at the center mark. Leave only a very small space between the ceiling and the shells.
Step 3
Measure between the first corner shell and the middle shell to find the center. Repeat this action from the center to the last large shell. Place additional large shells at these center points on the wall.
Step 4
Fill in the area between large shells with medium size shells.
Step 5
Finish the border by placing very small shells in the areas slightly above and below between the shells.
Additonal Decorating Ideas
Step 1
Place shells between pictures on the walls. Use seashells of similar size and shape to create a triangle shape between the pictures or place the shells in a horizontal or vertical line.
Step 2
Frame a window with seashells by attaching shells to the window frame or around the outer edge. Use similar size shells for a uniform look, or a variety of sizes for a more casual or natural look.
Step 3
Create a chair rail from seashells by drawing a straight, level line around the center of the wall and gluing on a variety of shapes, sizes and colors of shells. Make the line wavy for a more funky look.
Step 4
Add sand to the wall around seashells for an added tropical look. Spray epoxy adhesive on the wall and rub on sand with your hand.
Step 5
Hang fishing net on the wall and place the seashell in the openings for a nautical theme.
Tip
The type of paint on a wall does not make a difference in the adhesion of the epoxy glue. For brick or tile walls, consider using a coat of primer before attaching shells.
Warning
Round or spiral seashells will not typically adhere to the wall with this method. Save these shells for display cases or table decorations. Fragile shells, such as Sand Dollars may break during the process.
Video of the Day