A beautiful way to decorate your outdoor space is with a garden globe, which is also known as a gazing ball. These are spheres that you can nestle amongst your flowers, allowing them to sparkle in the sunlight. You can also place the globes on patio tables as a centerpiece, or use them to spruce up your front porch. And making your own is a breeze. So gather your supplies, and let's get the ball rolling.
Things You'll Need
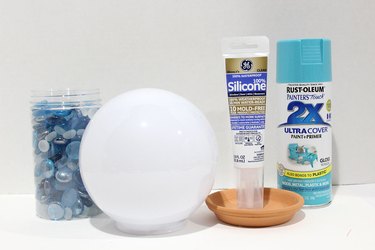
Spray paint
Silicone waterproof adhesive
Glass beads
Video of the Day
1. Select a globe base
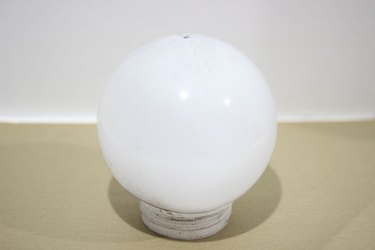
For this project, you'll need a solid spherical object as the base. An ideal base is a 6-inch diameter globe lighting fixture. You can purchase them new at home improvement stores or online, and you can also snag an old one at yard sales or thrift stores. If you're starting with a used globe, wash it with soap and water and dry it off completely with a towel. Note that these globe fixtures come in both glass and plastic. We recommend the plastic versions since they won't break as easily.
Video of the Day
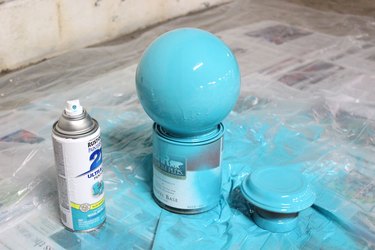
2. Paint the globe
We want the globe to have a foundation layer of color for any spots that are still exposed after we glue on the glass beads. Choose a spray paint that is in the same color family as the glass beads you'll be using, and apply two coats to the globe. For convenience, use a spray paint that has a combination primer and paint formulation. At the same time you're spray painting the globe, paint the clay saucer as well. Let the paint dry overnight.
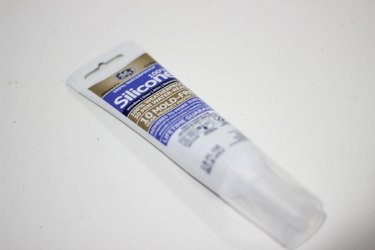
3. Choose the right adhesive
Because this garden globe will be displayed outdoors, you'll need an adhesive that will weather the elements. The last thing we want is glass beads falling off the globe. The adhesive used in this project is a silicone adhesive that's made for outdoor applications like windows and doors. Not only is it waterproof, it has great hold and sets very quickly. Avoid regular craft glues and hot glue — they are not strong enough for this project.
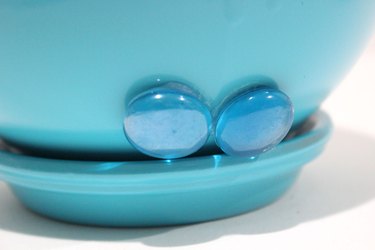
4. Glue the globe to the saucer
Remember that clay saucer that you spray painted? That will be the base for your globe. It will stop the globe from tipping over, and keep insects from making a home inside. First, apply adhesive around the rim of the globe.
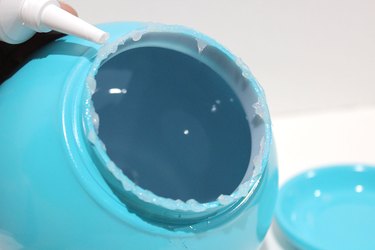
Add some adhesive around the inside perimeter of the clay saucer as well, and position the globe on top of the saucer, pressing down firmly. Let the glue set for about 30 minutes.
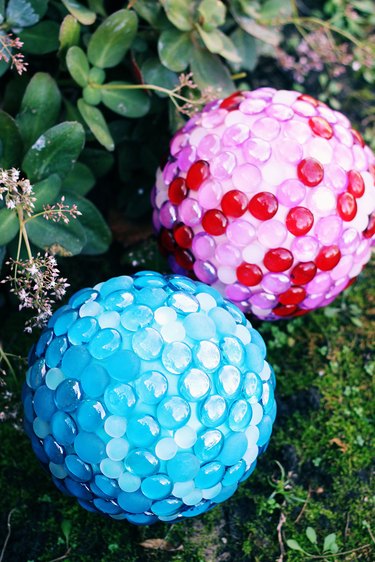
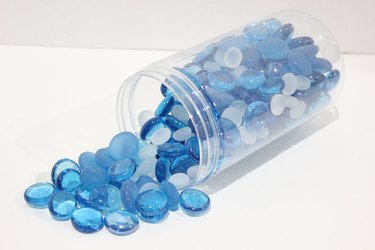
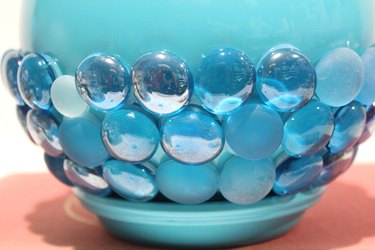
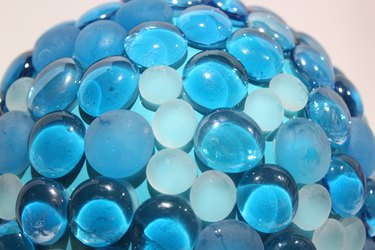
5. Select your glass beads
When choosing glass beads, make sure they have one side that is flat. At the crafts store, we found a container of glass beads that had assorted shades of the same color, with a mix of shiny and matte surfaces. As an alternative to glass beads, you can use other shiny objects like pennies, metal washers, or mirror pieces.
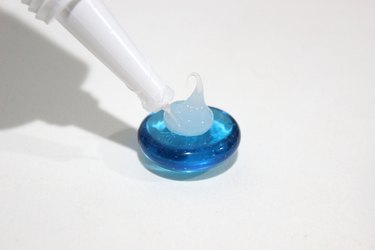
6. Glue the beads
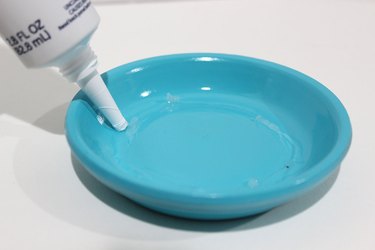
Squeeze a generous dab of the silicone adhesive on the flat side of the glass bead. You want enough adhesive so that when you press the bead against the globe, the silicone spreads to the edges.
Starting at the bottom of the globe, position the glass beads with the edges resting on the rim of the saucer. The saucer supports the beads so that they do not slide down. Press the beads firmly on the globe so that the adhesive makes contact and holds the bead in place. Continue adding beads to the bottom row.
Glue a second row of beads directly above the first row, letting the first row act as a support for the second.
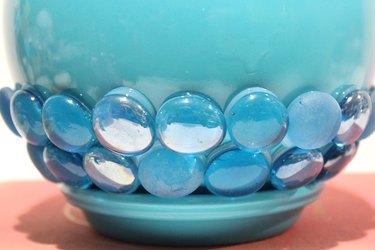
Continue adding beads, allowing each row to be supported by the one under it. Keep going until you've reached the top.
7. Fill in gaps
As you place glass beads around the globe, you'll notice that there will be spots that are too small for a full-sized bead. Fill in these gaps with smaller beads. The jar of beads purchased for this project included smaller beads in the mix. After you've covered the globe with beads, any areas that remain exposed will still look colorful thanks to the foundation of spray paint you applied.
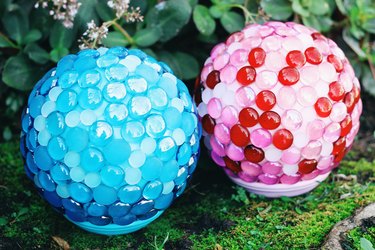
Make a variety of garden globes, and your yard will be popping with color whether the flowers are blooming or not.