Things You'll Need
Worsted-weight or heavy-weight yarn
Scissors
Embroidery needle
Finger knitting is a way to make knitted scarves, belts or headbands without knitting needles. It is taught to children who are too young to use knitting needles properly to help them gain an understanding of how knitted fabric works. Knitting a scarf on your fingers is an easy enough process, but keeping your stitches tight is another matter all together. The keys to making a tightly knit finger knitted scarf are proper yarn choice and giving the yarn adequate tension.
Step 1
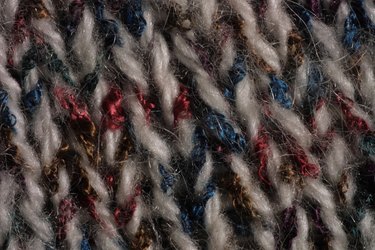
Choose a yarn for your scarf that is at least worsted-weight, but preferably bulky-weight. Larger yarn knits tighter on larger needles, and most adult fingers are around the size of a size 10 or 13 U.S. knitting needle -- the size recommended for most bulky-weight yarn. If you want to use thinner yarn, choose several in contrasting or complementary colors to knit together. Several yarns held together can be the same size as a bulky-weight yarn.
Video of the Day
Step 2
Hold your nondominant hand up, palm-side facing you. Pull a tail of yarn out of the skein, and pass it between your thumb and forefinger, with the tail end dangling over your palm. This is the tail.
Step 3
Wind the working yarn -- the side of your strand closest to the skein -- around your fingers in a figure-eight motion. Wrap it around the back -- the back of your hand side -- of your index finger, the front or palm side of your middle finger, the back of your ring finger, and completely around your pinky so the working end is now on the palm side of your hand. Take it back around the front of your ring finger, the back of your middle finger, and then the front of your index finger. You now have complete loops around each finger.
Step 4
Wind your yarn around your fingers again in the same pattern, back-front-back-around-front-back-front, so you now have two loops around your fingers. Pull a little bit on the tail and working ends of your yarn so your loops are tight, but not so tight you can't move them.
Step 5
Lift the bottom loop on your pinky finger up, and pull it over your pinky finger so it hangs over the back of your hand. Repeat this with all four fingers.
Step 6
Wrap your fingers again in the figure-eight pattern, and again lift the bottom loops over and off each finger in a row. You will begin to have a sheet of knitted fabric that extends down the back of your hand. Occasionally, adjust the tension of your knitting by tugging on the tail or your working end to pull your stitches tighter.
Step 7
Bind off your scarf by working down to one row of loops on your fingers. Pull the loop off your pinky, and put it on your ring finger -- two loops on your ring finger. Pull the bottom loop on your ring finger off and over the fingertip, then move the loop that remains on your finger to your middle finger. Repeat this until you have one loop left, pull the working yarn through the loop, and tighten down to knot the scarf. Use scissors to cut the yarn to leave a short tail -- between 4 and 6 inches -- and, threading it through an embroidery needle, thread it through the stitches of your scarf to conceal it.
Tip
If you need more security, make a slip knot in your yarn before casting on, and loop it around your thumb before winding the yarn around your fingers. It isn't necessary, but it will help prevent the yarn from slipping between your fingers.
It takes practice to get an even, tight tension in your knitting. Be patient and practice.
Video of the Day