Things You'll Need
Template for the face and neck plate
2 cereal boxes (empty)
Masking tape
Newspapers
Scissors
1 large balloon
2 cups flour
2 cups water
1 tablespoon salt
Plastic bowl
Spoon
Gold or silver paint

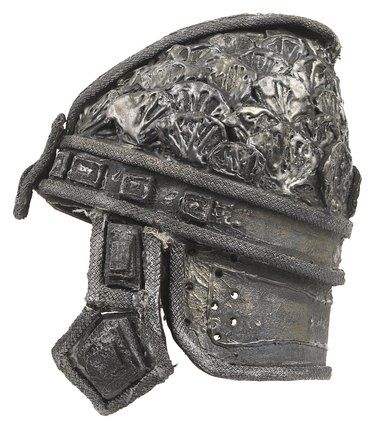
Make a cardboard Roman Gladiator helmet to top off your Halloween costume. This is also a great exercise for summer holidays as it teaches your child about Roman history while creating a costume that will keep him entertained for hours. You can also make these helmets as part of a Roman-themed birthday party. The helmet is made from cardboard and paper mache, and will take a couple of days to make, so plan ahead.
Step 1
Download a template for a face and neck plate. If you are artistic, you can design your own using pictures of Roman helmets. The faceplate should cover the forehead, ears and cheeks. It should also have a strip protecting the nose. The neck plate should form a skirt over the back of the neck.
Video of the Day
Step 2
Cut open the cereal box and lay it out on your work surface. Draw your own template for the face and neck plates, or trace ones you have downloaded. Cut the face and neck plates out of the cereal boxes. Tape them together and try them on. Add or remove cardboard until the helmet fits comfortably.
Step 3
Blow up the balloon and tie it off. Place it inside the cardboard helmet with the knot at the back. You will have to squeeze the balloon in, but that will help to give it a more circular shape.
Step 4
Make the paper mache. Cut the newspaper into strips that are 2 inches wide. In the plastic bowl, mix the water, flour and salt until it resembles pancake batter. Dip the strips into the flour mixture, allow the excess to drip off and lay them onto the helmet.
Step 5
Cover the balloon and cardboard cutouts in paper mache. Overlap the strips so that it will form a hard shell when it dries. Allow the helmet to dry overnight.
Step 6
Apply a second layer of paper mache and mold the helmet as you do so. Allow the helmet to dry overnight. Repeat the process until you have four layers of paper mache on your helmet.
Step 7
Allow the paper mache to dry completely. You can check for dryness by pressing your thumb nail into the paper mache. If no indent is left, the helmet is dry. Pop the balloon and paint your helmet silver or gold.
Tip
Add feathers to your helmet for a more Roman look. Add a toga or a tunic and skirt with leather sandals to complete the look. If your balloon goes flat or pops, it doesn't matter; so long as the first layer of paper mache is able to keep the shape, you can simply add other layers on top.
Warning
Supervise young crafters who are cutting out the cardboard.
Video of the Day