Things You'll Need
Scissors
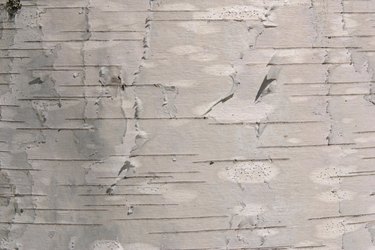
Birch bark
Craft knife
Ultra-fine tip permanent marker
Tape measure or yardstick
4-inch diameter plastic or glass cylindrical vase, 8 inches tall
Hot glue sticks
Hot glue gun
Birch bark peels from the tree in large pieces or sheets. Dead birch trees disintegrate quickly, leaving behind sections of birch bark that are round and up to several feet long. The bark is very strong and you can use it to create such things as decorative leaves, vases and a small canoe that floats. Each project takes approximately 15 minutes to make. Learn the process to work with birch bark, then experiment with other designs.
Birch Bark Leaves
Step 1
Draw the shapes of maple, oak and ash leaves at least 3 inches long on a piece of paper. Cut out the paper shapes and use them as templates.
Video of the Day
Step 2
Turn a piece of birch bark over so the front is on the bottom. Trace around the paper leaf templates.
Step 3
Cut along the traced line with a craft knife. Push firmly to cut through the thickness of the birch bark.
Step 4
Flip the leaves over so the front of the birch bark is facing up.
Step 5
Draw a center vein and several small leaf veins on the surface of the birch bark leaves with an ultra-fine tip permanent marker.
Birch Bark Vase
Step 1
Measure and cut a piece of birch bark 8 inches tall and 13 inches long. Flip the birch bark so the front side is on the bottom and the long edges are horizontal.
Step 2
Place a 4-inch diameter cylindrical vase that is 8 inches tall on its side. Line the vase up with the top, bottom and one side edge of the cut birch bark.
Step 3
Roll the bark around the outside edge of the vase.
Step 4
Squeeze a line of hot glue along the seam.
Step 5
Continue to roll the birch bark tightly around the vase so the final edge is attached to the line of hot glue.
Birch Bark Model Canoe
Step 1
Place a piece of birch bark on a flat work surface so the front side of the bark is facing down. Measure, mark and cut a 3-by-5-inch rectangle from the birch bark.
Step 2
Turn the rectangle so the two 3-inch ends are horizontal. Draw a V shape connecting the top left-hand corner and the top right-hand corner that is 1 inch deep. Repeat the process with the bottom left-hand and bottom right-hand corner. Cut the V shapes from the birch bark.
Step 3
Flip the birch bark over so the front side is on top. Squeeze a line of glue along one edge of the V shape cut in the top of the rectangle. Pull the opposite edge of the V shape across the glue until the cut edges for the top of the canoe are even. Repeat the process with the remaining V shape.
Step 4
Hot glue or cut any birch bark overlap that is not glued together.
Video of the Day