How to Make Garlic Bread With Toasted Garlic: 8-Minute Guide
The difference between garlic bread that sits ignored in the basket and garlic bread that disappears first usually comes down to one step most cooks never think to add: toasting the garlic before it goes anywhere near the butter.
The common approach mixes raw minced garlic straight into softened butter, the same starting point Naomy's Kitchen moves away from in favor of a cooked-garlic compound butter. Raw garlic is quick, but it leaves that sharp bite mostly unchecked. Learning how to make garlic bread with toasted garlic means adding one stovetop step, about 8 minutes long, that sits between raw intensity and the longer commitment of a full oven roast (Foodtastic Mom). A full roast takes roughly 45 minutes (Happy To Be Here Kitchen), so the dry toast is the option for anyone who wants a cooked garlic flavor without planning that far ahead.
There's chemistry behind why toasting changes anything. Garlic's flavor compounds form through enzymatic and non-enzymatic pathways inside the clove, producing sulfur compounds that are chemically unstable and sensitive to how they're processed, including by heat (Food Chemistry X, earlier this year). What follows is a full toasted garlic bread recipe: how to toast the cloves, how to build a garlic butter with toasted garlic, how to bake a loaf that browns without burning, and how to decide between this faster method and a full roast.
Why toasted garlic makes better garlic bread
Video of the Day
Raw minced garlic dropped straight into butter delivers a sharp, sometimes harsh bite that can dominate everything else on the plate. Cooking changes that. The cited recipes describe cooked garlic, specifically roasted garlic, as trading that raw edge for something sweeter and nuttier (Naomy's Kitchen). A dry toast aims for that same cooked-garlic character, just faster.
The mechanism is chemical, not mysterious. Garlic's flavor comes from sulfur-containing compounds like allicin and diallyl di- and trisulfides, generated when a clove is cut, crushed, or heated. A recent review of the research on garlic flavor formation identifies thermal processing as one of the key factors that shapes the final flavor and sensory quality of garlic, alongside fermentation and other processing methods (Food Chemistry X). In plain terms: how garlic is treated before it hits the butter genuinely changes how it tastes, not just how it looks.
Ingredient quality matters just as much as technique. Chef Mirabile, interviewed by Tasting Table, recommends the freshest garlic available and warns against pre-ground garlic, arguing that fresh cloves carry noticeably more depth than jarred or paste versions. Part of the reason, he suggests, is that processed garlic picks up water or oil during preparation that dilutes its flavor (Tasting Table).
None of this requires a special trip to the store. Toasting is a technique applied to garlic most people already buy, not a new ingredient to track down.
Video of the Day
How to dry-toast garlic cloves for garlic bread
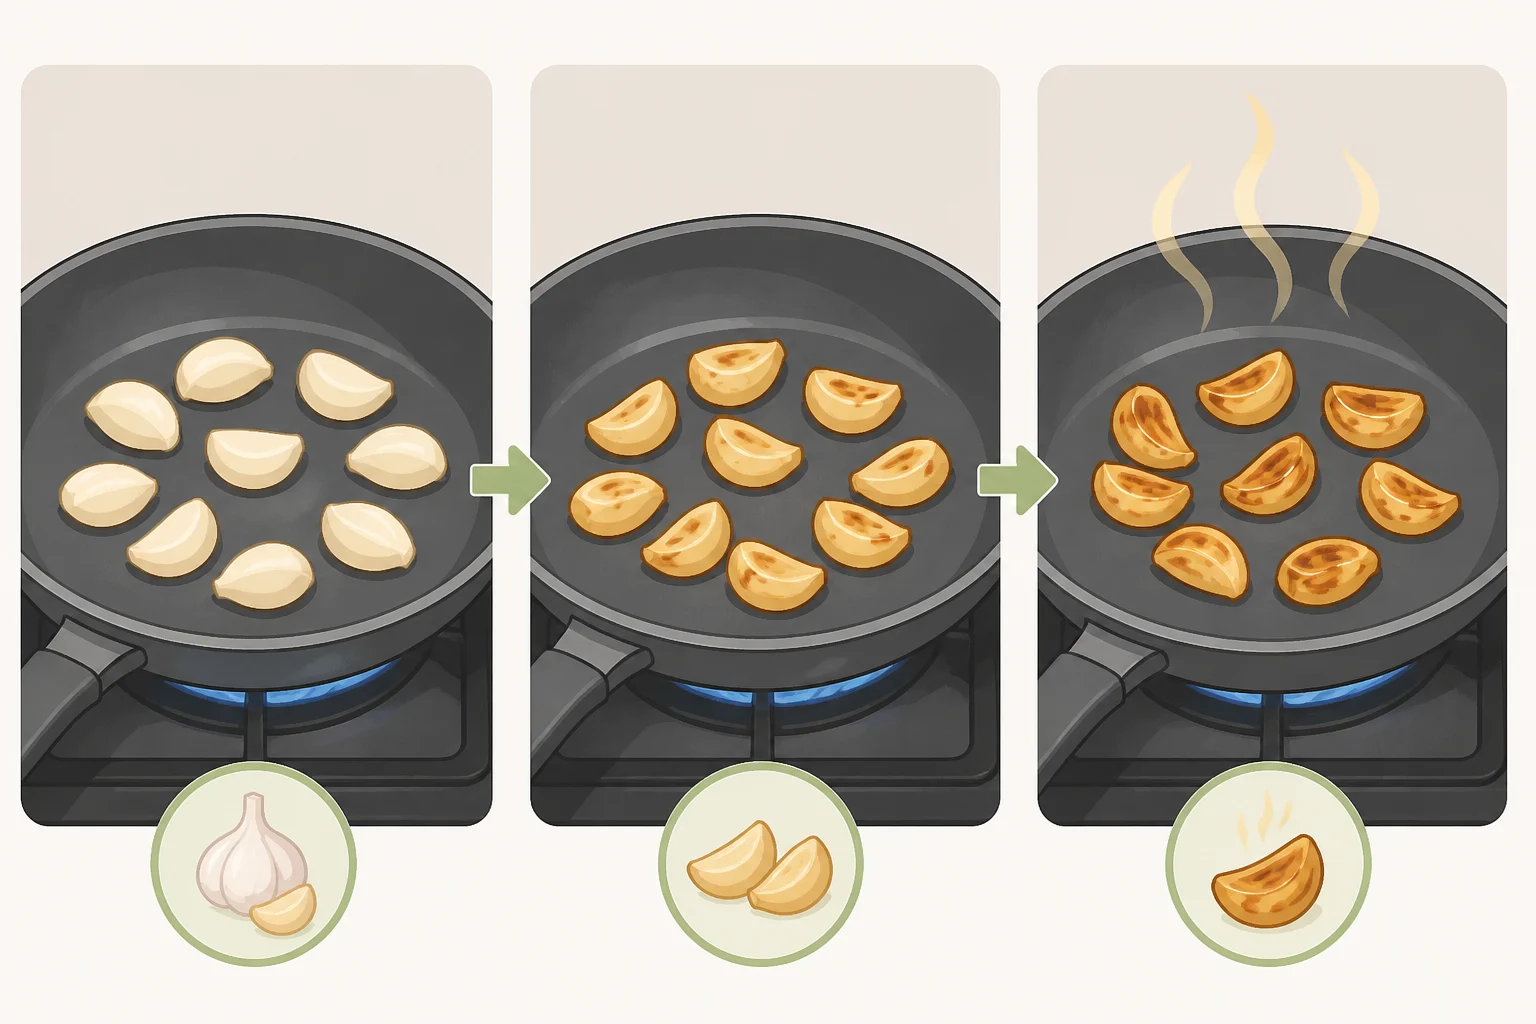
Gather whole, unpeeled garlic cloves, ideally fresh rather than a bag that's been sitting in the crisper drawer, plus a small dry skillet and a burner set to medium. No oil, no water, nothing added.
- Place the unpeeled cloves in a dry skillet over medium heat. This is a dry toast, not a sauté, so keep the pan empty (Foodtastic Mom).
- Shake the pan occasionally for about 8 minutes, until the cloves are fragrant and the color of the skins has deepened (Foodtastic Mom).
- Let the cloves cool until they're safe to handle, then peel them and mince or press them through a garlic press (Foodtastic Mom).
If the cloves aren't yet fragrant or noticeably darker at the 8-minute mark, leave them over the heat a little longer, shaking and checking often, until they are. There's no need to guess at a new timer; go by fragrance and color rather than the clock.
That process leaves dry toasted garlic cloves ready to mash into butter, with none of the timing or cleanup a full oven roast requires.
How to make garlic bread with toasted garlic
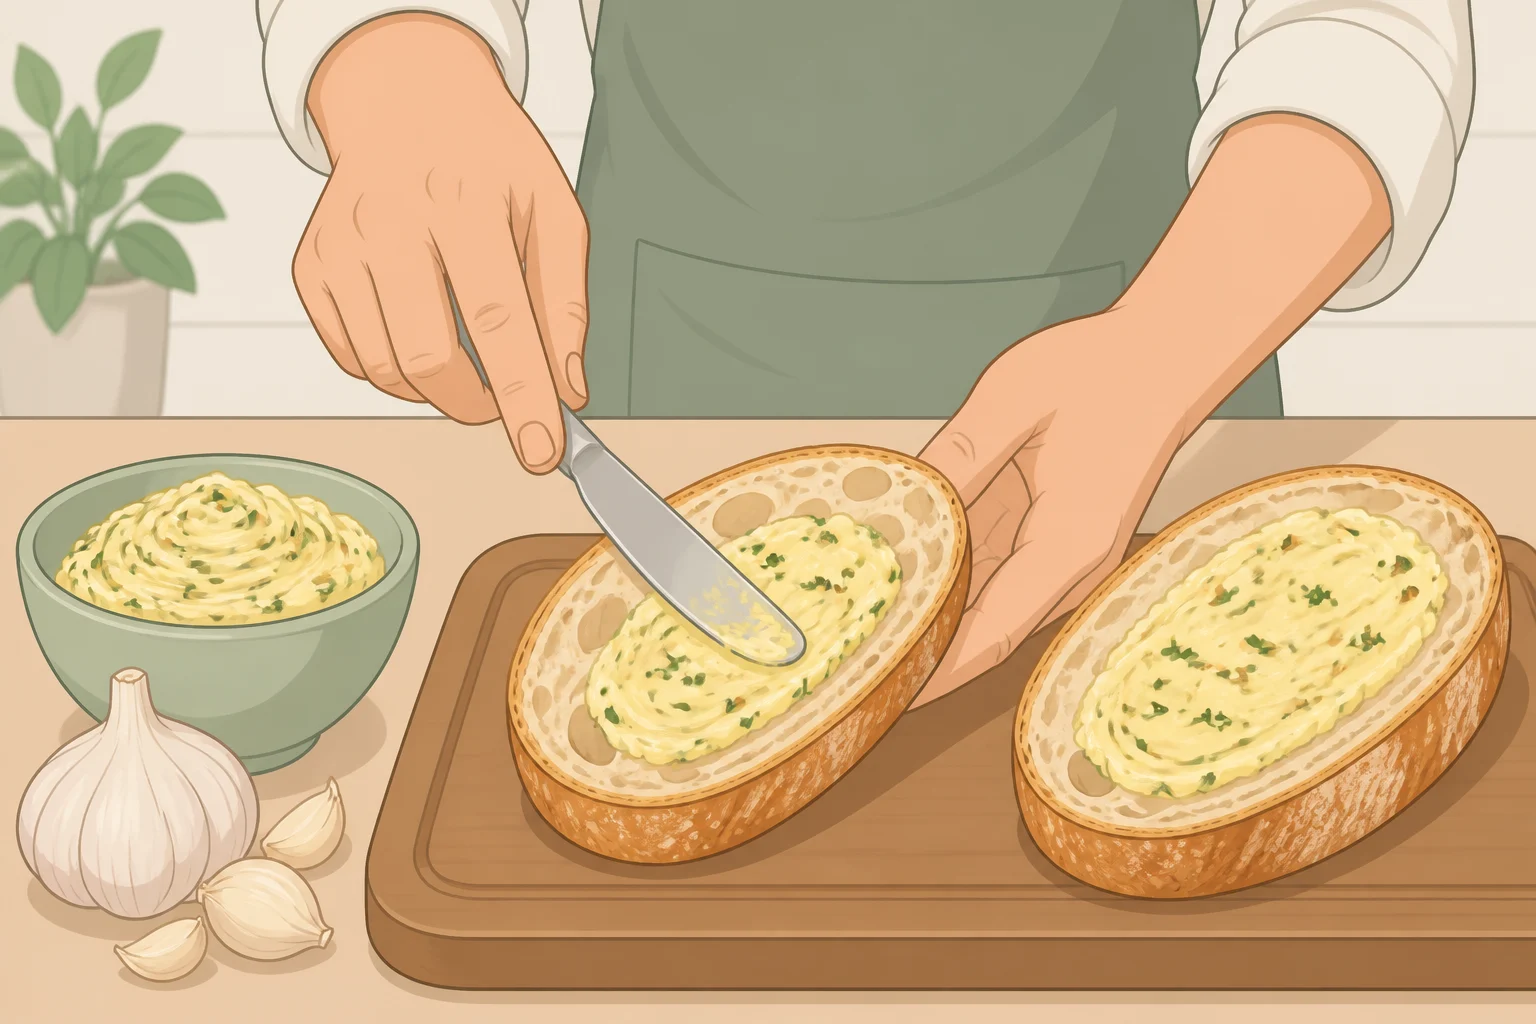
This tested formula from Foodtastic Mom takes about 20 minutes of prep and 10 minutes in the oven, for a 30-minute total, and yields about 8 servings from one loaf (Foodtastic Mom):
- 10 medium garlic cloves, unpeeled
- 8 tablespoons unsalted butter, softened
- 3 tablespoons grated Parmesan cheese
- 1/2 teaspoon salt
- 1 one-pound artisan loaf of bread, halved lengthwise
- Toast and prepare the garlic using the dry-toast method above, then set it aside.
- Start with softened butter, not melted. A spreadable compound butter helps the mixture spread evenly into the bread's crevices, rather than pooling on top the way melted butter does (Naomy's Kitchen).
- Mash the toasted garlic into the butter along with the Parmesan and salt until it forms an even garlic butter with toasted garlic running through it (Foodtastic Mom).
- Adjust the oven rack to the lower-third position and heat to 500°F (Foodtastic Mom).
- Spread the garlic butter generously over both cut sides of the halved loaf.
- Bake for 8 to 10 minutes, until the top is golden brown (Foodtastic Mom).
- Cut into 2-inch slices and serve immediately (Foodtastic Mom).
A couple of variations are worth knowing, even if they sit outside this exact tested formula. Chef Mirabile builds his garlic butter on good salted butter instead, since he treats salt as a flavor enhancer for the whole loaf, not just a seasoning (Tasting Table). If salted butter is what's in the fridge, that's a reasonable substitution here, but season cautiously rather than automatically adding the full half-teaspoon of salt on top of it. The same chef also points to browned butter and sage as a favorite swap for the standard garlic-Parmesan mix, for anyone wanting a second loaf that tastes noticeably different (Tasting Table).
Cheese lovers have an option too. A separate tested recipe adds shredded cheese, either Parmesan or mozzarella, during the final 2 minutes of baking, which is enough time to melt without scorching the crust (Ambitious Kitchen). That recipe bakes at 425°F for 10 to 15 minutes rather than 500°F for 8 to 10, so treat it as its own method, not a mid-bake add-on to the tested formula above.
For extra crackle on top, a different recipe finishes under the broiler for 2 to 3 minutes after baking. That method uses a different loaf, butter quantity, and base oven temperature, so it's best thought of as an optional finishing move rather than a ninth step in this formula. Watch it closely if trying it; bread under a broiler can go from golden to burnt very quickly (Naomy's Kitchen).
The bread itself matters less than people assume, as long as it's sturdy. The cited recipes favor a 1-pound artisan loaf, Italian bread, or soft French bread, not a thin baguette that can't hold a thick layer of butter (Foodtastic Mom; Naomy's Kitchen).
Toasted garlic or full oven roast: which to use
The 8-minute dry toast is a faster stand-in for a full oven roast, not a proven upgrade over it. No source directly compares the two side by side, so this comes down to trade-offs rather than a settled ranking.
A full roast takes about 45 minutes and turns garlic into a soft, spreadable paste (Happy To Be Here Kitchen), described elsewhere as deep, sweet, and nutty in flavor (Naomy's Kitchen). If a recipe calls for roasted garlic and 45 minutes isn't available, one source's own fallback is to substitute a couple of cloves of fresh pressed garlic, extra garlic powder, or both, adjusting to taste (Happy To Be Here Kitchen). That's a reasonable shortcut when roasted garlic isn't on hand, though it doesn't carry the same fresh-garlic emphasis Chef Mirabile makes for pre-ground or jarred alternatives.
The practical choice is simple. Reach for the dry toast on a weeknight, when speed matters more than a fully caramelized paste. Reach for the full roast on the weekend, when there's time to let the oven do slower work.
Storing and reheating leftovers
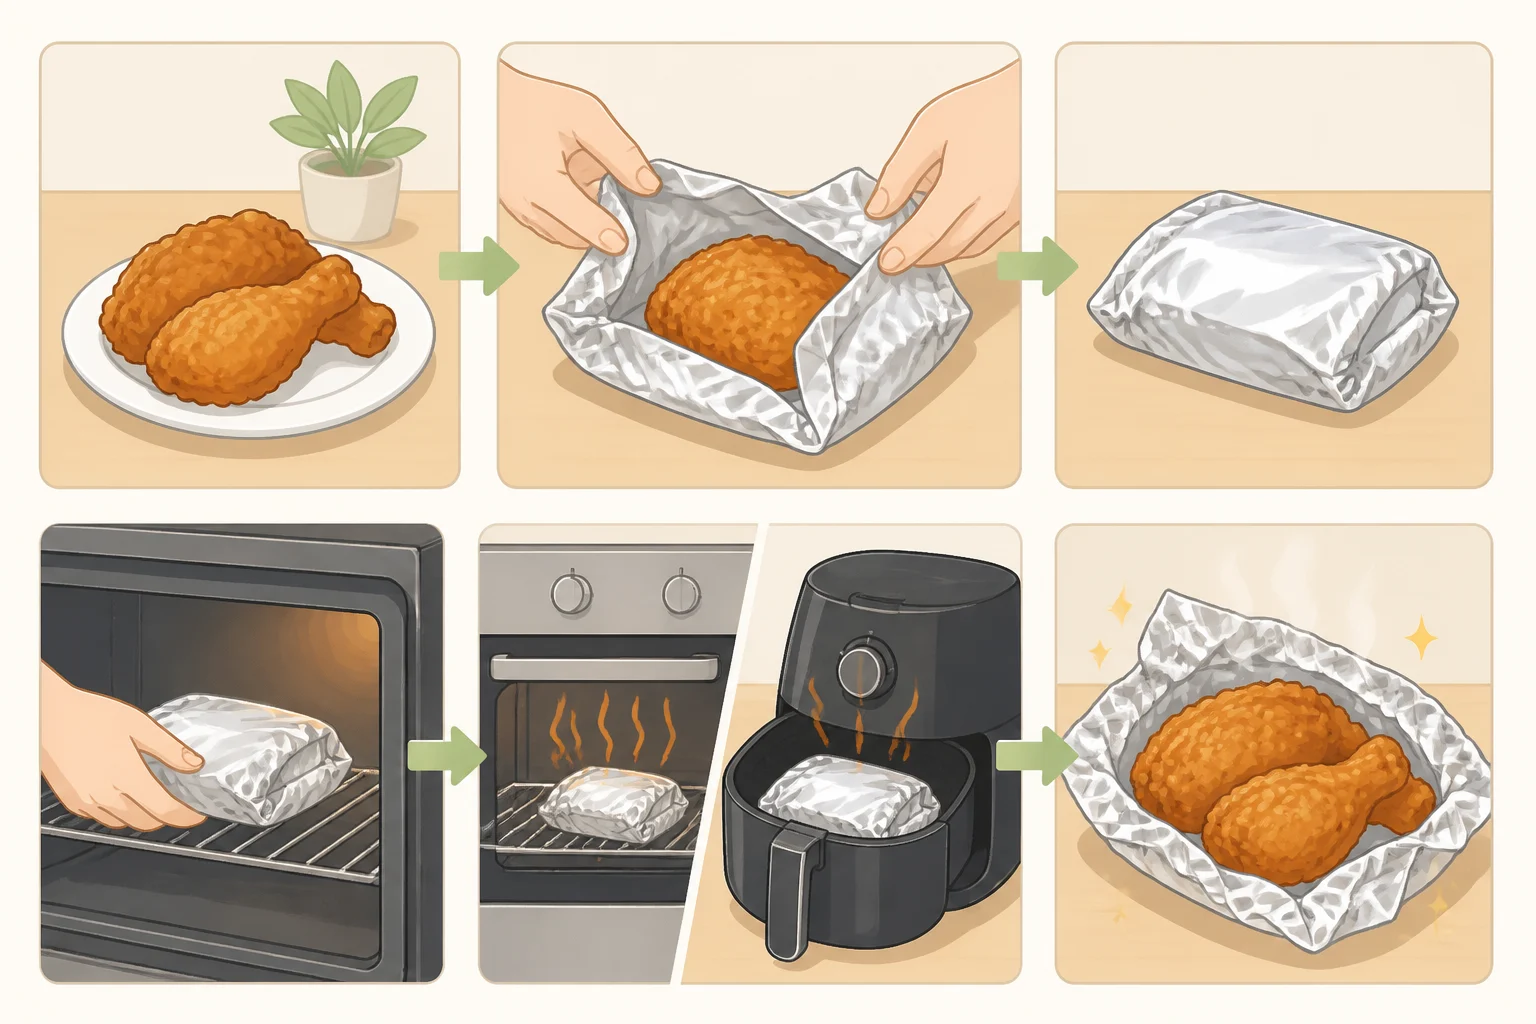
Foodtastic Mom's tested version skips the fridge entirely, since refrigeration dries the bread out. Wrap leftovers tightly in foil and leave them at room temperature for 1 to 2 days, or freeze in an airtight bag for up to a month (Foodtastic Mom).
Naomy's Kitchen takes a different approach, refrigerating leftovers for up to 4 days, or freezing an unbaked, prepared loaf wrapped in plastic and foil for up to 3 months (Naomy's Kitchen). That trade-off makes sense if shelf life matters more than a perfectly soft crumb the next time around.
For reheating, skip the microwave, since it tends to make the bread soft and chewy instead of crisp. An oven or air fryer works better: warm foil-wrapped or uncovered slices at 350°F for 5 to 10 minutes in the oven, or 350°F for 3 to 5 minutes in an air fryer, until heated through and crisp again (Naomy's Kitchen).
Dry-toasted garlic is the practical choice for a less raw flavor without planning a 45-minute roast. Save the full roast for when a soft, sweet garlic paste matters more than getting dinner on the table quickly.