Summer backyard upgrade ideas: what to build first, second, third
Nearly 39% of homeowners who renovated in 2024 upgraded a patio or terrace, making it the most common outdoor project that year. Those patios returned roughly 95 cents on the dollar at resale, according to NAR data cited by This Old House last year. That's not an argument for patios specifically. It's an argument for starting in the right place.
This is a sequencing guide for homeowners who want the most usable outdoor space per dollar spent on summer backyard upgrade ideas. One question drives it: given a real budget, what do you build first, second, and third so each project enables the next? The projects are a hardscape base, a shade structure, and a lighting and landscaping layer, ordered deliberately. Reverse them and you create rework. Skip ahead and you spend money on things that don't get used.
One honest note upfront: patios, shade structures, and irrigation systems are not weekend projects. If you're starting this week, some work will complete this summer and some will phase into fall or next spring. That's normal. This guide is about what to start this season, not what to finish by Labor Day.
Outdoor living has overtaken kitchen renovations as the most-requested home feature, according to Joe Raboine, VP of Design at Oldcastle APG, quoted by the Concrete Masonry and Hardscapes Association last year. The demand is real. A Thumbtack/Zillow survey found more than one in three homeowners describe their yard as a personal sanctuary, and 60% have canceled plans just to stay home and use it, per Better Homes & Gardens last year.
Summer backyard upgrade ideas by budget: a framework before the projects
Video of the Day
The three-project sequence applies differently depending on what you're working with. Locate yourself in one of these tiers before reading further it determines how much you can tackle this season versus phase over time.
Under $10,000: Build one zone well. A modest paver patio with basic path and string lighting is a complete, usable outcome. Don't spread across all three projects. Renoovate makes this point directly this month: at this budget, a single strong functional zone beats three underfunded ones.
$10,000–$25,000: This range is where Projects 1 and 2 both become achievable hardscape plus a shade structure with some budget remaining for basic lighting. A mid-range scenario covering a larger paver patio, basic irrigation, and raised beds runs $15,000–$25,000 in total, per Current Cost late last year.
$25,000 and up: At this level, all three projects can come into scope, with room for quality material upgrades and a connected cooking, dining, and living zone layout. Premium integrated builds deck or patio plus cover plus landscaping and lighting can run $40,000–$70,000, per Current Cost.
Before you build: the permit checklist
Handle permits once, up front, rather than project by project. The rules vary significantly by municipality, and getting caught without one is expensive.
In San Diego, for example, flat paver or concrete patios at grade don't require a permit, but decks over 200 square feet or higher than 30 inches above grade do, per New Age Design & Build. Gas lines require a plumbing permit and any electrical work requires an electrical permit. Other municipalities apply similar logic to electrical and gas work, but thresholds and exemptions vary. Check with your local building department before hiring anyone.
Unpermitted work can result in fines or mandatory removal, per New Age Design & Build. Also reserve 10%–20% of your total budget outside the main contract as contingency. Utility trenching, drainage adjustments, and permit fees can add several thousand dollars that never appear in the original quote, per Renoovate.
Video of the Day
Project 1: build the hardscape base patio or deck
Why this comes first
A hardscape surface is the floor everything else sits on. Furniture, shade structures, and outdoor kitchens all need a level, permanent base. Without it, shade structures have nowhere to anchor, furniture sits on uneven ground, and every subsequent project costs more to install correctly. Think of it as framing a room before painting the walls.
The ROI case reinforces the logic. Pools recover only 56% of their cost at resale, and fire features recover 56% on an average $9,000 spend, according to NAR data cited by This Old House. Patios recover 95%. You get more usable space and stronger financial recovery from the floor than from any feature you place on it.
Step 1 Decide between a patio and a deck based on site conditions and budget, not preference alone
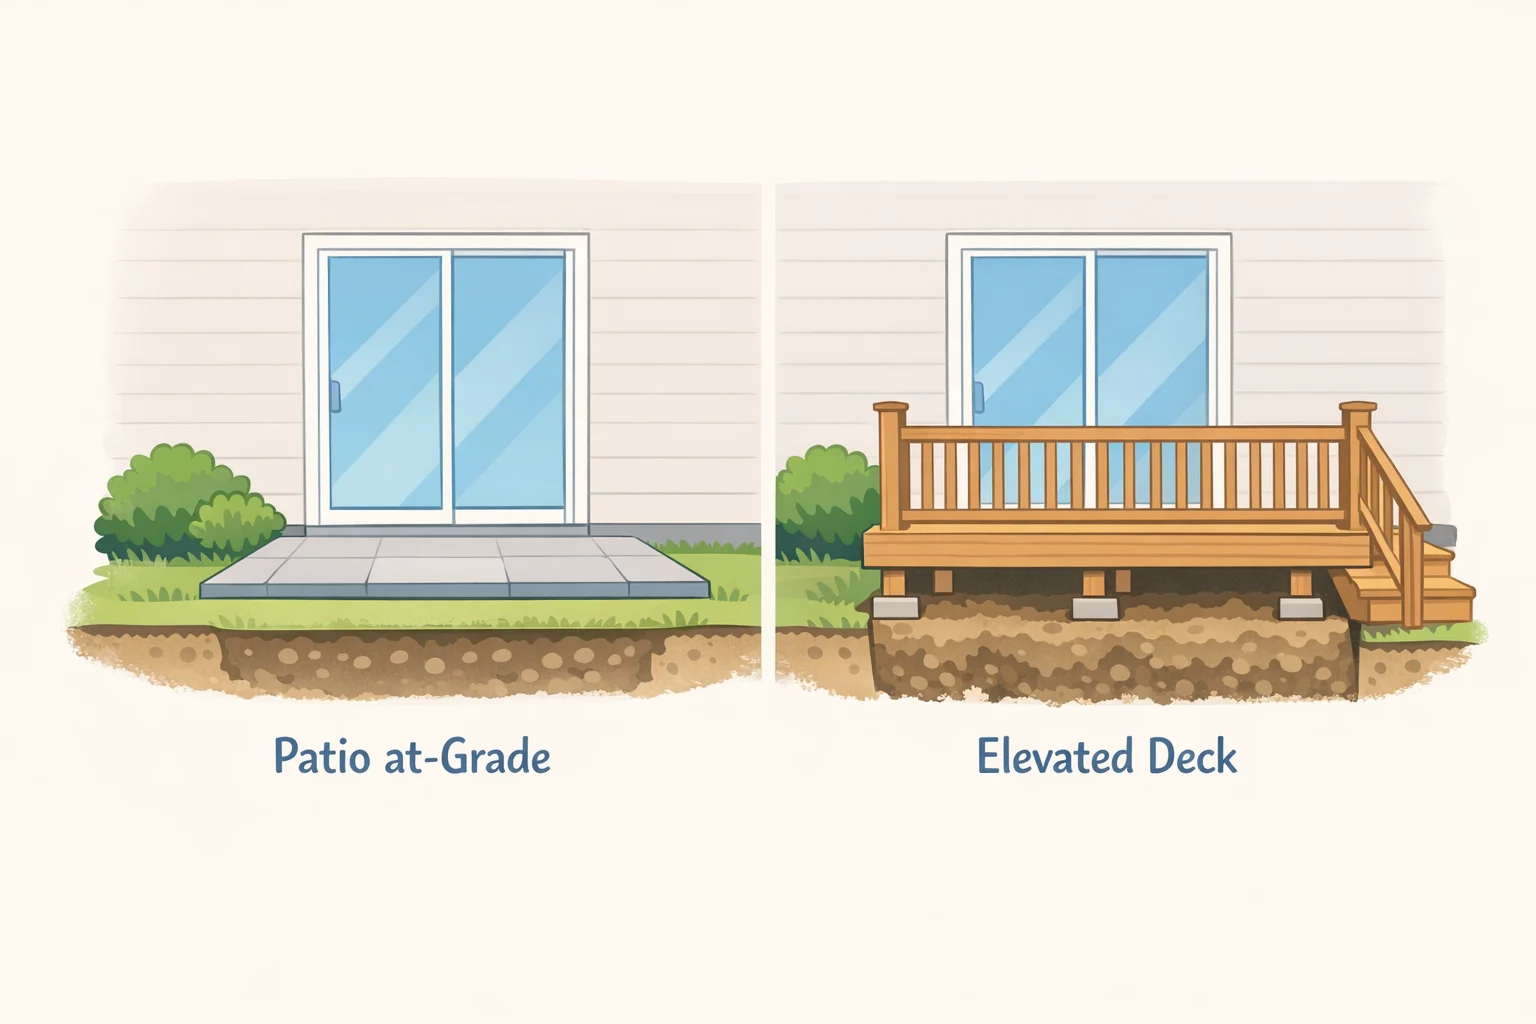
A ground-level paver or concrete patio is almost always less expensive. A 20-by-20-foot brick paver patio runs $3,200–$20,000 depending on materials, per Renoovate citing Angi data. A professionally built deck runs $30–$60 per square foot, putting that same 400 square feet at $12,000–$24,000 before accounting for elevation complexity.
If your yard is flat and your door opens near grade, a patio is the more cost-efficient choice. Significant grade change or a home entry that sits well above the yard may make a deck structurally necessary.
Step 2 Size it for daily use, not peak entertaining
Industry designers structure outdoor spaces around three zones cooking, dining, and living essentially "a version of their house outside," according to the CMHA. If your budget puts you in the under-$10,000 tier, size and finish one zone completely rather than roughing in all three. A well-built 200-square-foot patio outperforms a half-finished 400-square-foot one in daily use and resale perception.
Step 3 Choose materials with maintenance in mind from the start
Concrete pavers are modular. Individual units lift and reset when tree roots shift them or layouts need to change, unlike poured concrete, which requires full-section repair. More homeowners are choosing factory-sealed pavers specifically because they resist staining and weathering from installation day forward, per the CMHA. The upfront premium is modest relative to what you avoid in ongoing maintenance.
Who should act now vs. defer
- Act now: Any homeowner with a budget of $5,000 or more and no existing hardscape. Every subsequent project depends on having a usable surface to build from.
- Defer: Homeowners with an existing patio or deck in serviceable condition. Resurface or repair rather than replace; save the capital for Projects 2 and 3.
- Minimum viable version: A basic 200-square-foot concrete paver patio with simple edging. Functional, permanent, expandable. A project at this scope runs $6,000–$8,500 in total, per Current Cost.
Project 2: make the space usable in heat add a shade structure
Why shade is the second project, not the third
A patio without shade in a hot-summer climate is one you won't use during the hours you actually have free. Most homeowners avoid unshaded outdoor spaces during peak afternoon hours, regardless of how well-built the surface is. Shade converts square footage into hours of actual use. It's the difference between a slab and a room.
Step 1 Choose between a pergola and a solid patio cover based on your climate and use pattern
A 100-square-foot pergola runs $2,118–$6,435, averaging around $4,251, per Renoovate. Pergolas provide filtered shade and an overhead structure without full coverage appropriate for moderate climates or spaces where airflow matters more than blocking direct sun. A professionally installed solid patio cover runs $4,500–$12,000, or $20–$50 per square foot. Adding a full roof over an existing patio averages $6,500 and can reach $11,000, per This Old House.
In climates with strong afternoon sun, the cost difference for a solid cover is worth considering. A pergola that filters rather than blocks direct sunlight may still leave the space uncomfortable on peak summer afternoons.
Step 2 Size the structure to your seating footprint, not to a catalog dimension
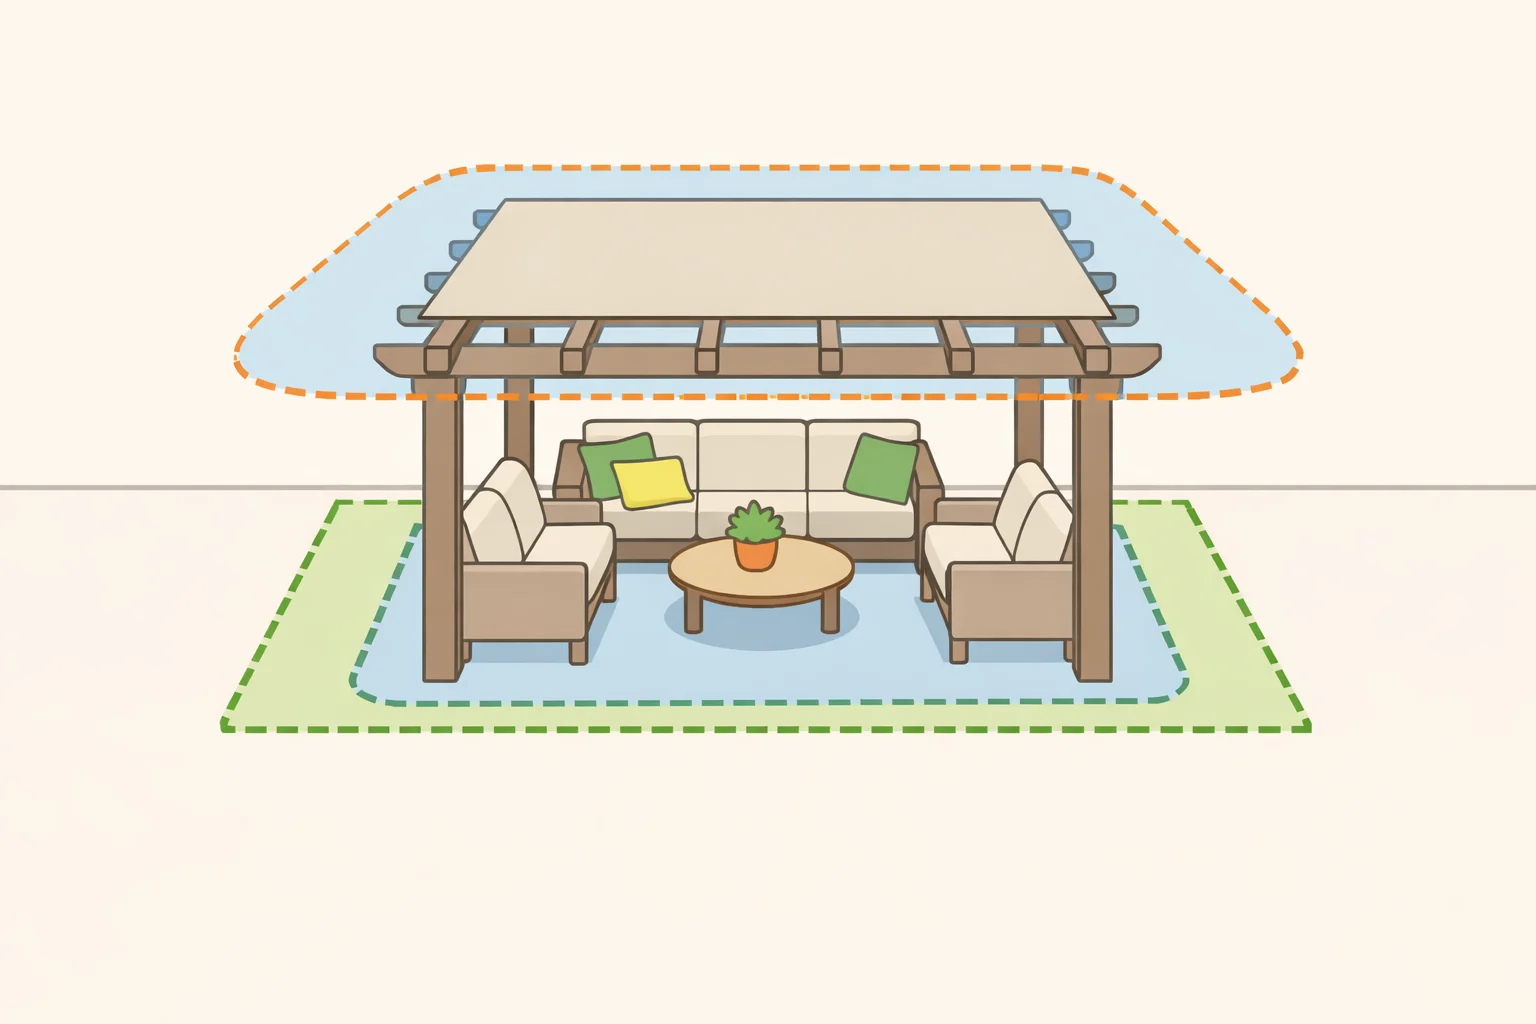
A shade structure that covers half the seating splits the group into comfortable and uncomfortable halves. Measure your furniture arrangement first. Design the structure to cover it with at least two feet of clearance on each side.
Step 3 Run electrical conduit during installation if ceiling fans or lighting are anywhere in your future
Retrofitting conduit through finished pergola beams or sealed patio cover panels is expensive and disruptive. If there's any chance you'll want ceiling-mounted fans, fixtures, or speakers, have an electrician rough in conduit during the build. The incremental cost at installation time is a fraction of what it costs afterward.
Permit note specific to this project
In San Diego, patio covers under 300 square feet are generally exempt from a building permit, but adding electrical work triggers an electrical permit regardless, per New Age Design & Build. That permit requires inspection before electrical work is closed up. Other jurisdictions apply similar triggers for electrical work, but thresholds and exemptions differ verify with your local building department before finalizing plans.
Who should act now vs. defer
- Act now: Anyone with an existing hardscape and a budget of $4,000 or more. This is the single upgrade most likely to change how frequently you use the space.
- Defer: Homeowners still completing Project 1. Don't install a shade structure before the hardscape is final; anchoring locations change with patio layout.
- Minimum viable version: A freestanding pergola over the primary seating area. Requires no structural attachment to the home and carries the most permitting flexibility of any shade option.
Project 3: finish the experience lighting first, then irrigation and planting
Why this is a bundle, and what to prioritize within it
Outdoor lighting, irrigation, and planting belong together because they complete what the first two projects started. They make the yard usable at night, keep plantings alive through summer heat, and create the visual enclosure that makes a patio feel like a destination rather than a slab surrounded by turf. They're also the most phaseable of the three projects.
If you can only fund one element this season, fund lighting. It delivers the fastest visible return, requires no ongoing maintenance, and makes every other upgrade look more finished.
Step 1 Start with lighting
Lighting was upgraded by 78% of homeowners who made outdoor system improvements in 2024 the highest rate of any outdoor system category per This Old House citing Houzz. A basic outdoor lighting install runs $800–$6,000 depending on scope, per Current Cost. Path lights along edges, string lights or pendant fixtures over the patio, and low-voltage spotlights on perimeter plantings or architectural features together transform the space after sunset. Not decoration additional hours of use during summer's long evenings.
Step 2 Add irrigation before you invest in plantings, not after
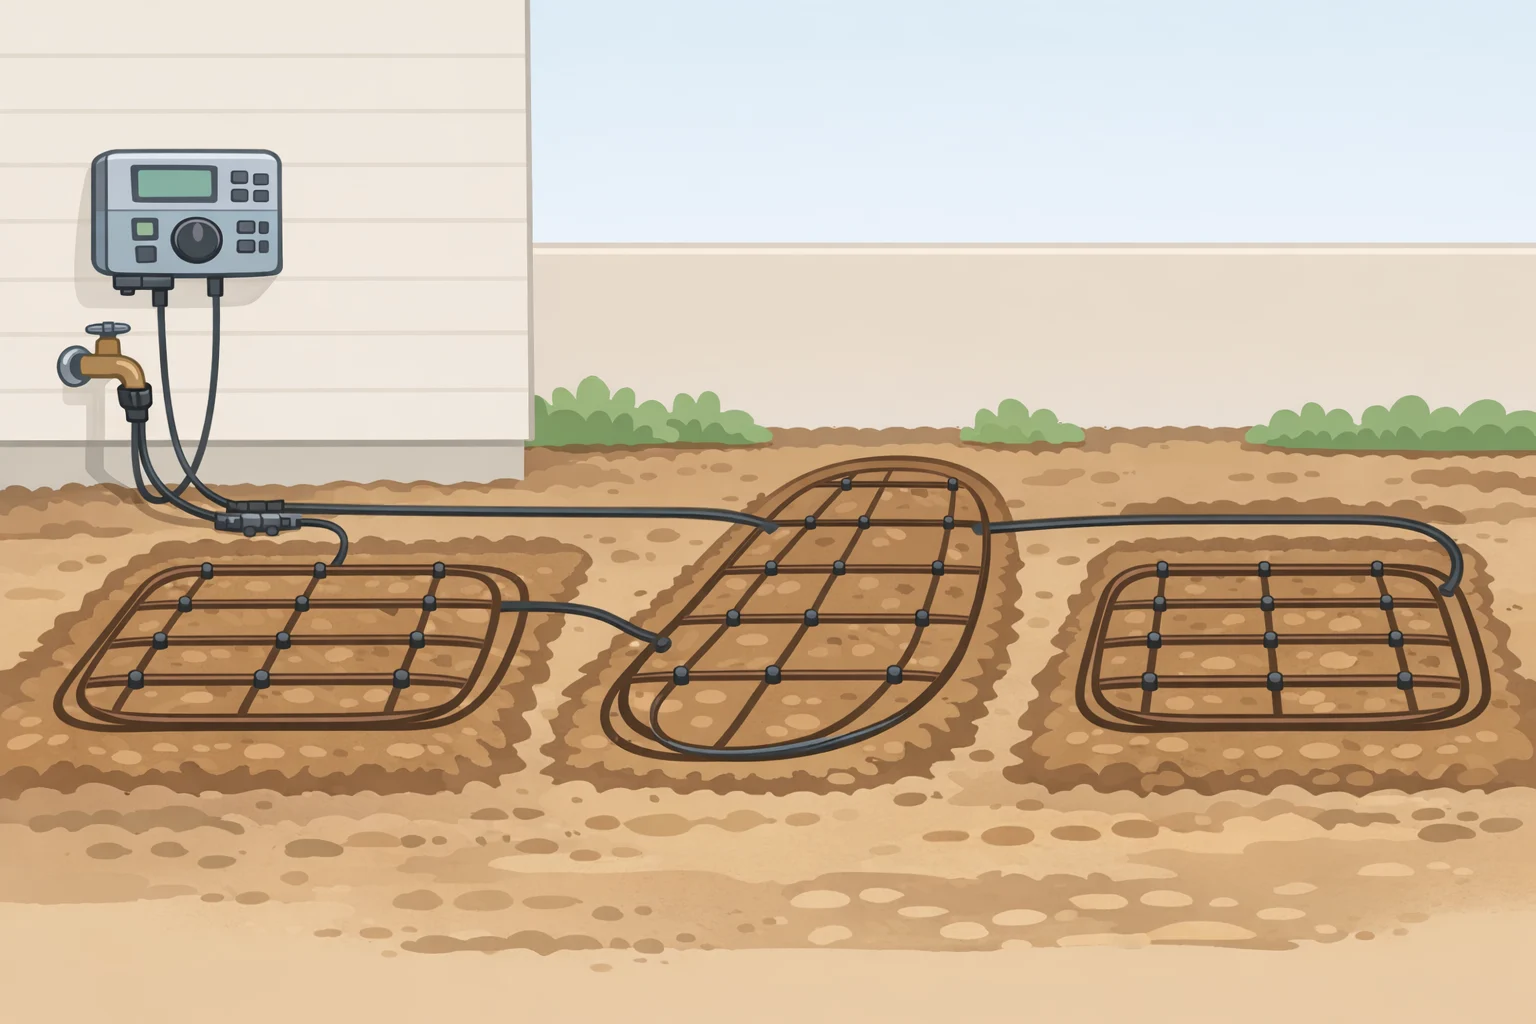
59% of homeowners who made outdoor system upgrades in 2024 included irrigation, second only to lighting, per This Old House citing Houzz. A professionally installed irrigation system averages $6,000 and recovers roughly 83% of that cost at resale, according to NAR data via This Old House.
The sequencing logic is simple: without irrigation in place, summer plantings require sustained hand-watering through peak heat and most homeowners can't keep that up through a full season. Install drip zones before you plant, not after the plants start suffering.
One cost to verify upfront: utility trenching for irrigation lines can add several thousand dollars that don't appear in standard installation quotes, particularly in yards with established hardscape or dense root systems, per Current Cost. Get a separate trenching quote before assuming irrigation fits your budget at this specific site.
Step 3 Focus planting on the perimeter first
Hedge rows, ornamental grasses, or shrub borders along fence lines deliver more visual impact per dollar than scattered specimen plantings in open ground. They create enclosure the sense that the yard is a room rather than open turf. This is what outdoor designers describe as biophilic design: blending natural texture into hardscaped spaces to create comfort and a sense of permanence, per the CMHA. A full landscape upgrade on an average $9,000 spend returns 100% of its cost at resale, according to NAR data via This Old House the strongest recovery rate in the outdoor category.
Who should act now vs. defer
- Act now on lighting: Any homeowner with a completed hardscape, any budget. The minimum viable version $800–$1,500 for path and string lighting is DIY-installable with low-voltage systems.
- Act now on irrigation: Anyone planning to add or expand planting beds this season. Don't plant first.
- Defer planting: If irrigation isn't yet in place and summer heat is already here, wait until fall planting season. Install irrigation in the meantime.
If your budget runs higher: where an outdoor kitchen fits in
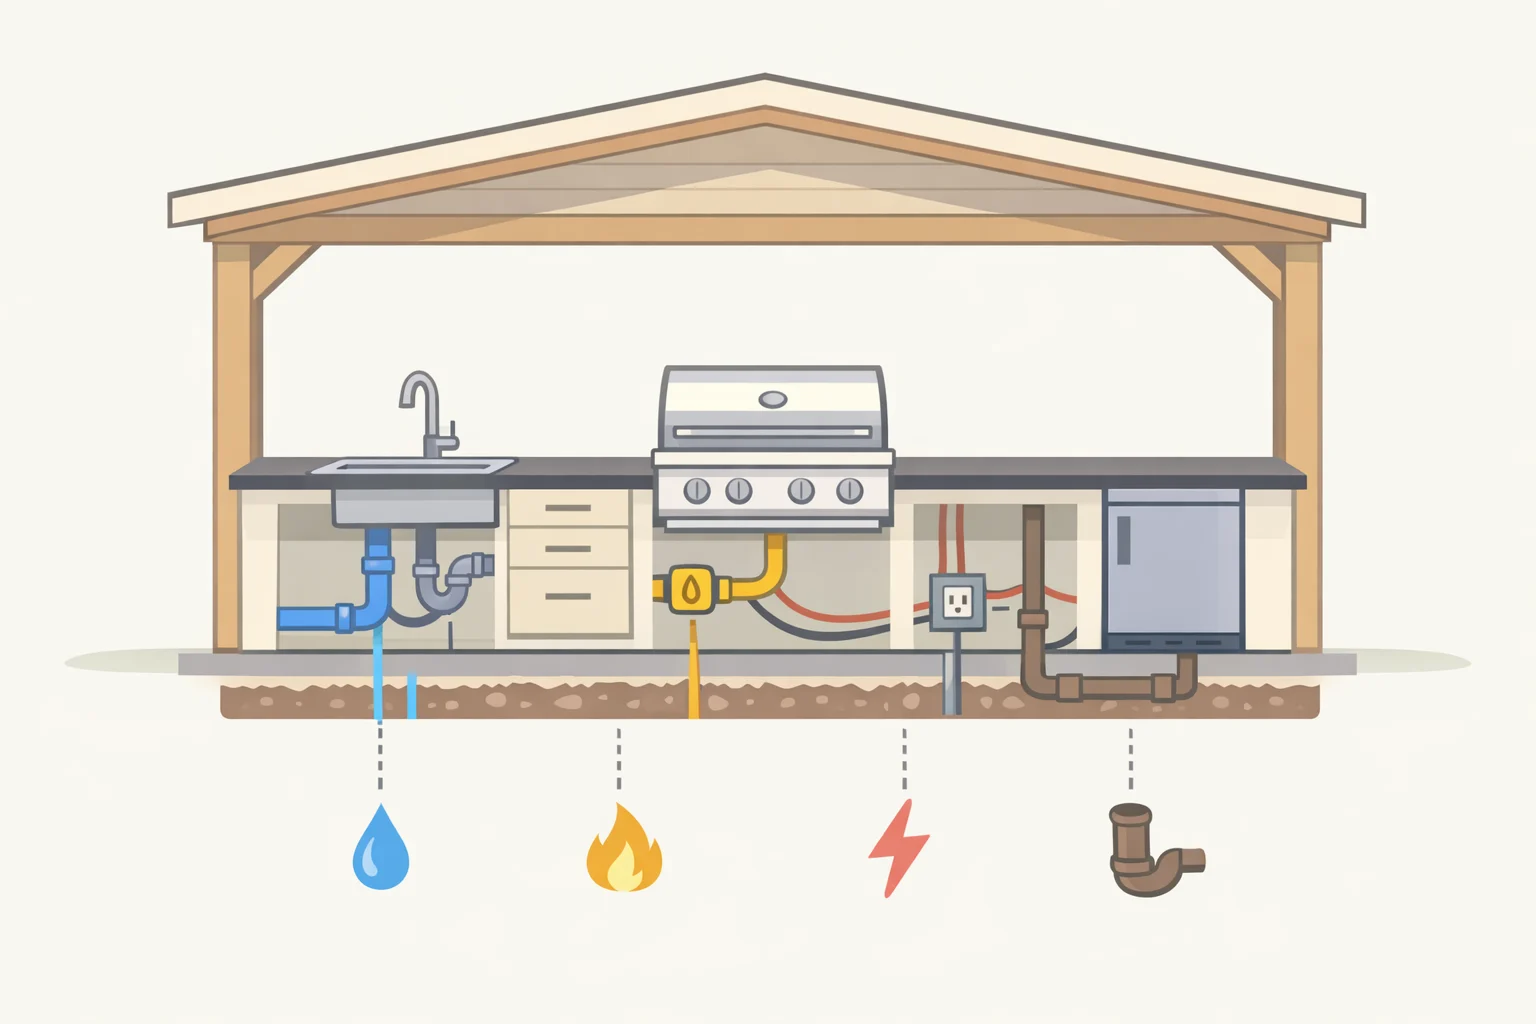
Outdoor kitchens recover 100% of their cost at resale according to NAR data cited by This Old House, and adoption is climbing: 12% of renovating homeowners added or upgraded one in 2024, rising to 22% among millennials. Most renovating homeowners spend around $13,000 on their outdoor kitchens, with 22% spending more than $30,000, per NKBA data via This Old House. Any configuration with gas lines adds a plumbing permit; electrical components add an electrical permit both extend timeline and cost, per New Age Design & Build.
The practical guidance: if your budget is $25,000 or more and Projects 1–3 are covered or underway, an outdoor kitchen is a strong addition with solid resale recovery. If you're choosing between a kitchen and completing the sequence skipping shade or lighting to fund a grill island the kitchen loses. A covered patio with lighting you use five nights a week is worth more than an outdoor kitchen you use on Saturdays.
Start here: a decision map for this season
Skip to the entry point that matches your situation.
- No existing hardscape: Start with the patio or deck. Everything else follows from it. Budget at least $5,000; minimum viable version runs $6,000–$8,500.
- Existing hardscape, no shade: Project 2 is the move. Budget $4,000 minimum; a freestanding pergola is the low-commitment starting point.
- Hardscape and shade in place, limited funds remaining: Lighting first, planting later. The $800–$1,500 path-and-string setup is DIY-friendly and immediately visible.
- Hardscape and shade in place, planting beds planned for this season: Install irrigation before you plant anything. Get a trenching quote separately.
- Budget of $25,000 or more, sequence complete or underway: An outdoor kitchen earns its keep at this tier. Don't fund it before the foundational projects are done.
Nothing here locks you into a single summer. A well-built patio can accept a shade structure next year and a full kitchen the year after. 75% of homebuyers say they'd prioritize homes with outdoor living spaces over those without, per Brown Jordan data cited by This Old House. That value is real but it builds from the ground up, in the right order.