Video: Painted Doormat
You know that feeling when you find the perfect greeting card that just speaks to you? Or when you finally put up those quirky decorations that make your space yours? That's the magic we're channeling into this project. We're not just making a doormat; we're creating a welcome mat for joy!
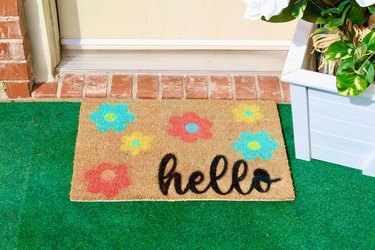
Here's how to turn a plain coir doormat into a vibrant, summer-themed DIY painted doormat with cheerful flowers and a friendly "hello." It's easy, fun, and perfect for beginners!
Video of the Day
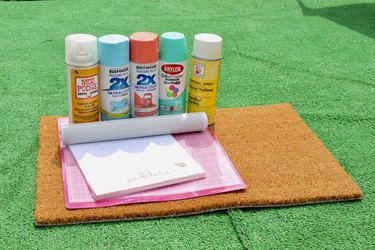
Things You'll Need
Blank coir doormat
Spray paint or outdoor acrylic paint
Variety of paintbrushes (if using acrylic paint)
Stencils made with a cutting machine (use card stock or vinyl)
Painter's tape
Clear acrylic spray sealer
Cardboard or plastic sheet
1. Set up your space
Lay out a piece of cardboard or a plastic sheet in a well-ventilated area; your garage or backyard works great. This is going to get a bit messy, so wear something you don't mind getting paint on. Place your doormat flat on the workspace and secure the edges with painter's tape to keep it from curling up as you work your magic.
Tip
Always paint in a well-ventilated area, preferably outdoors, especially if you'll be using spray paint.
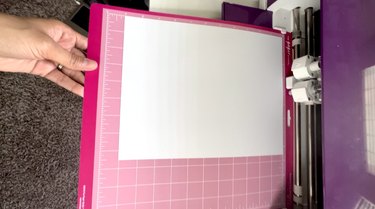
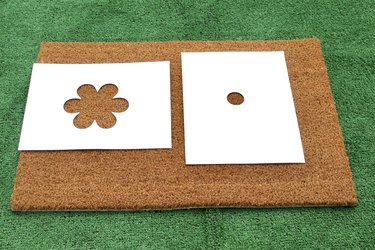
2. Create a stencil
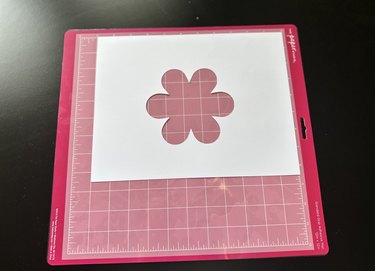
Using a cutting machine, design your stencil with card stock paper or vinyl.
In your cutting machine's software, create or upload your "hello" and flower designs. Adjust it to fit your mat's size.
Next, load your chosen material (card stock or vinyl) into the machine. Set the machine to the appropriate material settings and start the cutting process.
Remove the letters and main design parts from the vinyl, retaining the outer vinyl and small inner parts of letters like "e."
Tip
Opt for simple stencil patterns for cleaner, crisper lines.
Position the outer vinyl/card stock on the doormat, carefully placing back any inner letter parts to complete the design, using the negative space for precise paint application.
Tip
If you don't have a cutting machine, you can make a stencil with a computer printout and card stock:
- Use your computer or mobile device and printer to print out large letters or shapes onto printer paper.
- Trim around the graphic to remove excess paper, leaving a margin around the graphic.
- Apply a glue stick or spray adhesive to the entire backside of the cut-out paper. Stick the paper face up to the center of a large piece of card stock. Let the glue dry.
- Cut along the outline of the graphic with a craft knife, cutting all the way through the card stock to create a relief of your graphic.
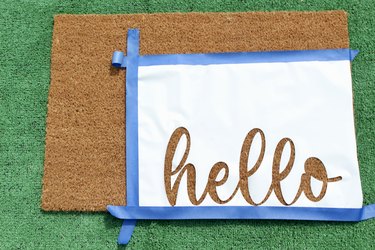
3. Position the stencil
Once your stencil is ready, position it on the doormat where it feels right. Once you're happy with the layout, use painter's tape to secure the stencil to the mat, ensuring it doesn't move while you're painting.
Tip
Use push pins to hold vinyl stencils in place around wording. This is crucial for preventing movement during painting, especially with lighter adhesive vinyl. Applying the same method to heavier card stock stencils can also be beneficial, though they generally stay in place better due to their weight.
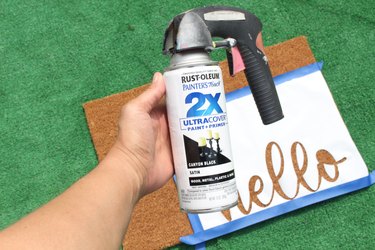
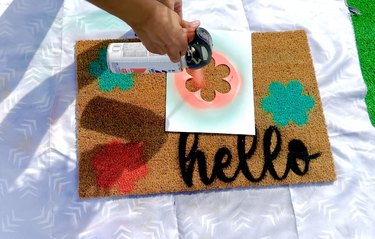
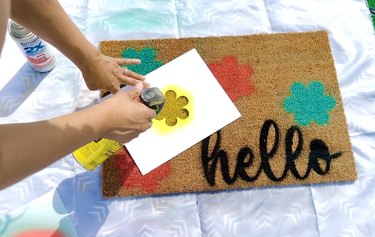
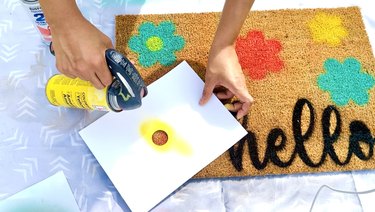
4. Paint the doormat
Paint your doormat using one of two easy methods.
- Spray method: If using spray paint, shake the can well and hold it about 3 inches away from the mat. Spray evenly across the stencil for a clean finish. For a summer design, you might choose vibrant colors for a fun and dynamic look.
- Brush method: If using acrylic paint, use a dabbing motion with your brush to push paint deep into the mat's fibers. It also prevents the paint from bleeding under the stencil and ensures a sharper image. This method helps you obtain vibrant and full coverage.
Tip
Apply a second coat of paint (or more) to make the colors pop even more and to ensure your design lasts longer.
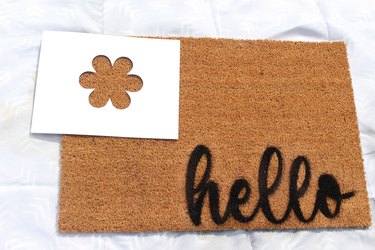
5. Let it dry
Allow the paint to dry thoroughly to avoid smudging. This usually takes a few hours, but for best results, let it dry overnight. Once dry, take a moment to appreciate your craft!
6. Apply sealant
To protect your artwork and ensure it stands up to weather and wear, apply a clear sealant over the painted areas. This protective coating acts as a barrier against moisture and fading, keeping your doormat looking fresh and colorful for a longer period of time. Place your new doormat outside your door and enjoy the bright, custom look it brings to your home.