
Have you ever gazed at Beyoncé's iconic on-stage style and thought, "If only I could pull that off?" Brace yourself, fashionistas and BeyHive members—with a little DIY magic, you can. Beyoncé's Renaissance World Tour outfits, particularly those unforgettable over-the-knee fringe boots, have totally taken over social media with their eye-catching flair.
But you don't have to break the bank to copy Bey's style! We've created a DIY version of her shimmery, playful silver boots so you can create your own pair at home. The resulting shoes, which just might make you feel like a fabulous walking disco ball, are ideal for making a statement while watching Renaissance: A Film by Beyoncé at a party (think: Christmas, New Year's Eve, you name it!) or on an average day when you'd like to embody Queen Bey.
Video of the Day
If you're a beginning crafter, you'll be glad to know that this tutorial is as simple as snipping, gluing and dazzling—and most of the materials you'll need can be easily found on Amazon, on Etsy or in craft stores. So, read on for a DIY fashion project that will help you celebrate Beyoncé's silver outfit vibes.
Video: Beyoncé-Inspired Boots With Shimmery Silver Fringe
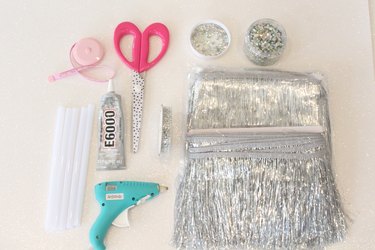
Things You'll Need
Tape measure
Scissors
Dry-erase marker
E6000 glue or equivalent
Blow-dryer
Clamps
Rhinestone trim
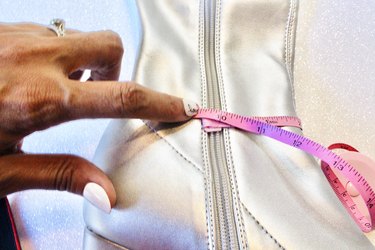
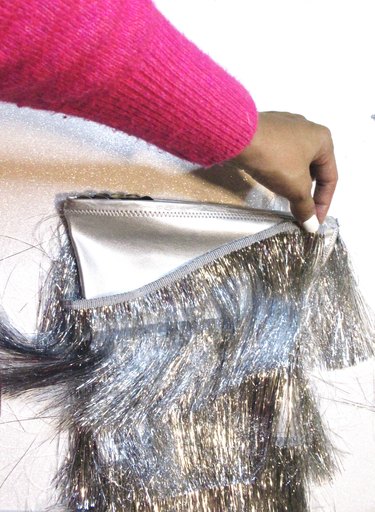
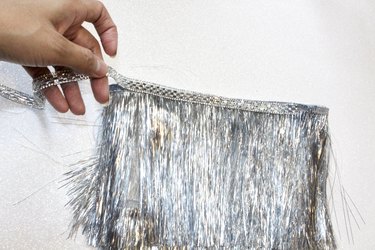
1. Position first row of fringe on boot
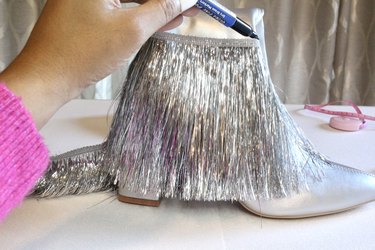
Each boot will ultimately have six layers of fringe.
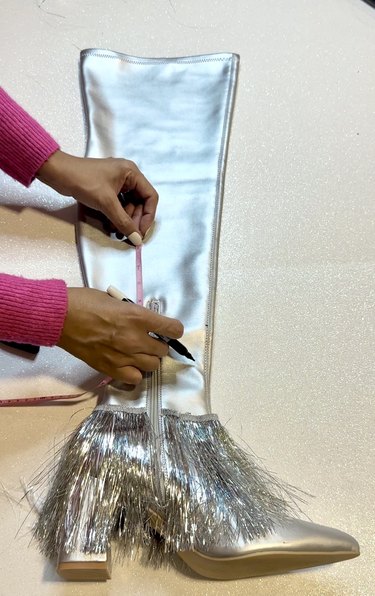
To begin, position first layer around boot heel, keeping fringe 1/2 in. above heel base to ensure fringe flutters beautifully without getting underfoot.
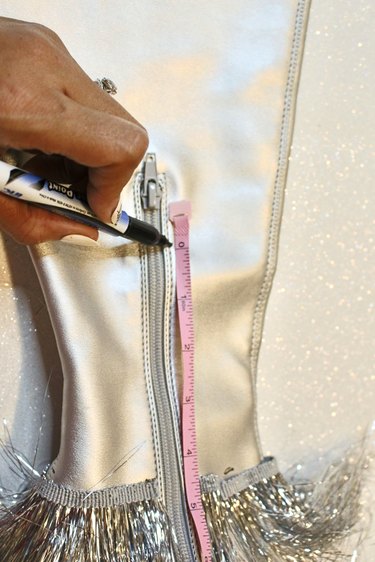
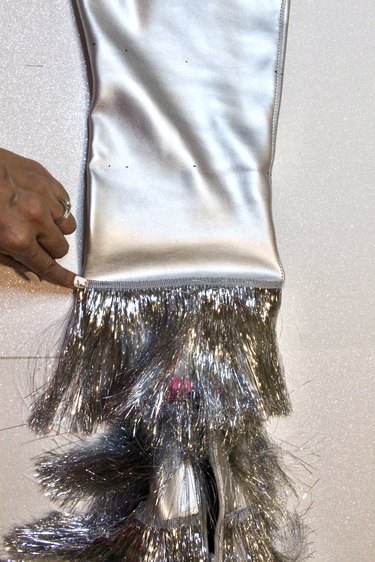
2. Mark top edge of first fringe row
Once happy with placement, use a dry-erase marker to note top edge of fringe on both sides of boot. A bit of eyeballing is fine as long as fringe is consistently above heel.
3. Cut and glue first row of fringe
Measure around ankle and cut fringe to size.
Tip
To maintain a clean look, apply glue in a straight, controlled line to prevent glue clumps from showing through trim.
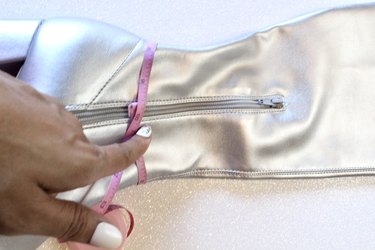
Make sure fringe covers surface without obstructing zipper. After all, functionality is just as important as style in a Beyoncé-inspired piece.
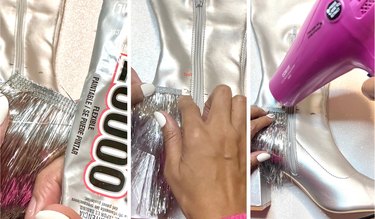
Starting in small sections, apply glue to top edge of fringe and adhere it carefully to boot.
Tip
Before applying to boot, blow-dry glue on a cool setting for a few seconds to make it tacky. This helps prevent sliding. Post-application, a quick blow-dry speeds up drying.
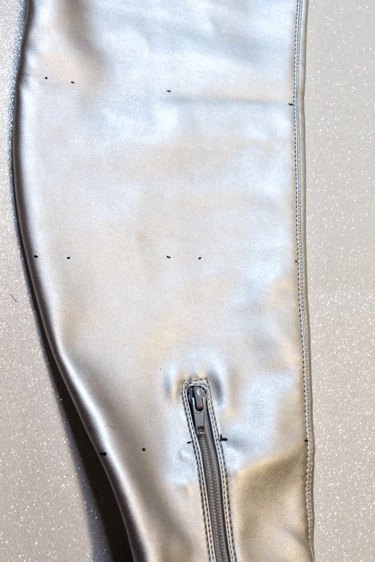
4. Measure for remaining layers
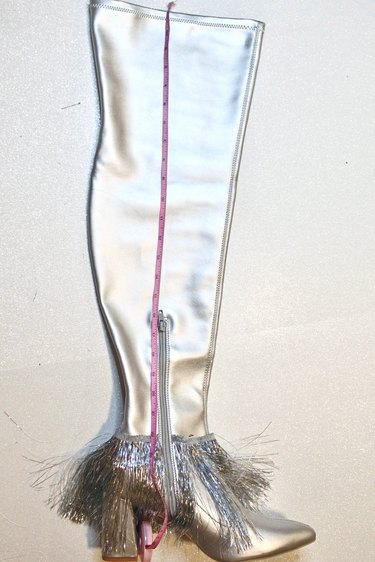
With foundation fringe in place, it's time to plan for remaining layers. Measure from top of boot to start of first fringe layer. Divide this length by 5 for evenly spaced, show-stopping fringe layers.
Tip
For our boots, the top of boot to first layer of fringe measured 22.5 in., divided by 5 to equal 4.5 in. Therefore, each row was placed 4.5 in. apart.
Repeat measurement process several times around boot to ensure each fringe layer runs in a straight line from one end to other.
5. Cut fringe
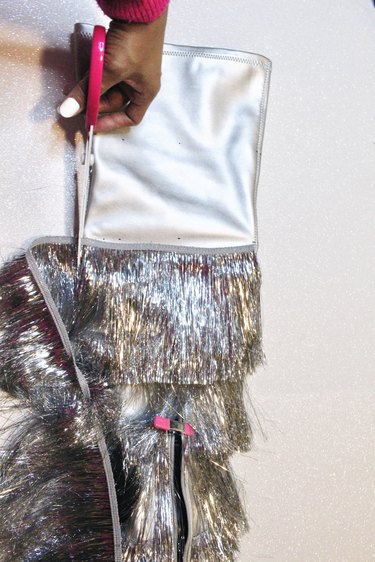
Adjust fringe width as you move up boot. Each layer will vary as calf section widens. Measure and cut fringe lengths to fit each layer.
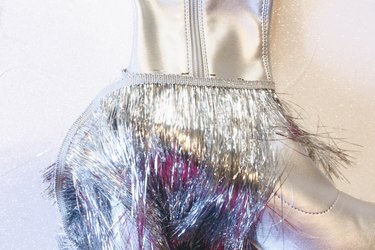
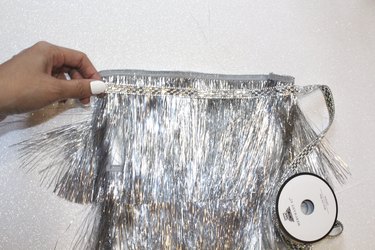
6. Glue fringe layers
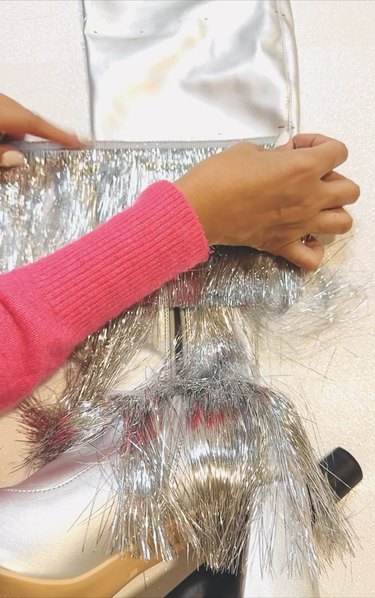
Follow marked guides to glue each additional layer of fringe, bearing in mind the application directions from Step 1.
Ensure each layer is evenly spaced and straight. Each layer should overlap the other by at least 1-1.5 in.
Tip
If using stretchy, slip-on over-the-knee boots, consider the material's flexibility. Apply fringe in separate sections on each side, not as one continuous strip. This method keeps the boot's seams flexible for easier wear. Optionally, insert an object inside the boot while applying fringe to maintain stretch.
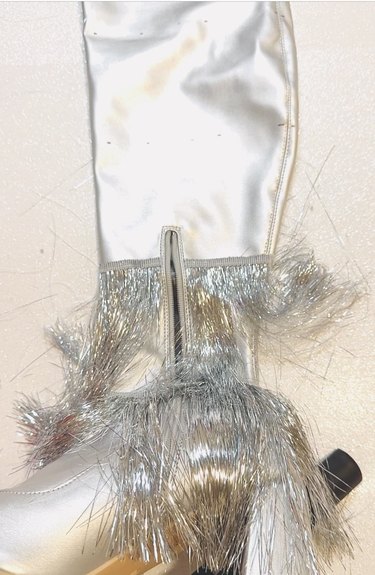
7. Add rhinestone trim
A little extra bling goes a long way! Upon reaching top layer, crown creation with a decorative rhinestone trim.
Repeat steps 1-7 to complete second boot.
Tip
Use iron-on rhinestone trim over top fringe layer. Alternatively, you can apply individual rhinestones.
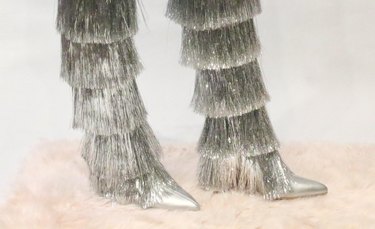
8. Let boots set and dry
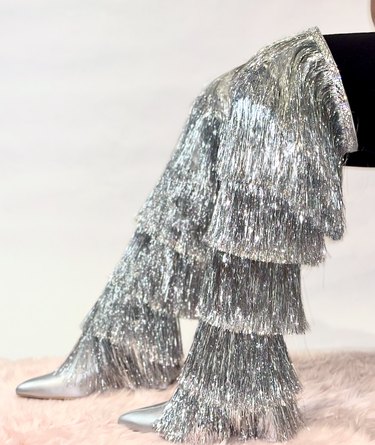
Allow glue to fully dry for a durable and Beyoncé-worthy finish! With these dreamy DIY creations, you'll soon be ready for any Beyoncé concert or viral TikTok dance.
Tip
Why stop at boots? Embrace the Renaissance concert dress code by adding silver and black sequins to a corset bodysuit, cowboy hat or pair of sunglasses. Remember Beyoncé’s birthday wish for concertgoers and fans: to wear fabulous silver fashions!
Now that you've got a pair of brilliant boots, get creative by mixing and matching eras of Beyoncé's style. For example, consider combining elements from her "house of chrome" look with traditional fringe for a Renaissance Tour-inspired outfit that stands out.
Remember, in the world of Beyoncé-inspired fashion, more is more!