There are so many reasons to love macarons, but I'm particularly captivated by their versatility. After all, macarons can be filled with any sort of mouthwatering ganache, buttercream or curd imaginable. If that weren't enough, they're wonderfully moldable and perfect for creating dreamed-up designs. I'm particularly fond of replicating adorable anime or Pokémon creatures and characters in my bakes, from Pikachu to Bulbasaur to Charmander. Call me a Pokémon desserts specialist! And with Valentine's Day on the horizon, I felt inspired to make DIY kawaii macarons modeled after a beloved pink Pokémon: Jigglypuff!
These sweet treats are perfect for a Pokémon Go-themed party, a Pokémon birthday party or really any dessert table to bring a fun pop of pink color and some much-needed variety to the typical assortment of donuts, sugar cookies, cake pops, ice cream, Oreos and cupcakes. Not to mention that the Pokémon dessert theme is sure to lead to all sorts of anime conversations—my kind of party!
Video of the Day
Video of the Day
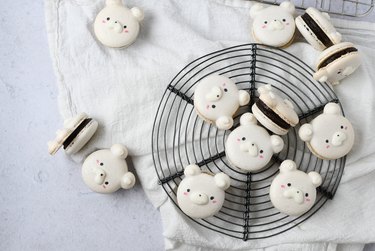
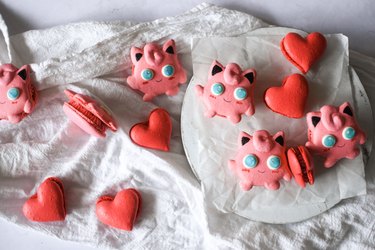
The resulting macarons are sweet but not too sweet and are sandwiched together with a light and creamy strawberry cheesecake filling. To round out the sweet vibes, I also created adorable heart-shaped macarons that are perfect for Valentine's Day, an anniversary treat or "just because." Of course, feel free to shake things up by adding or subbing in your favorite Pokémon character or Pokémon cookies to the lineup (imagine these macarons alongside pokeball cookies?!).
Before we dive in, here are some basics to keep in mind. Macaron shells are meringue-based sandwich cookies made with almond flour, powdered sugar, granulated sugar and egg whites. Macaron shells' bottoms feature distinct ruffles known as "feet," which are one of the telltale signs of a properly baked macaron. When you bite into a macaron, the shells should be full, the exterior should provide a slight crunch and the middle should be a little chewy. A well-made macaron is a real treat for the senses.

If you're a beginner at making macarons, these Pokémon cookies provide a great starting point for your first foray. However, since macarons are notoriously finicky, be sure to read carefully and review the tips throughout this tutorial. Macarons require practice, time and the mastering of baking techniques. And trust me: My earliest macaron bakes did not come out as expected—they were cracked, wrinkly and hollow. Don't be disheartened if your first few tries don't come out exactly as you hoped. Just remember: You get to go through more trial runs and eat lots of yummy macarons. That's right, you'll get to eat em all. Err, we mean, catch 'em all!
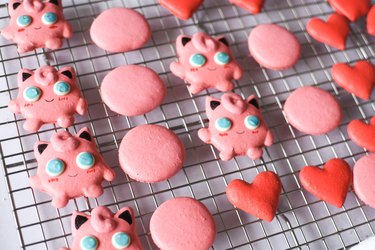
Whether you're a Pokémon fan or not, these jolly Jigglypuff and heart macarons will make you smile (and delight your taste buds). We've even included free Jigglypuff-shaped macarons and heart-shaped macarons PDF templates to help you pull off the DIY design. Let's jump right in!
Quick Recipe Overview
SERVING SIZE: 7 Jigglypuff macarons and 8 heart macarons
PREP TIME: 30 minutes
DRYING TIME: 1–2 hours
BAKING TIME: 15–18 minutes
DECORATING TIME: 15 minutes
TOTAL TIME: 2–3 hours
Part 1: French Macaron Shells
Things You'll Need
2 baking sheets
Parchment paper or silicone mats
Macaron templates (Jigglypuff and heart)
2 large piping bags
Hand mixer or stand mixer
Large mixing bowl or bowl of a stand mixer
Medium mixing bowl
Food processor or sifter
Rubber spatula
Toothpick or cookie scribe
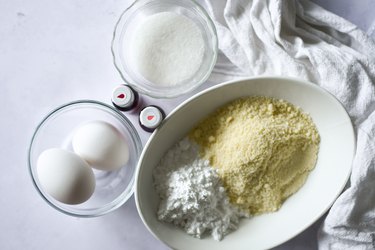
60 g almond flour
50 g powdered sugar
50 g egg whites
40 g granulated sugar
Gel food coloring (pink and red)
Small microwaveable bowl
1 Tbsp. melted white chocolate
Small piping bag
Edible food markers (blue, black and pink)
How to make French Macaron Shells:
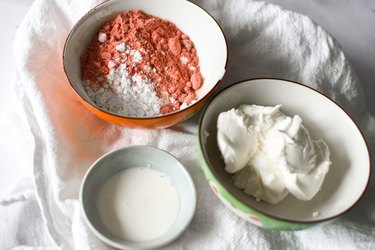
1. Prepare tools and ingredients
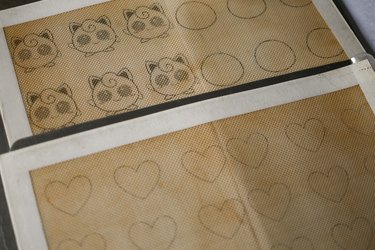
Measure out all of your ingredients in separate bowls. Print out the Jigglypuff and heart macaron templates—this is how you'll achieve that adorable Pokémon design and those perfectly shaped hearts!
Place the macaron templates over baking sheets and top them with parchment paper or silicone mats. Set up piping bags over large cups so transferring batter to them will be easier.
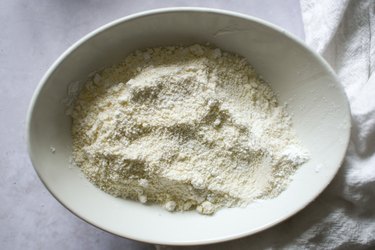
2. Food process almond flour and powdered sugar
Food process almond flour and powdered sugar for about 10 seconds or until you get a fine powder. Do not blend for much longer or oils will start to come out of the almond flour, which will make your macarons blotchy and flat. Alternatively, pass the ingredients through a sifter. Transfer the dry ingredients to a medium mixing bowl.
3. Begin French meringue
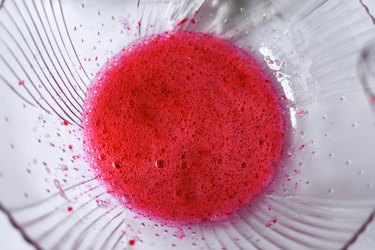
Pour egg whites into a large mixing bowl or the bowl of a stand mixer fitted with a whisk attachment. Begin mixing on medium speed until frothy, about 1 minute.
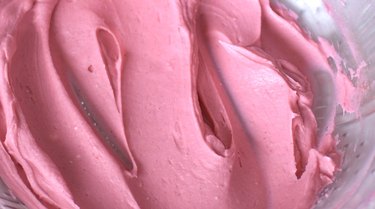
4. Gradually add granulated sugar
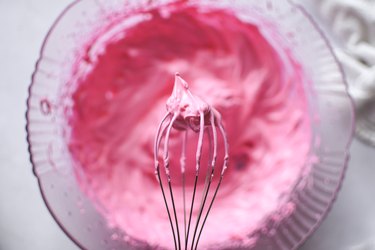
Slowly add in granulated sugar while whisking on medium-high speed. Continue whisking until stiff peaks form and you get a thick, glossy meringue (as pictured below). This should take at least 5 more minutes.
Tip
Meringue should ball up onto the whisk. When the whisk and bowl are held upside down, the meringue should not move.
5. Fold in dry ingredients
Add in all of the almond flour and powdered sugar. Using a rubber spatula, fold the dry ingredients into the meringue, scraping the sides and bottom of the bowl often. Fold just until there are no dry spots remaining.
Transfer 75 g batter into a medium mixing bowl and set it aside. This will be for the heart macarons.
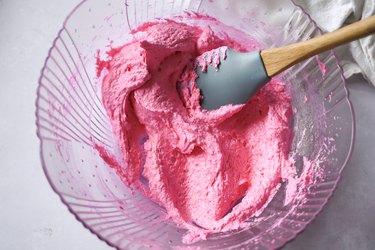
6. Fold pink macaron batter
Fold until the pink batter reaches a thick, glossy consistency and comes off the spatula in continuous ribbons. Batter coming off the spatula should melt back into the rest of the batter in the bowl within 20 to 30 seconds.
Tip
Take this step slowly, as it’s very easy to overmix the batter. If you overmix, your macarons will spread too much and come out flat.
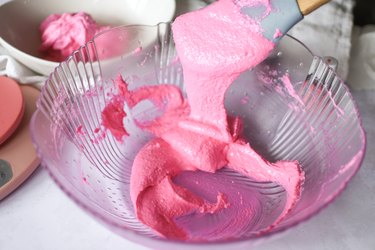
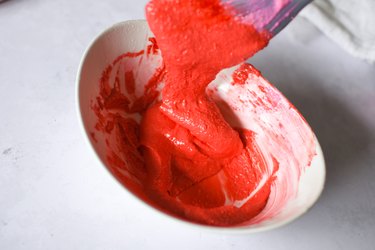
7. Add red food coloring to remaining pink batter
Add a few drops of red gel food coloring. Again, fold the batter until it ribbons off the spatula.
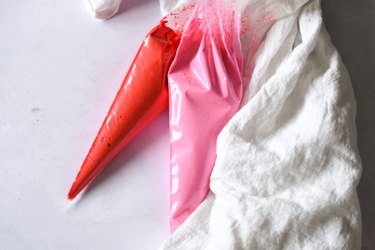
8. Transfer macaron batters to piping bags
Using a rubber spatula, scrape all macaron batter into piping bags. Snip the bottom of the pink bag with scissors to create a small to medium piping tip.
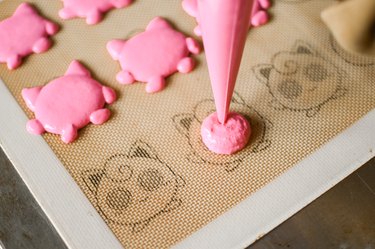
9. Pipe Jigglypuffs' body
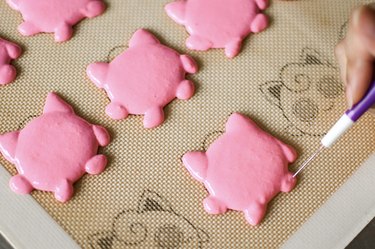
Hold the piping bag 90° to the tray, slightly above the template and in the middle of one Jigglypuff. While keeping the tip in place, apply gentle pressure from the top of the piping bag, slowly piping until the macaron reaches 2-3 mm from the circle's inner edge. When releasing, quickly pull the bag up while slightly twisting at the top.
Use a cookie scribe or toothpick to move batter closer to the edges, fixing the shape of Jigglypuff's body.
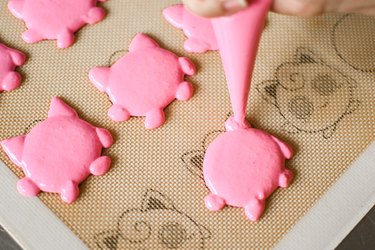
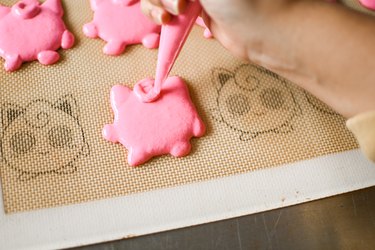
10. Pipe Jigglypuffs' ears and feet
Pipe on ears, hands and feet. Use the cookie scribe or toothpick to move batter around and smooth it out.
11. Pop air bubbles and let dry
Pop any air bubbles on the surface of the Jigglypuff macarons using a cookie scribe or toothpick.
Let the macarons sit at room temperature for about 10 minutes before piping Jigglypuff's hair. This will dry out the macarons just enough, allowing you to layer batter on top for a 3D effect.
Tip
While waiting for the Jigglypuff macarons to dry, you can skip ahead and pipe all of the heart macarons.
12. Pipe Jigglypuffs' hair
Add swirls atop the Jigglypuffs' heads to create their hair. How cute!
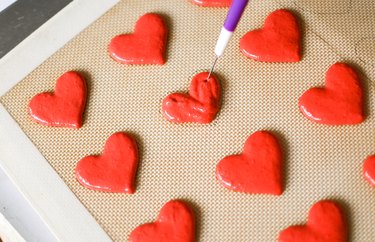
13. Pipe heart macarons and let sit
Cut a small to medium tip in the red piping bag and pipe heart-shaped macarons. Use a cookie scribe or toothpick to move the batter, shaping it into a heart as precisely as possible.
Remove all of the templates and let the macarons sit out between 1 and 2 hours or until the macarons are very dry to the touch. If the room is humid, this step may take longer.
Tip
Drying helps prevent macarons from cracking in the oven!
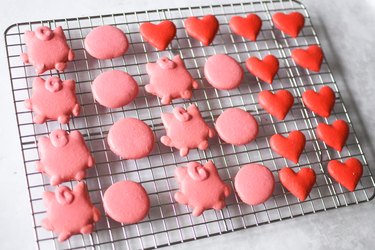
14. Bake completed macarons
Bake macarons at 325°F for 15 to 20 minutes, flipping halfway through. Let them cool completely. Match the macaron shells and line them up in rows.
15. Decorate Jigglypuffs' face
In a small microwavable bowl, melt white chocolate in the microwave. Transfer it to a small piping bag and pipe on eyes. Use a cookie scribe or toothpick to smooth it out. Let it dry for a few minutes.
Use a black edible marker to draw smiles and inner ears. Use a red marker for blush and blue for eyes.
Part 2: Strawberry Cheesecake Filling
Things You'll Need
Hand mixer or stand mixer
Medium mixing bowl or bowl of stand mixer with paddle attachment
Medium piping bag
Open star piping tip (optional)
3 oz. cream cheese, softened
1 Tbsp. heavy cream
3 Tbsp. powdered sugar
3 Tbsp. freeze-dried strawberry powder
Pink food coloring
How to make Strawberry Cheesecake Filling:
1. Measure and mix ingredients
To begin crafting your delicious strawberry cheesecake filling, measure all ingredients into different bowls. Add ingredients to a bowl and cream until smooth. Transfer to a piping bag fitted with an open star tip (optional).
2. Pipe cheesecake filling onto macarons
Pipe dollops of filling on the bottom shell of the macarons. You can add as little or as much as you like.
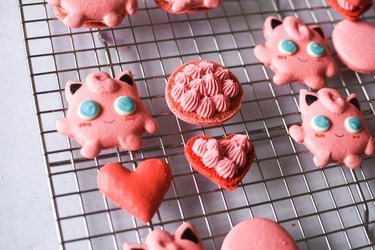
3. Assemble macarons
Match the macaron shells together and enjoy!
Store macarons in an airtight container in the fridge for up to three days or in the freezer for up to a month.
Tip
You can dig into the macarons right away, but it’s better to let them mature in a refrigerated airtight container for at least 12 hours beforehand. This allows the shells to absorb the filling, making them softer, chewier and more flavorful. Just make sure you let them come to room temperature before eating!
With a bit of practice and patience, you'll be a macaron expert in no time. Here's to adorable, edible, jolly Jiggypuff and heart macarons—and all the delicious designs you'll dream up next!