Oh, macarons. We go way, way back. They're the reason I fell in love with baking and why baking is now my career.
I started baking macarons when I was in high school about 10 years ago! I kept seeing them all over Instagram, but I never had one before, so I decided that I would make them from scratch. What I didn't know at the time is that macarons are notoriously finicky and take time to master. So, when I pulled my first batch out of the oven, I was surprised to see that they came out completely flat, shaped into one big blob on my baking sheet. I mean, I didn't have any mixing bowls (I desperately used old Tupperware), a mixer for the meringue or a macaron template, but I was still shocked. So, I started doing some research on what went wrong.
Video of the Day
Video of the Day
After reading numerous food blogs and watching YouTube videos about macarons, I started baking batch after batch until they were perfect. Because of these cookies, I was introduced to techniques like weighing ingredients, making meringue, folding batters, piping and decorating. Over the next two years, I baked macarons multiple times a week, and that's why I became quite obsessed with baking. And now here I am, sharing my own recipe and tips with you!
Before we go into making polar-bear-themed macarons, let's quickly review...
What are macarons anyway?
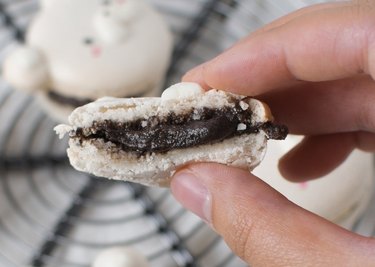
Macarons are meringue-based sandwich cookies made with almond flour, powdered sugar, granulated sugar and egg whites. There are distinct ruffles at the bottom of the macaron shells, known as their "feet," which are one of the signs of a properly baked macaron. When biting into a macaron, the shells should be full, the exterior should provide a slight crunch and the middle should be a little chewy.
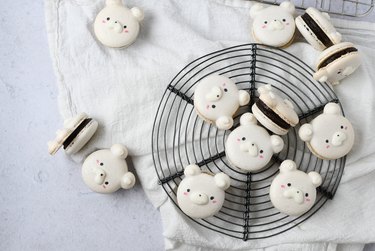
One great thing about macarons is that they're extremely versatile when it comes to flavor. You can add powders or extracts to the shells or make different fillings, like buttercreams, ganaches, jellies and more. Additionally, you can create different shapes and designs, like the adorable polar bear macarons in this recipe. (And when paired with the delicious cookies and cream cheesecake filling, they make the perfect treat for any special occasion!)
If this is your first time making macarons, be sure to check out the tips throughout the recipe. Macarons require practice, time and mastering baking techniques. But the best part of that is that you get to eat and share all of the trial runs. So, let's get to baking and don't forget to have fun!
How to make polar bear macarons with Oreo cheesecake filling
SERVING: 14 macarons
PREP TIME: 20 minutes
DRYING TIME: 20 minutes–1 hour
BAKING TIME: 15–18 minutes
DECORATING TIME: 10 minutes
TOTAL TIME: 1 hour 5 minutes–1 hour 50 minutes
Tip
Since macarons are finicky to make, most macaron recipes require a kitchen scale to ensure better results.
Part 1: How to make French macaron shells
Things You'll Need
Kitchen scale
Two baking sheets
Parchment paper or silicone mats
Large and small piping bags
Hand mixer or stand mixer
Large mixing bowl or bowl of a stand mixer
Medium mixing bowl
Food processor or sifter
Rubber spatula
Toothpick or cookie scribe
60 g almond flour
50 g powdered sugar
50 g egg whites
40 g granulated sugar
Gel purple food coloring (optional)
Bench scraper (optional)
Small microwaveable bowl
1 tbsp melted white chocolate
Edible food markers (black, pink)
1. Prepare your ingredients
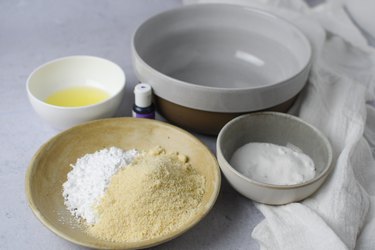
Measure out all your ingredients in separate bowls.
2. Set up your tools
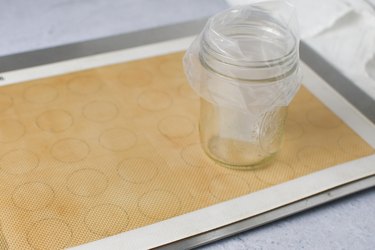
Place your macaron templates over your baking sheets and then top them with parchment paper or a silicone mat. Set up your piping bags over a cup as pictured so that transferring batter to it will be easier.
3. Food process almond flour and powdered sugar
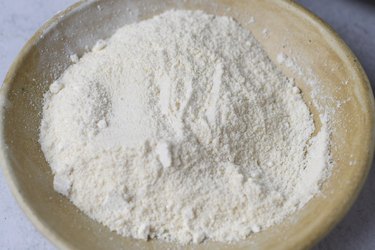
Food process the almond flour and powdered sugar for about 10 seconds or until you get a fine powder. Do not blend for much longer or oils will start to come out of the almond flour, which will make your macarons come out blotchy and flat. Alternatively, pass the ingredients through a sifter. Transfer the dry ingredients into a medium mixing bowl.
4. Start making the meringue
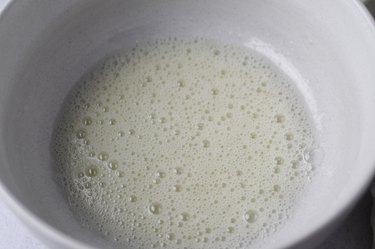
Pour the egg whites into a large mixing bowl or bowl of a stand mixer fitted with the whisk attachment. Begin mixing on medium speed until frothy, about 1 minute.
5. Gradually add granulated sugar
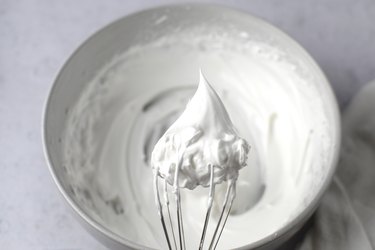
Slowly add in the granulated sugar while whisking on medium-high speed. Continue whisking until stiff peaks form and you get a thick, glossy meringue as pictured above. This should take at least 5 more minutes.
Tip
The meringue should ball up onto the whisk. When the whisk and bowl are held upside down, the meringue should not move.
6. Fold in the dry ingredients
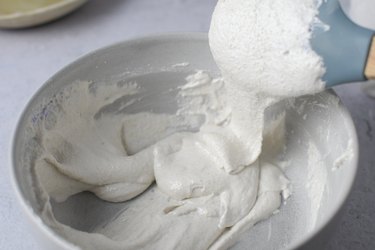
Add all of the dry ingredients into the meringue. If you want really white macarons, add a very small amount of purple food coloring, which will counter the yellow color from the almond flour.
Using your rubber spatula, fold the dry ingredients into the meringue, scraping the sides and bottom of the bowl often. Fold until the batter reaches a thick, glossy consistency and comes off the spatula in continuous ribbons. The batter coming off the spatula should melt back into the rest of the batter in the bowl within 20 to 30 seconds.
Tip
Take this step slowly, as it’s very easy to overmix the batter. If you overmix the batter, your macarons will spread too much and come out flat.
7. Transfer all of the macaron batter into a large piping bag

Using the rubber spatula, scrape all of the macaron batter into the large piping bag. Snip the bottom of the bag with scissors to create a small-to-medium piping tip.
Tip
I like to use a bench scraper to push all the batter toward the bottom of the bag, as pictured above.
8. Pipe your macarons
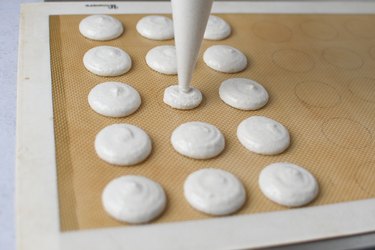
Hold the piping bag 90 degrees to the tray, slightly above the template and in the middle of one circle. While keeping the tip in place, apply gentle pressure from the top of the piping bag, slowly piping until the macaron reaches the inner edge of the circle. When releasing, quickly pull the bag up while slightly twisting at the top.
Pipe a total of 28 shells. Save the leftover batter for the polar bear ears.
9. Pop air bubbles
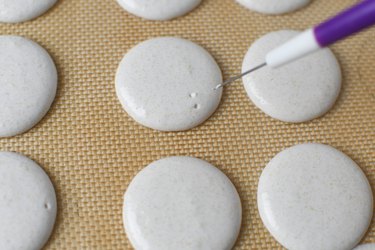
Pick up your tray and tap it against the counter a few times to get rid of any air bubbles. If visible bubbles on the surface don't pop, use a toothpick or cookie scribe to pop them.
10. Pipe the polar bear ears

Since only the front of the macarons need ears, use the leftover batter to pipe two small circles on top of half of the macaron shells. Remove the templates and let the macarons sit out between 20 minutes and 1 hour until the macarons are dry to the touch. If the room is humid, this step will take longer.
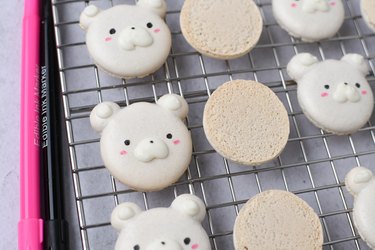
11. Bake the macarons
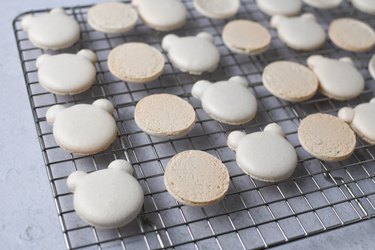
Bake the macarons at 325°F for 15 to 20 minutes, flipping halfway through. Let them cool completely and then match macaron shells and line them up in rows.
Tip
To test if the macarons are done, gently push on the side of a cookie. If it slightly wiggles, bake for an additional 1 to 2 minutes until they are firm.
12. Add the polar bear snouts and ear detailing
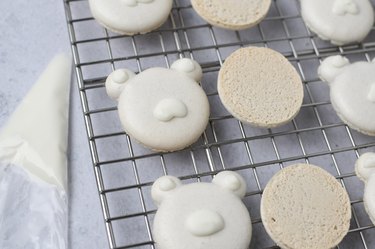
In a small microwavable bowl, melt the white chocolate in the microwave and transfer it to a small piping bag. Pipe on the snouts and ears.
Tip
Use the toothpick or cookie scribe to move the white chocolate to your liking.
13. Draw the polar bears' eyes, nose and rosy cheeks
Using edible food markers, draw the polar bear faces.
Part 2: Oreo cheesecake filling
Things You'll Need
Food processor
Medium mixing bowl
Hand mixer or bowl of stand mixer fitted with paddle attachment
3 oz cream cheese, softened
1 Tbsp. heavy cream
3 Tbsp. powdered sugar
8 Oreo cookies
Large piping bag
1. Prepare the ingredients
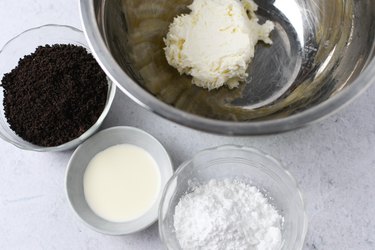
Measure out all the ingredients. Food process the Oreos until you get fine cookie crumbs.
2. Mix the cream cheese
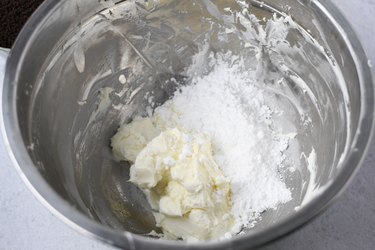
Mix the cream cheese until smooth. Whisk or paddle in the heavy cream and powdered sugar until fully combined.
3. Fold in the Oreo crumbs
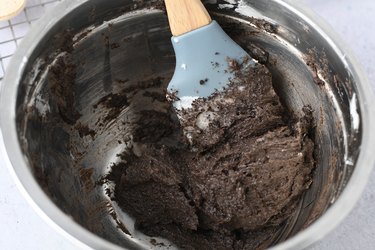
Add in all the Oreo crumbs at once, folding until you get a thick paste. Transfer the filling into a large piping bag.
4. Assemble the macarons

Pipe a large dollop on the bottom shell of the macarons, top with its matching shell and enjoy!
Tip
You can eat the macarons now, but it’s always better to let them mature in an airtight container in the fridge for at least 12 hours before eating. This allows the shells to absorb the filling, making them softer, chewier and more flavorful. Just make sure you let them come to room temperature before eating!
Store the macarons in an airtight container in the fridge for up to three days or in the freezer for up to one month.