Things You'll Need
Gas mask template
Scissors
A3 size black or olive cardboard
Pencil
Ruler
Tape
Cellophane
Bubble wrap
Hat or shirring elastic
Pen
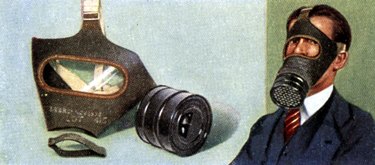
Gas masks are an easily recognizable and distinct shape most often seen on television and in movies. The masks protect wearers from hazardous materials in the air and have historical significance, such as in World War II. For this reason, model masks make for an ideal companion activity to teaching students about global history.
Step 1
Download and print the gas mask outline provided in Resources.
Video of the Day
Step 2
Cut the shape of the gas mask free from the paper, and then cut out the circles for the eyes and mouth section within the gas mask shape.
Step 3
Place the cardboard on a flat surface, and put the gas mask template on top of it. Trace the circles for the eyes and mouth space onto the cardboard using a pencil. Next, cut the gas mask shape out of the cardboard or cardex.
Step 4
Draw a circle on the cellophane that measures 4 inches in diameter, and then cut the shape out of the cellophane. Repeat this step so you have two 4-inch circles.
Step 5
Turn the cardboard over so the rear of the mask faces up. Place the cellophane circles over the eye holes, and adhere it with tape or glue stick.
Step 6
Draw a rectangle on the cardboard that measures 12 by 2 inches. Cut out the shape, and then round it so the ends of the cardboard meet and the rectangle forms a cylinder. Hold the cylinder in place, and place it against the mouth hole of the mask to see whether it matches. Adjust the cylinder so it matches the exact size of the mouth hole, and then secure the cylinder's shape with tape.
Step 7
Draw a 4-inch circle in the bubble wrap, and then cut out the shape. Repeat this step so you have two 4-inch circles of bubble wrap.
Step 8
Place pieces of tape around the edges of the bubble wrap circles. The tape should hang off the edge of the circle, leaving room to attach the tape to something else. Don't allow the tape to stick to your surface.
Step 9
Put the cardboard cylinder in the center of one bubble wrap circle, and fold the tape ends upward so they attach to the walls of the cylinder.
Step 10
Glue the cylinder in place over the mouth hole of the mask.
Step 11
Measure 8 inches of elastic, and cut. Mark small dots halfway up the outer sides of the eye holes, and then poke a hole through the cardboard with a pen tip.
Step 12
Push the tip of the elastic through one hole, and loop it around the same side of elastic and pull it tight like a shoelace. Repeat for the other edge of the elastic and cardboard hole.
Video of the Day