Flowers have a beautiful language of their own. From reflecting nature's beauty to celebrating life, flowers can speak volumes without using words. You can surround yourself with natural floral beauty all year long or preserve special memories by pressing fresh flowers and using the pressed petals to create all kinds of DIY craft projects and flower art. Create your own home decor, keepsake bookmarks or great gifts or follow our tutorial to illuminate the nights with these DIY pressed-flower paper lanterns.
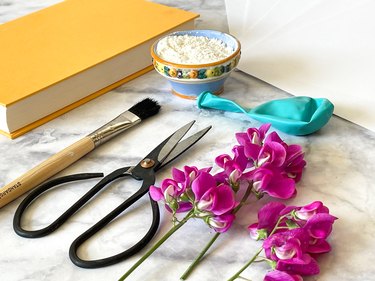
Things You'll Need
Fresh flowers
Heavy book
Parchment paper
Paper towel or coffee filter
Microwave-safe dish
Iron
1 cup white flour
1 cup water
2 teaspoons salt
Balloons
White copy paper
White tissue paper
Knife
Scissors
Towel
White glue
Straight pins
Battery-operated light
Video of the Day
Step 1: Pick the Perfect Flowers
When creating a pressed-flower paper lantern, it's important to pick flowers that are in excellent condition with no spots or tears. If you're using wildflowers or some that are fresh from the garden, be sure to pick them in the morning after the dew has evaporated. If you don't have access to wildflowers or a garden, most grocery stores carry a nice selection of flowers that will do the trick. The best flowers to press are naturally flat and have a single layer of flower petals. Of course, you can use thicker flowers, but keep in mind that they will take longer to dry.
Video of the Day
Tip
The best flowers for pressing include:
- Violets
- Clematis
- Pansies
- Sweet alyssum
- Zinnias
- Delphiniums
- Daisies
- Geraniums
- Cosmos
- Aster
- Camomile
Step 2: Choose a Flower-Pressing Method and Get Pressing!
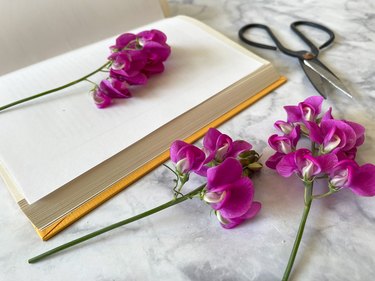
Method 1: There are several different methods you can use to press and preserve flowers, but using a book is one of the simplest pressing methods. Choose a heavy book (one with pages that you don't mind getting a little wrinkled). Open the book to the middle and place a piece of parchment paper or just a plain white piece of paper inside the pages. Carefully arrange the flowers on the paper so they aren't touching each other. Put another sheet of parchment paper on top of the flowers and carefully close the book. To weigh down the book even more, stack a few more books or heavy objects on top of it. Keep the flowers weighed down for about a week or so.
Method 2: If you don't have a week to press flowers, try a microwave flower-pressing method. You can purchase a microwave flower press or simply place a paper towel or a coffee filter in the microwave, lay your flowers on top and cover them with another paper towel or coffee filter. Gently put a heavy microwave-safe dish on top of the paper towel. Set the microwave at half power and cook for one minute. Check the flowers to see if they are dry. If not, place the dish back on top and cook for 30-second increments, checking the flowers after each session. When the flowers are dry, carefully remove them from the microwave and let them cool. Once cool, they will be ready to use for your paper lantern or for other dried-flower craft projects, such as bookmarks, home decor or other keepsake flower art.
Method 3: You can also use an iron to speed up the process of pressing flowers. Place the flowers between two sheets of parchment paper. Empty the water from the iron and set it on low heat. Press the iron on top of the paper and hold it in place for 10 to 15 seconds. Do not move the iron back and forth like you would if you were ironing clothes, as this will most likely tear the flowers and possibly ruin them. Let the flowers cool and check to see if they are dry. If not, you can repeat the process until they are flat and dry.
Step 3: Cover a Balloon in Papier Mâché
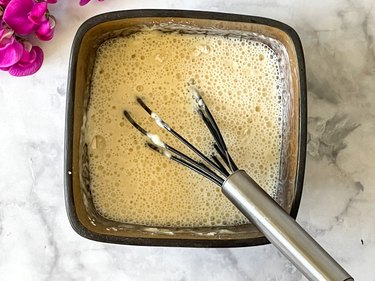
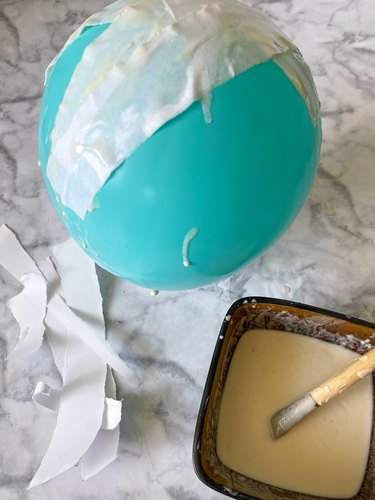
OK, this is where you prepare to roll up your sleeves and get messy! Using a whisk, mix together 1 cup of white flour, 1 cup of water and 2 teaspoons of salt to make the papier-mâché paste.
Blow up a balloon and tear a few sheets of white copy paper into strips. There's no need to be exact here; the strips can be different sizes.
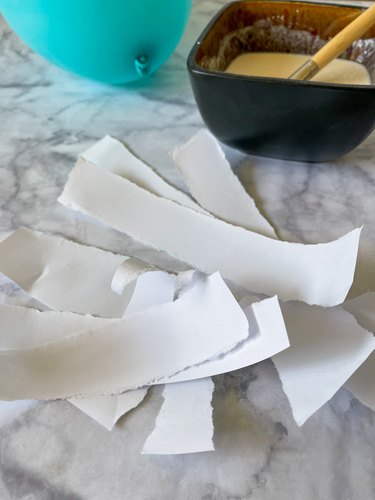
Dip the paper strips into the papier-mâché, removing most of the excess paste by pulling it through your fingers before applying it to the balloon. Continue to cover the balloon with one layer of strips going in different directions and overlapping each other. Leave the top open. This will be the base layer to give your lantern strength.
Add a few layers of white tissue paper over the base layer to give it a nice texture. Instead of dipping the tissue paper into the papier-mâché paste, just place torn pieces of tissue on top of the base layer. The tissue will soak up most of the excess paste, but you might need to use a paintbrush to gently add more paste.
Step 4: Transform Your Mold Into a Lantern
Let the lantern dry at least overnight. Use a sharp knife to pop the balloon. Then, reach your hand inside and pull out the balloon.
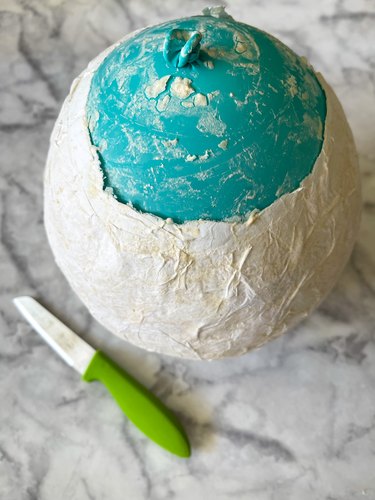
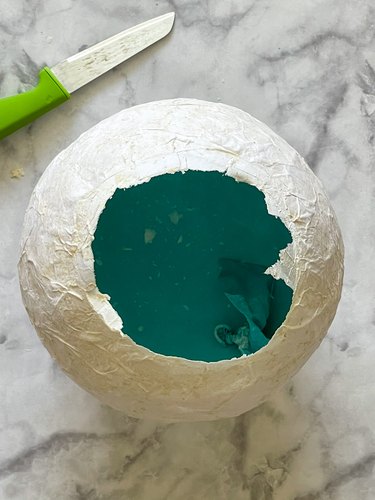
Trim around the top of the lantern with a sharp pair of scissors.

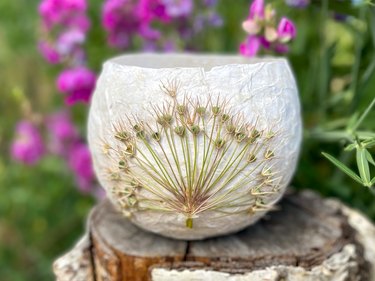
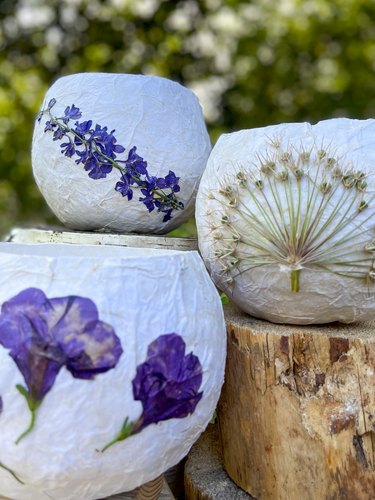
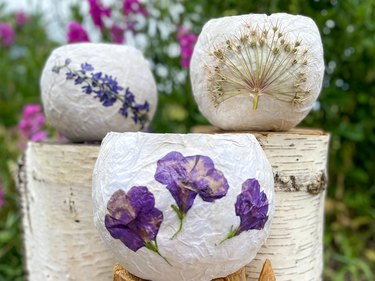
Step 5: Grab Your Pressed Flowers and Start Decorating!
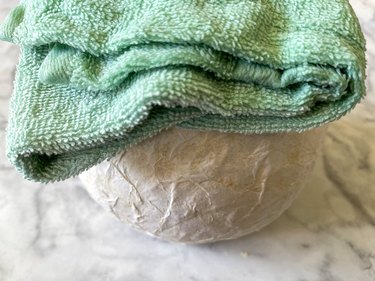
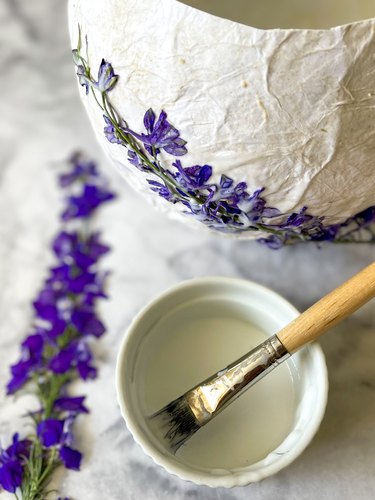
First, moisten the bottom of the lantern by placing a wet towel on it. That way, it won't move around while you're decorating it. Once it's wet enough to be pliable, press the bottom on a flat surface and let it dry in this position.

To attach pressed flowers to your lantern, brush white glue directly on the lantern wherever you'd like to place the flowers. Attach the flowers and then gently brush more glue on top to secure them in place.
Tip
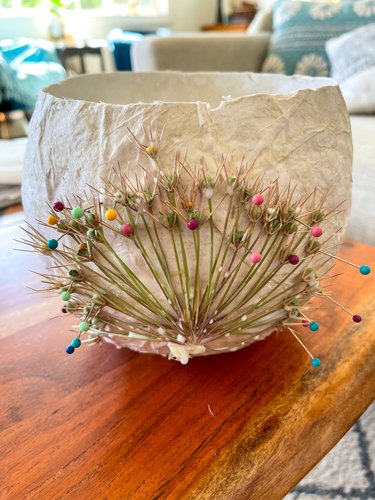
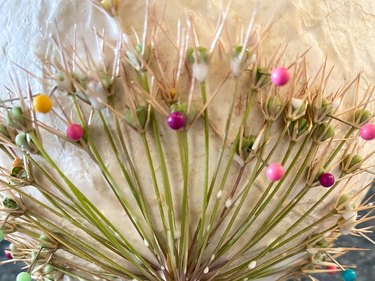
If you're choosing to use dried flowers with more texture, like a star allium, you might need to use a few straight pins to hold the flowers in place while they dry. Once dry, pull the pins out carefully.
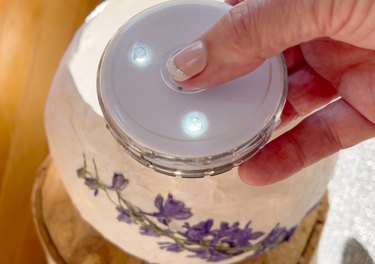
Step 6: Light Up Your Lantern and Then Light Up the Party!
Place battery-operated lights inside the lanterns, and you're finished! You can place the finished lanterns on your outdoor table as a centerpiece, welcome your guests with a few lanterns on your front porch or even hang them in trees for a fun backyard decoration. The possibilities are endless!