The birds are starting to sing again, days are getting warmer and there is a light green wash covering the trees and the ground. It must mean spring is just around the corner! This is a great time to brighten up your front porch with some new home decor. Sure, you can go on Amazon and just buy a welcome mat, but why not get crafty and save some money with this easy, step-by-step doormat tutorial.
You don't even have to own a Cricut cutting machine to create your own custom doormat. You can customize a blank coir doormat by creating your own template or stencil. Just grab a few supplies and we can show you how to make your own personalized doormat with this easy DIY that even a beginner can do.
Video of the Day
Video of the Day
Things You'll Need
Railroad board or freezer paper
Marking pen
Exacto knife or scissors
Cardboard
Coir mat
Painter's tape
Acrylic paint or spray paint
Paper plate or paint tray
Foam paint daubers
Small paintbrush
Step 1
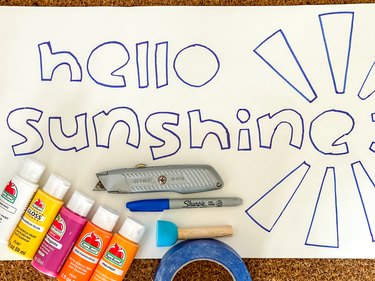
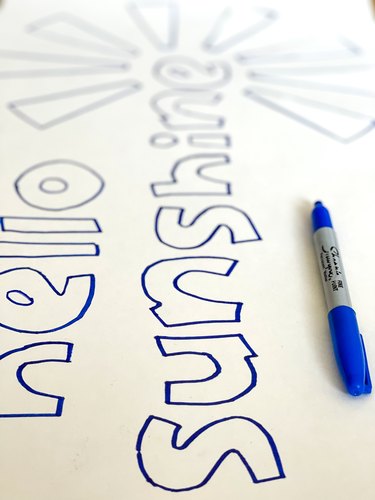
Create a stencil for your personalized doormat by drawing your design on a large piece of railroad board or freezer paper. You can download printable images and letters using your computer and then trace them to make a stencil, or if you're artistic, you could freehand the letters and design. Even better, if you are lucky enough to own a Cricut maker, you could use it to create the template for your stencil.
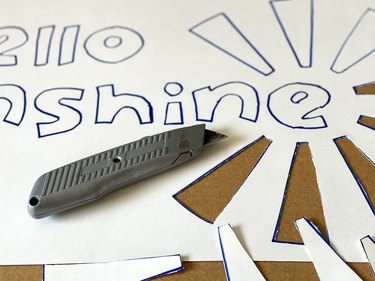
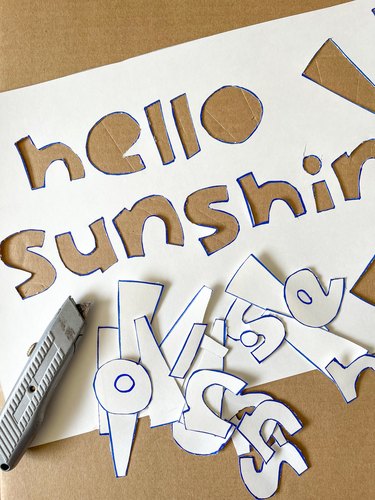
Step 2
After drawing or tracing your welcome mat design on the railroad board, use an Exacto knife or a sharp pair of scissors to cut it out. Be sure to put a thick piece of cardboard underneath to keep your cutting surface safe.
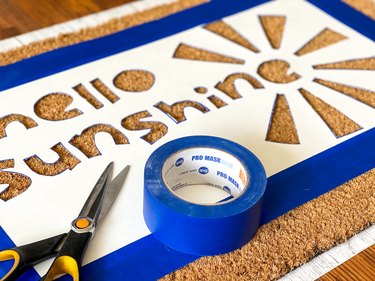
Step 3
Place your stencil onto the blank coir doormat and then use painter's tape to secure the sides of your stencil.
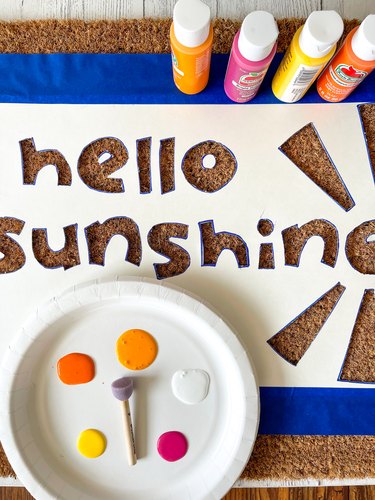
Step 4
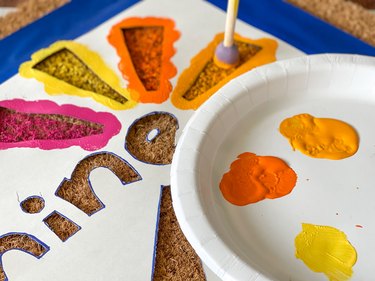
Determine what colors you would like to use for your painted doormat. Squirt small amounts of the acrylic paints (you could use outdoor acrylic paint for this step if you prefer) onto a paper plate or paint tray. Use a foam paint dauber to dab the paint into each open area on your stencil. While you are dabbing, watch to make sure none of the paint is going under the stencil. You could also use spray paint for this step, but if you do, be sure to hold the spray can far enough away from the stencil so the paint won't leak underneath the cardboard. You'll also have to be sure to have the entire coir doormat covered to protect it from overspray. Wait for the paint to dry before you pull the stencil off your DIY doormat.
Step 5
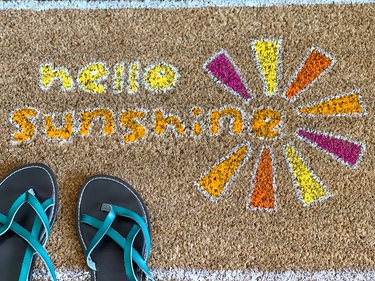
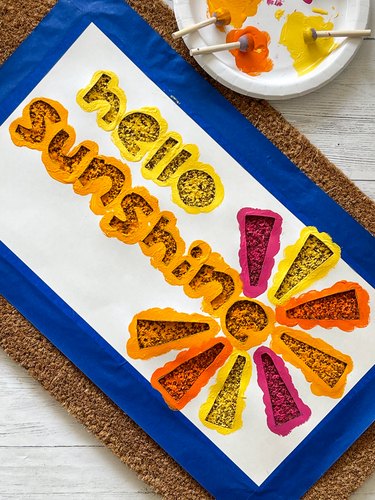
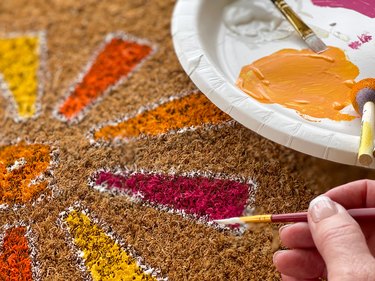
Once the paint is dry, carefully pull the stencil off the mat. Use a small paintbrush to outline the letters and the image so they will stand out.
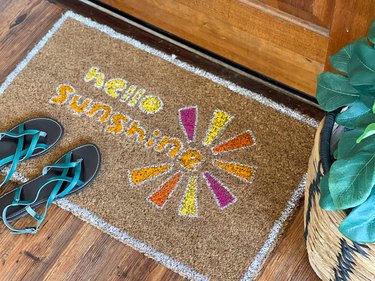
Place your new DIY welcome mat in front of your entry door to welcome your friends and neighbors to your front porch. Who knows, you might even have so much fun with this DIY project that you might find yourself making painted doormats for all your friends and neighbors.