Losing your glasses or keys doesn't have to mean you're losing your mind. It just might mean you need to spend some time organizing your space. Give your home office, craft room or sewing room a facelift and create storage solutions at the same time with our DIY hanging organizer tutorial. Whether you've been quilting for years or you're just a beginner, you can use this sewing tutorial to construct a beautiful caddy to hold life's minutia that tends to get lost and design some beautiful new home decor at the same time.
Video of the Day
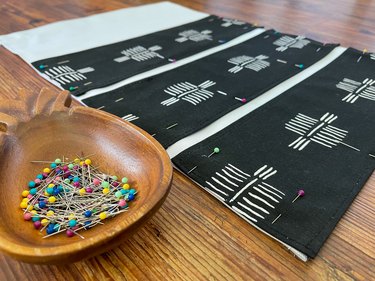
Things You'll Need
Sewing machine
110/18 sewing machine needle
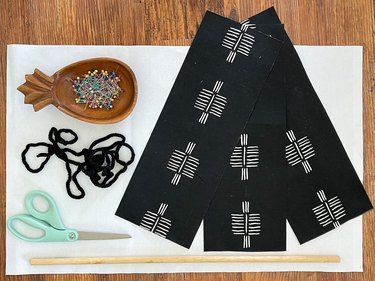
1 piece of 15 x 23.5-inch canvas or heavy fabric for base fabric
3 pieces of 5.5 x 15-inch heavy fabric or clear vinyl for pockets
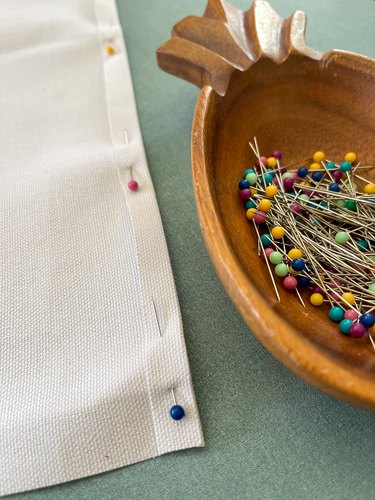
Straight pins
Sharp scissors
Tape measure
20-inch length of 7/16 wooden dowel rod
2 yards of coordinating yarn, ribbon or cord
Step 1
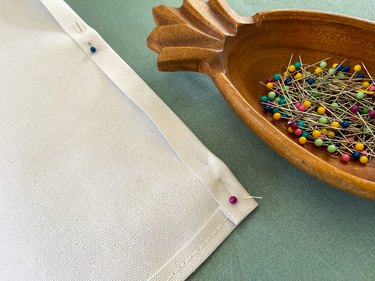
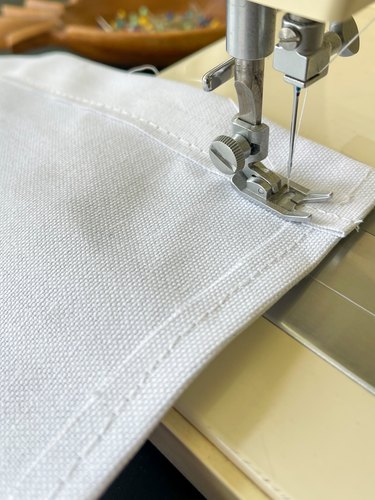
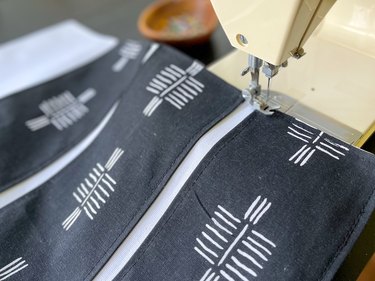
Press and pin under 1/2 inch on both 23.5-inch edges of the hanging wall organizer base fabric. Sew along both edges with a sewing machine, removing the pins as you sew. Be sure to backstitch on each end to keep the ends from unraveling.
Video of the Day
Step 2
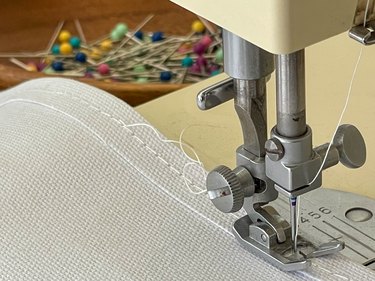
Press under and pin 1 1/2 inches on the top edge of the hanging pocket organizer base fabric. Sew along the raw edge, leaving enough room to slide the dowel through later. Be sure to remove the pins as you sew and backstitch on both ends.
If you want to use a hanger instead of a dowel to hang your pocket organizer, you can fold 1 1/2 inches of the top of the base fabric over the bottom of the hanger and sew in place.
Step 3
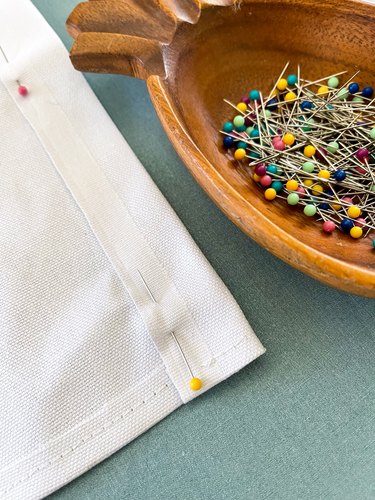
Press under 1 inch and then press and pin under another inch on the bottom of the DIY hanging organizer base fabric. Sew the folds in place, once again removing the pins as you sew and backstitching on both ends.
Step 4
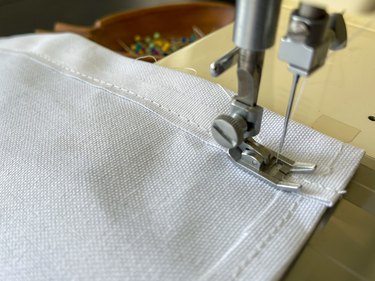
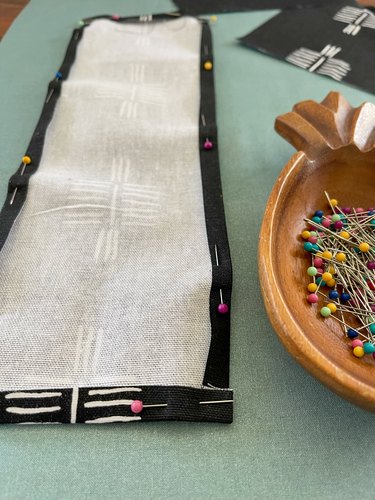
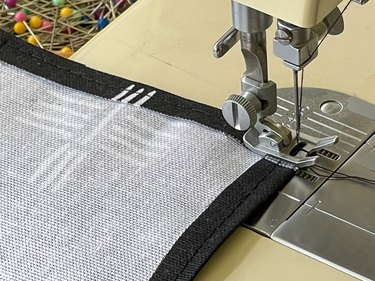
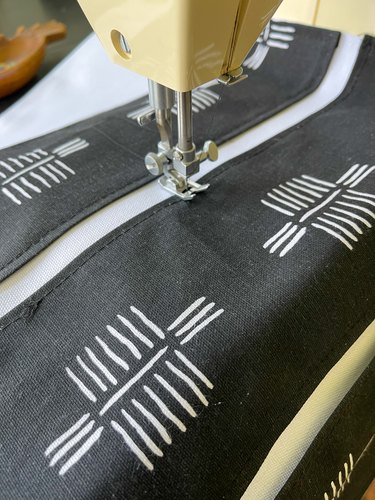
Press under 1/2 inch and pin around all four sides of each pocket piece. Sew the folds in place, removing the pins as you sew. When you get to each corner, leave the needle down in the fabric, lift the presser foot, turn the fabric, put the presser foot back down and continue to sew. Backstitch at both ends to keep the stitches in place.
If you have a fun print on the base fabric of your DIY hanging organizer, you might want to use clear vinyl for the pockets. If you choose to use clear vinyl for the pockets, you won't need to fold and sew the edges of each pocket. You can just place them onto the base fabric and sew around the sides and bottom of each pocket.
Step 5
Place the pockets right side up onto the right side of the base fabric. Pin the sides and the bottom of the pockets onto the base fabric of your hanging wall organizer. Place the bottom pocket even with the bottom edge of the DIY organizer base fabric and pin. Pin the bottom edges of the next pocket 1/2 inch above the top edge of the first pocket. Pin the bottom edge of the third pocket 1/2 inch above the second pocket.
Step 6
To attach the pockets to the hanging wall organizer, sew along the side edge of the pocket. When you get to the bottom edge, leave the needle down in the fabric, lift the presser foot, turn the fabric, put the presser foot back down and continue to sew. Do this at each corner. Remove the pins as you sew. Backstitch at the beginning and end of stitching each pocket.
Step 7
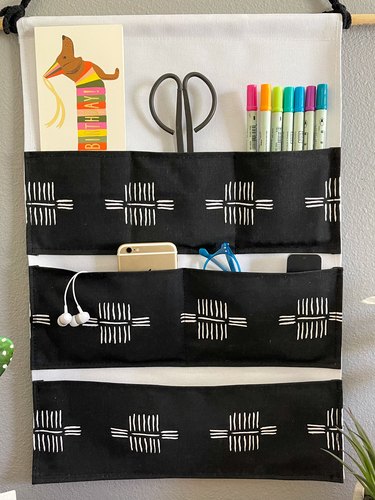
Measure halfway across the middle pocket and stitch down through both layers of fabric from the top of the pocket to the bottom of the pocket to create two compartments. Measure each third on the top pocket and stitch down at each third to create three compartments in the top pocket.
Step 8
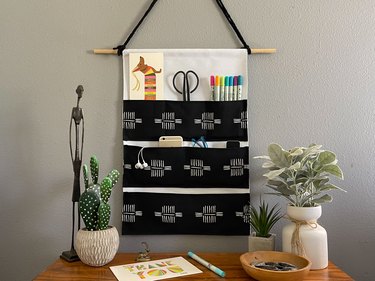
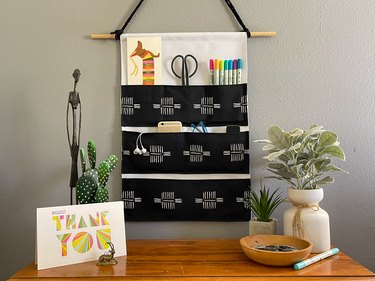
Push the wooden dowel through the casing in the top of the pocket organizer. Fold the yarn in half and tie it onto each end of the wooden dowel.
You can skip this step if you chose to use a hanger.
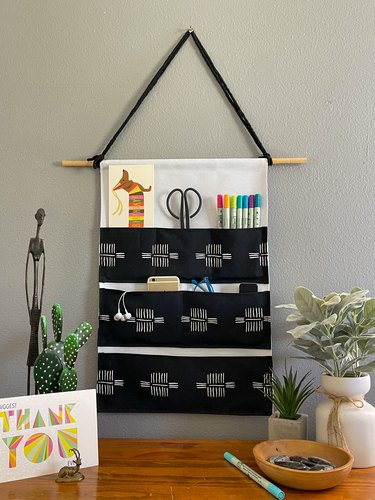
Fill the pockets of your hanging wall organizer with pencils, pens, scissors, cards, envelopes, glasses, keys, phones, remote controls, craft supplies or anything else that seems to get lost in your craft room, sewing room or home office. This multipurpose wall organizer not only creates handy storage solutions but it becomes beautiful home decor as well.