Even before Pennywise, the sinister dancing clown from Stephen King's IT movie crept his way into our collective nightmares, people were already scared of clowns. Now you can feed on their horror movie fears with a DIY window silhouette of Pennywise for Halloween. This is a clown sighting that is sure to strike terror in the neighborhood.
Make one for your front window with our tutorial and scare all the trick or treat fun-seekers. You'll be the "it" house of the year with this scary Halloween decoration idea.
Video of the Day
Video of the Day
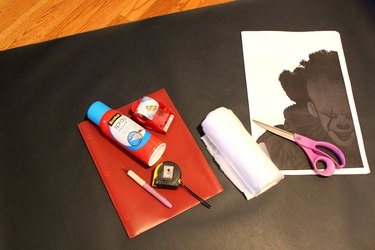
DIY Pennywise Clown Halloween Decoration — Things You'll Need:
- Measuring tape
- Print-out image of Pennywise
- Tape
- Scissors
- White marker or crayon
- 36-inch wide roll of black craft paper
- Hobby knife
- Red translucent report cover
- Plastic drop cloth
- Spray adhesive
- Glue stick
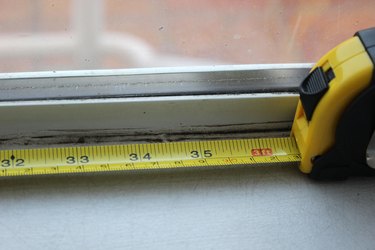
Measure your window for your Pennywise Halloween Decoration
Measure your window to determine the dimensions that your silhouette decoration will need to be. My window was 40 inches wide by 76 inches high, so I knew my silhouette would have to fit within that space.
Print Out a Creepy Clown Image of Pennywise
Select a printable image of IT's Pennywise from online and enlarge it to the size you want using graphics software like Photoshop or free online software that will do image enlargement for you.
Once enlarged, your image will not fit onto one piece of letter-sized paper. Instead, you will print your image in tiles, in which the whole image is broken up onto several pieces of paper that you assemble.
You can select the tiling function in the print settings.
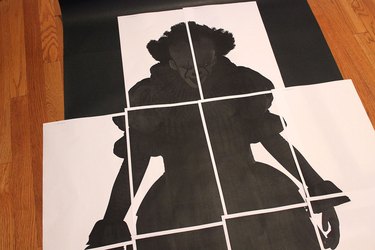
Tape the Tiles Together
After lining up the pieces of paper, tape them together with some clear tape.
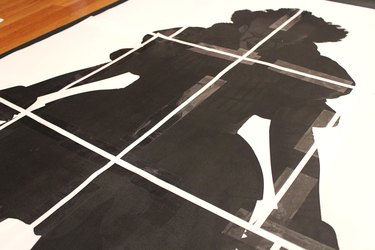
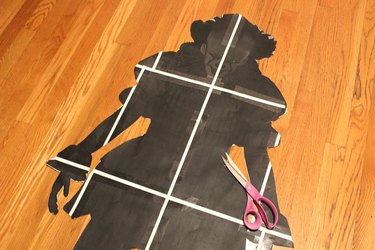
Cut Out the Template
Cut around the image with scissors. As you can tell by all the white lines, this tiled image of Pennywise is not the actual window silhouette, but the template.
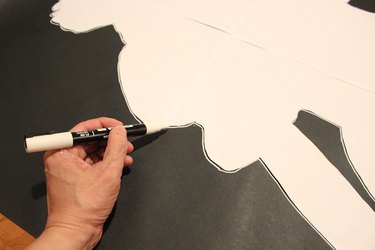
Trace the Template onto Black Paper
Place the template upside down on the black craft paper and trace around it with a white marker or crayon. Your black paper will need to be larger than the template if you want the Pennywise window silhouette to be in one piece. I used a 36-inch-wide roll of black butcher paper.
My window was large enough for a full-sized Pennywise, but you can also make a silhouette with just his head, torso and red balloon if your window is smaller.
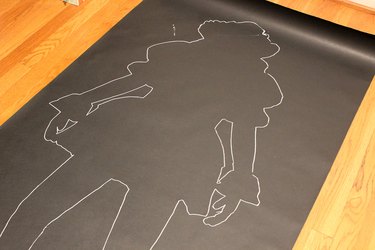
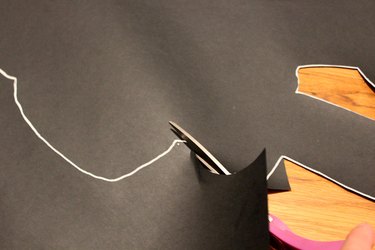
Trim Around Outline
With scissors, cut around the white line you traced. To get around more detailed areas, use a hobby knife.
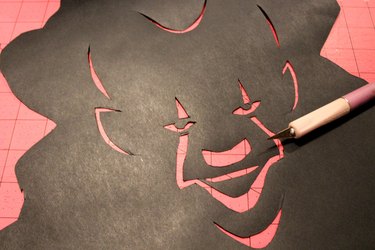
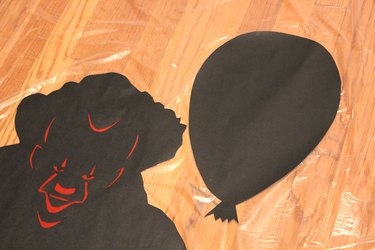
Cut Out Facial Features
Silhouettes don't typically have visible details within them — that's why they're called silhouettes.
But facial features do help make our Pennywise more malevolent. This clown is so evil, even his shadow has eyes. To create the facial features, line up the head from the template onto the head of the cut silhouette and use a hobby knife to trace over the eyes, nose, mouth and face painting that connects those features.
I also cut out his ears, along with a few lines that define the shape of his head.
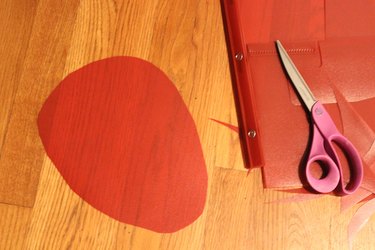
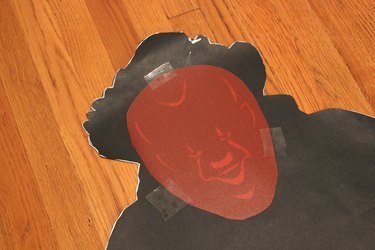
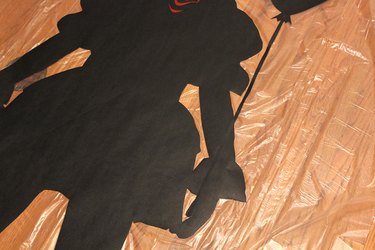
Attach a Red Backing
Behind the face, we'll attach a piece of red translucent report cover so that when the light shines through it, the features will glow red. Scary! Cut a shape that is large enough to cover the openings of the facial features.
Tape it to the back of the silhouette over the facial features.
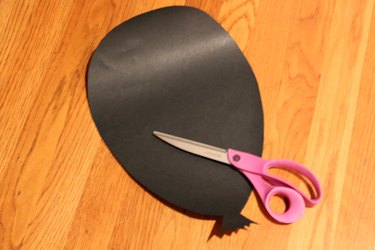
Cut Out a Balloon Shape
Draw a balloon shape on another piece of black paper. Make it a little bigger than the size of Pennywise's head.
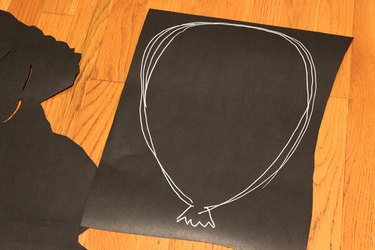
Cut out the balloon shape with scissors. While you're at it, cut a long strip of black paper that is about a quarter-inch wide for the balloon string.
Trim the Drop Cloth
Rather than attach the silhouette directly to the window, we're gluing it to a plastic drop cloth. This way, you won't damage your windows, and you don't have to worry about window frames or screens that would get in the way.
Plastic drop cloths are usually very large, so trim it to the dimensions of your window, adding about 1 or 2 inches on all sides for safety.

Attach the Silhouettes
Apply spray adhesive to the back of the Pennywise silhouette and place it down on the plastic drop cloth. Use spray adhesive that is re-positionable, rather than permanent, so you can move the silhouette around if you need. Once you're happy with the placement, press down with your fingers or use a brayer to achieve a secure seal.
Next, apply spray adhesive to the back of the balloon and adhere it to the plastic next to Pennywise's head.
Attach the balloon string between the balloon and the hand, trimming any excess. Instead of spray adhesive, I used a glue stick because the strip of paper was so thin.
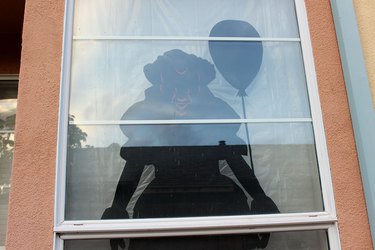
Tape the Drop Cloth to the Window
Tape the drop cloth to your window, allowing any excess plastic to extend onto the window frame and sill.

Close any curtains or blinds behind the silhouette.
Finish Your Spooky Pennywise DIY Halloween Decoration
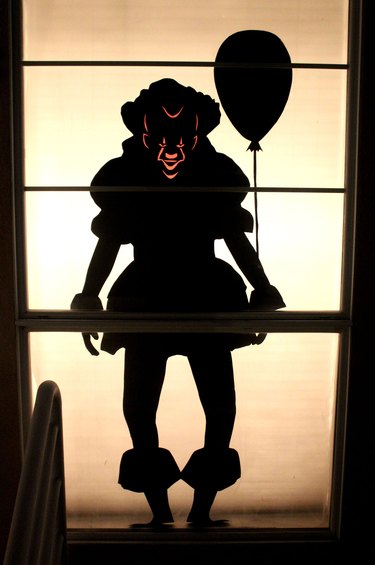
When the sun goes down, turn on the lights inside behind the window. It also helps to turn off any porch lights. Pennywise's life-size silhouette stands in stark contrast against the brightness, while his face glows red. They say IT takes many forms — this could be his most wicked.
Tip
There are many different ways to use this versatile home decor, both indoors and outside. Mount this Halloween craft as wall decor or even as a centerpiece in the party room of your haunted house event. Spread spiderwebs across the refreshment table at your Halloween party. Use it as an outdoor Halloween decoration and couple it with tombstones, spiderwebs and assorted seasonal creeps.