When Halloween rolls around, our favorite motto regarding costumes is: Why buy, when you can DIY? Most of us have empty boxes around, especially parents with kids still in diapers. With just a few simple supplies and minimal effort, we've got all the deets you need to recycle your cardboard containers and transform them into great costumes for your kiddos.
From a charming train conductor to an adorable ice cream seller or a sweet little robot, we're pretty sure you'll have the cutest trick-or-treater on the block.
Video of the Day
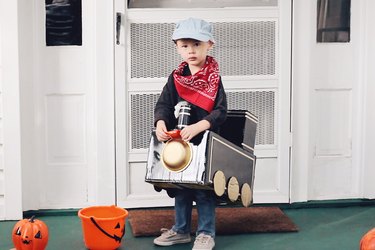
Train conductor — choo choo!
eHow may earn compensation through affiliate links in this tutorial.
Train engineer: Things you'll need
- Box cutter or utility knife
- Empty large diaper box
- Small box
- Paper or plastic cup
- Hot glue gun
- Black glossy spray paint
- Gold spray paint
- Paper bowl
- Gold washi tape
- Cotton ball
- Ribbon
- Suggested props: Conductor hat and bandana
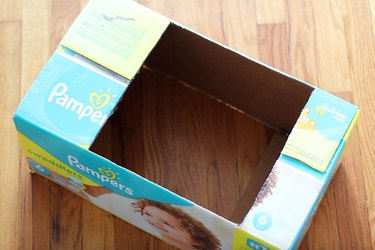
Cut Squares Into Your Cardboard Box
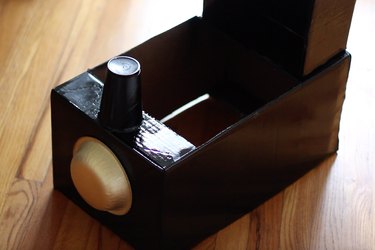
For this DIY train costume, use a box cutter or utility knife to cut a large square hole in the top and bottom of the empty diaper box. Make sure the holes are large enough to fit your little one. Leave enough space uncut in front of and behind the hole to fit the small box and cup.
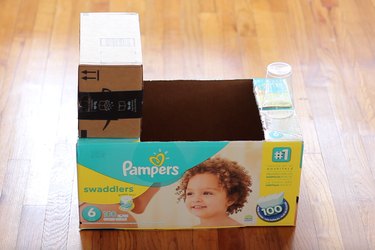
Glue the Boxes in Place
Place the small box and cup on top of the diaper box and hot glue them in place.
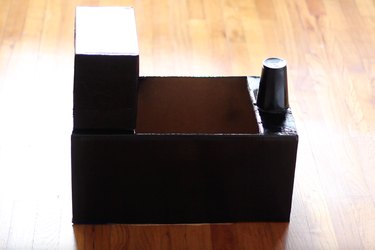
Spray Paint the Boxes
Spray paint the train with a black glossy spray paint. It'll take at least two or three coats to cover the print on the boxes. Be sure to paint in a well-ventilated area and put a tarp or newspaper down to protect your surface.
Spray Paint a Bowl Gold
Spray paint a paper bowl with gold spray paint. Once the train and bowl are both dry, hot glue the bowl to the front of the diaper box, just below the cup.
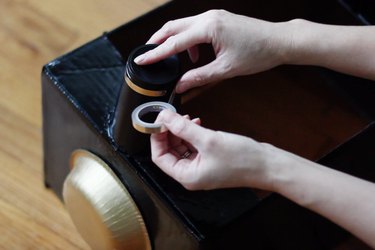
Add Decorative Stripes
Use gold washi tape to create decorative stripes on the sides of the train and around the smoke stack.
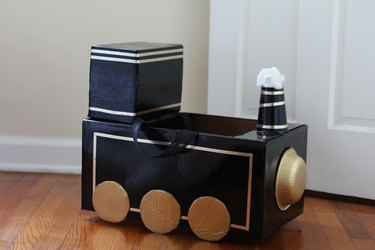
Create the Train Wheels
Cut out circles from scrap cardboard to create six wheels. Paint them with gold spray paint. Once dry, hot glue three wheels on each side of the cardboard box train.
Pull a cotton ball apart to loosen it and hot glue it on top of the smoke stack to look like a puff of steam. Lastly, hot glue two long strips of ribbon on each side of the train to act as straps, so your child can "wear" the train costume.
And just like that, you've created a simple cardboard box Halloween costume!
Ice cream seller

Things You'll Need
Empty cereal box
Tape
Scissors
Printer and paper
Brown card stock or construction paper
Tissue paper (mint, pink, brown and white)
Colored paper or felt
Red pom pom
Ribbon
Suggested prop: Retro diner paper hat
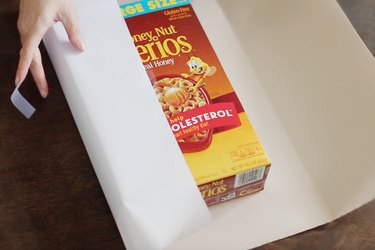
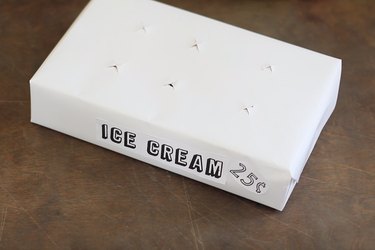
Wrap Your Cereal Box
Wrap an empty cereal box with white wrapping paper, as if you were wrapping a present.
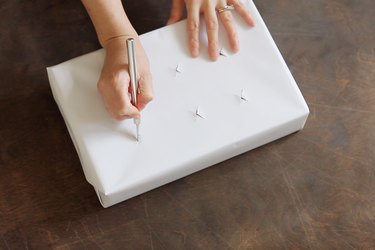
Cut Holes in the Box
Use a utility knife to cut six X-shaped holes in the top of the box. Space them about 2 inches apart on each side.
Print Your Signs
Print out text that says "ICE CREAM" and "25¢" on white printer paper and cut them out. Tape or glue them to the front of the box.
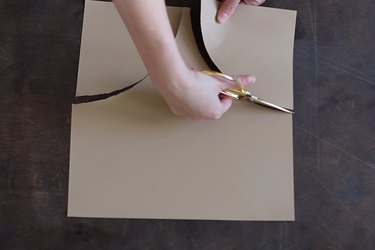
Cut the Card Stock
Draw an arc shape on each corner of brown card stock or construction paper and cut them out.
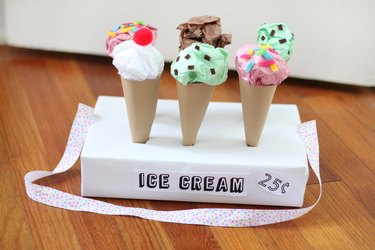
Create the Ice Cream Flavors
Roll the arc shapes into cones and hot glue the ends together to secure the cones. Then scrunch up tissue paper into a ball to look like ice cream and hot glue it inside each cone. We used mint green, pink, brown and white tissue paper to create various "flavors." There's a lot of variety in this simple DIY Halloween costume!

Add Sprinkles and Other Decorations
To create sprinkles, cut out little pieces of colored paper or felt. To create chocolate chunks, cut out small squares from brown paper or felt. Use a small red pom pom to create a cherry on top. Hot glue the decorations on top of the ice cream cones and then insert the cones inside the holes of the box.
To create a carrying strap for your child to wear the box around his or her neck, cut a long strip of ribbon and hot glue each end on the sides of the box. Your kiddo will be the most successful ice cream salesperson in the neighborhood!
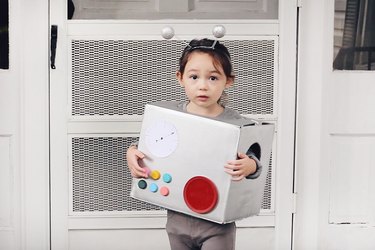
DIY robot costume
Things You'll Need
Empty square diaper box
Scissors
Silver spray paint
Water bottle caps
Craft paint
Small paintbrush
Round lid
White paper
Black marker
Suggested prop: Silver ball headband boppers
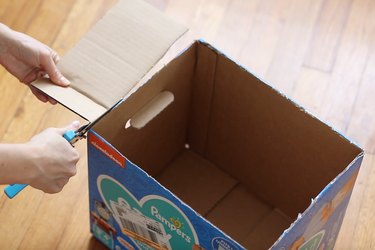
Cut the Flaps off the Box
Use scissors to cut the four flaps from the top of the box.
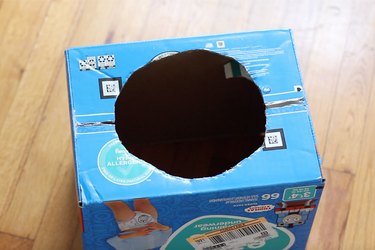
Create a Head Hole
Turn the box upside down and use a box cutter to cut a large round hole in the bottom of the box. Be sure to center the hole and make it large enough for your child's head to fit through.
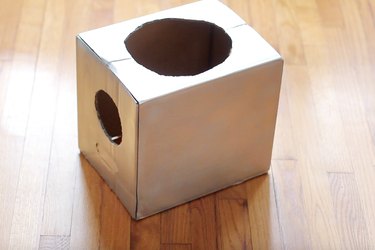
Make the Arm Holes
Cut a round hole on each side of the box large enough for your child's arms to fit through.

Paint the Box Silver
Spray paint the box silver. It'll take about two or three coats. Be sure to paint in a well-ventilated area. Put a tarp or newspaper down to protect your surface.
Paint six water bottle caps with various colors of craft paint. Once dry, hot glue two rows with three caps each on the front of the box. Hot glue a plastic lid (we used an empty oatmeal container lid) on the front of the box next to the smaller caps.
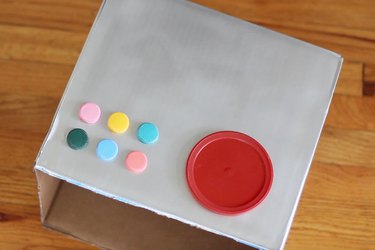
Add the Robot's Gauge
Cut out a circle from white printer paper and draw a gauge on top. Hot glue it above the smaller caps.

With that, you have three simple Halloween costume ideas that require little more than what you have lying around the house already. These homemade costumes can be recycled, modified and improved year after year as your child grows, too.
We wish you luck in your DIY journey, and a very happy Halloween!