We love nothing more than to find creative uses for old plastic bottles. It's not only a pivotal part of the crafting ethos, but the second and third pillar of the environmental mission to reduce, reuse and recycle. All of these projects require used, clean plastic bottles. Unlike wine-bottle crafts, the adhesive used to secure labels on some plastic containers can be tough to remove. Polishing your pre-project bottle may require repeated soaking and scrubbing. Check out these 10 ways to save money and heal the environment by reusing old bottles.
Video of the Day
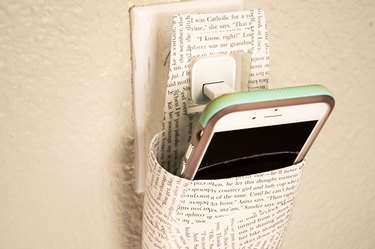
1. Decoupage Hanging Charging Station
If you're a member of Decoupage Addicts Anonymous, please raise your hand and then slather it with Modge Podge. We tweaked the original charging-station tutorial, but here's what you need for this version: a plastic bottle from the body-care aisle (we used an old lotion bottle), an X-Acto knife, Modge Podge, a copy of Trump's "Art Of The Deal," a Sharpie and a brush. Instructions: Mark your pattern on the bottle before carefully cutting away the excess material. Apply Modge Podge to the soon-to-be charging station and cover with bits of a book, magazine or scraps from your dream board. Apply a second layer of Modge Podge and let dry for an hour.
Video of the Day
2. No-Sew Zippered Carrying Cases
Organize everything in your messenger bag, purse or life, basically, with our no-sew zippered plastic case project. Materials: the bottom halves of two plastic water bottles, scissors, a hot glue gun and an 8-inch to 12-inch circumference zipper. Instructions: Depending on the height of your intended carrying case, cut 2-5 inches from the bottoms of two standard-sized water bottles before hot-glueing the zipper to the insides of the bottle. Be sure to leave enough space between the edge of the bottle and the zipper, so that the pull has enough space to close the teeth.
3. Kitchen Sponge Cozy
I'm not going to say who, but some people leave the soggy dishwashing sponge in the sink where it grows bacteria and gets disgusting. Make being not so gross easier for them by upcycling a body-wash bottle into a kitchen sponge cozy! Materials: an empty bottle from the personal-care aisle (we used an old body-wash bottle), a Sharpie, an X-Acto knife and a piece of sandpaper. Instructions: Mark a pattern with the Sharpie similar in shape to the charging-station tutorial, but be sure that the top of the bottle is the bottom of your sponge cozy (the opening will allow water to drip out). Cut away the excess plastic and then bevel any rough edges with the sandpaper.

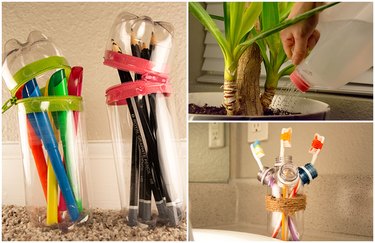
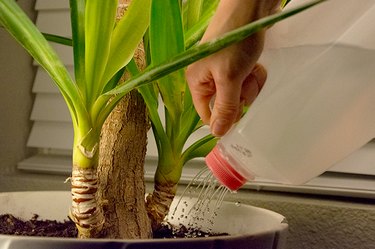
4. Milk Jug Watering Can
You are a sucker if you continue to spend $5 on watering cans from the garden accessories aisle at IKEA when you have a perfectly good prospect in your recycling bin. Materials: a milk jug, a drill and a one-eighth inch drill bit. Instructions: Against a hard and secure surface like a cutting board, drill about a dozen holes into the cap of the milk jug. Secure the cap back onto the jug, and you have yourself a budget-savvy watering can.
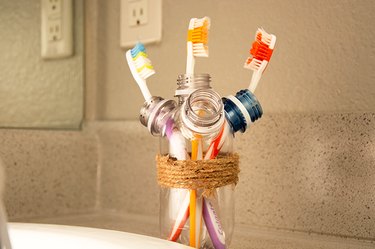
5. Toothsome Toothbrush Holder
If you're looking to express how much you love both crafting and dental health, then this homemade toothbrush holder may be the spiritual talisman that's been missing from your life. Materials: a plastic water bottle, the mouth pieces of additional water bottles, X-acto knife, hot-glue gun, iron and a bit of twine. Instructions: Hot-glue the top and bottom of a water bottle together after cutting out the middle. Wrap twine around the seam for added durability. Gently cut holes equal in size to the mouth pieces in the top of your toothbrush holder and then hot-glue the mouth pieces over the holes. Let the glue set.
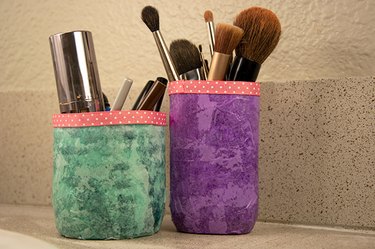
6. Decoupage Makeup Organizers
No craft-project roundup is complete without decoupaging tissue paper, and these '80s-inspired makeup organizers are not-so-subtle proof. Materials: the bottom halves of 1-3 bottles of different shapes and sizes, a box cutter, an iron, Modge Podge, colored tissue paper, ribbon, glue and a brush. Instructions: Cut the bottom halves from plastic bottles to your desired length before smoothing the rough edges by pressing the ends to a hot iron. Don't worry: Plastic will not melt onto the surface of your iron. Apply a layer of Modge Podge to the bottles, followed by a layer of tissue paper and then a second layer of Modge Podge. Repeat this process until you get the look that you want (we have two layers of tissue paper on ours). Let the Modge Podge dry before gluing the ribbon around the opening of the containers.
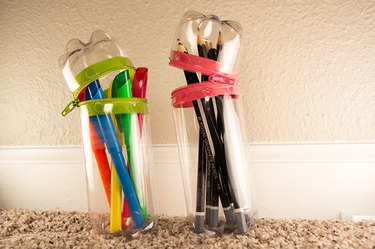
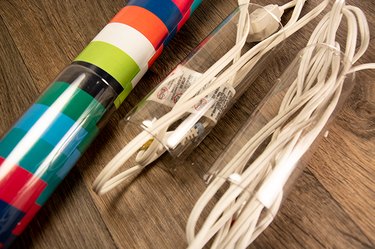
7. Cord and Wrapping Paper Organizers
Tame the tangle of extension cords and the unwieldy mess of leftover wrapping paper with, what is perhaps, the easiest organizing hack in the history of DIY. Materials: a water bottle, scissors and an iron. Instructions: Simply cut the top and bottom from a water bottle and gently press the two ends of the remaining tube against a hot iron. The heat will cauterize your plastic tube and leave you with smooth edges.
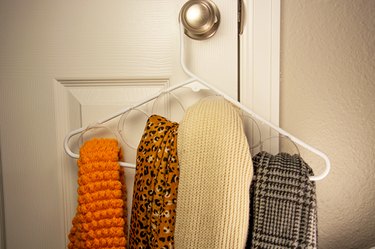
8. Scarf Organizer
If you have limited closet space and your scarves bring you joy, then this DIY scarf organizer is the life changing magic of tidying up that you need. Materials: two plastic water bottles, an X-Acto knife, measuring tape, a Sharpie and a hot glue gun. Instructions: Mark off 1-inch sections of the bottles with the measuring tape and Sharpie. Then cut the sections out, so that you are left with about eight plastic hoops. Hot-glue the hoops to a standard clothing hanger and allow to dry.
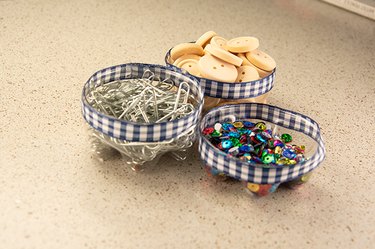
9. Desk Drawer Organizers
Who doesn't have cluttered, messy drawers? Everyone who hasn't made these cute, beverage-bottle organizers — that's who! Materials: the bottoms of several water bottles, scissors, a hot-glue gun, an iron and (optional) ribbon. Instructions: Cut the bottoms from several water bottles and gently press the ends against a hot iron to smooth the edges. Hot-glue the cups together and then attach ribbon around the circumference of the cups to give them some jaunty flair!
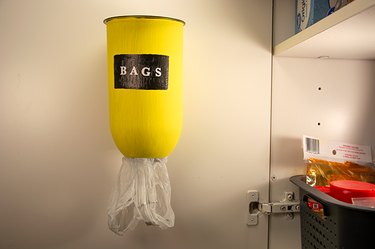
10. Grocery Bag Dispenser
This project may be the most important discovery in plastic-bottle crafts this century. Seriously, what are you even doing with your life? Make this vision a reality! Materials: a CD or DVD, a two-liter bottle, acrylic paint, a piece of sandpaper, sticker lettering, painters' tape and an X-Acto knife. Instructions: Cut the top one inch and the bottom two inches from a two-liter bottle and sand the edges smooth. Paint both the bottle and the CD with 1-3 coats of paint, allowing drying time between applications. Apply the sticker lettering to the face of the dispenser and then attach the CD to the top with a hinge of painters' tape. Mount your grocery bag dispenser with the fastener of your choice!