Amy Tangerine, designer, blogger, and author of Craft a Life You Love, is all about making your passions a reality through creativity and a spirit of adventure. Amy did just that when she decided to Go RVing up the California coast with her husband, JC, and their 4 ½-year-old son, Jack.

Video of the Day
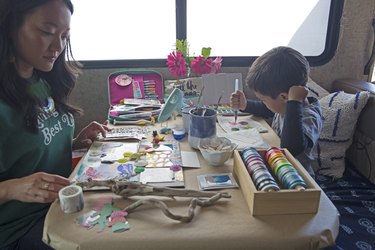
They left Los Angeles on a Friday. They stopped in Santa Barbara and then San Luis Obispo, where they made a pit stop at a friend's sticker shop to stock up on supplies. Finally, they ended up on the beach in Morro Bay, where they gathered sand dollars to create a DIY shadow box to capture memories of their first RV road trip. Luckily, their RV had a cozy table where they could easily set out all their materials.
Crafting on the Road
"I love crafting on the go," says Tangerine. "I have developed a system to make sure that I am never bored on flights or on trips or during down time." Indeed, Tangerine is constantly recording her experiences. "You can spend just 10 minutes a day, in the evening, documenting what you've done directly into a travel journal," she says—and have a beautiful record of your memories. "You're assuming you're going to remember," she says, but without taking that time, "so many details get lost."
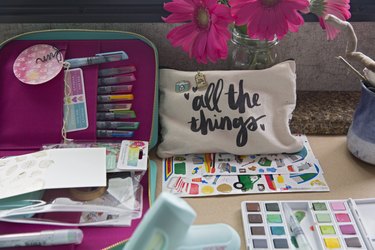
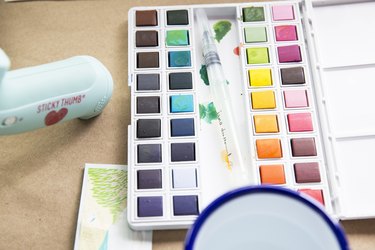
For most of her on-the-go crafting efforts, all she needs fits in her Planner Pouch, which has interior pockets and a clear, zippered envelope perfect for markers, tape runners, mini scissors, pins, stickers, and more. "Sometimes I bring a date stamp and ink pad," she adds. And last, but not least, the portable printer toprint memories right off her phone.
Then, it is about setting aside the time—something she and Jack had plenty of that afternoon. When they returned to the camper, they painted sand dollars. For Amy, it is about letting Jack participate as much or as little as he wants. "If you can set expectations low, and say, 'Hey, we're going to take time to set up this craft, we can do it for an hour and it'll be quiet time,' then if your kid wants to participate, great. And if they get bored, they still have down time when they can soak it all in."
Jack's interest that day surprised her. "He ended up painting so many sand dollars he was able to give each and every person [they met] a memory of the trip," says Tangerine.
Not Your Ordinary Shadow Box
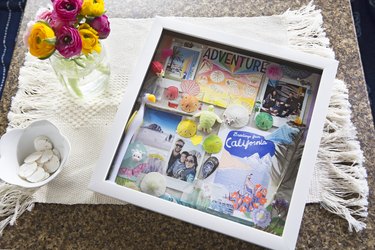
"The shadow box I created is a little atypical," says Tangerine.
Most shadow boxes have the elements layered or falling down, with sand at the bottom, for instance, and then memorabilia on top. While they did collect memorabilia and take photos, the concept Tangerine used was slightly different.
"This was 12x12 canvas that you could pin things to, like a mini memory board that was framed and personalized," she explains.
To do your own shadow box, keep these tips in mind:
Don't stress about the theme."The main thing is to focus on getting the project documented," says Tangerine. "In other words, don't worry too much about the details. Choose your favorite photos, a few of the elements you want to preserve. You can add little bits along the way," she says.
Three is the magic number. When it comes to layout, Tangerine generally goes with whatever appeals to her at the moment. "I tend to stick with rule of thirds—but knowing design principles means you can also break them when you want to make the design yours." For her, odd numbers look best—though like anything it's a personal choice. With this shadow box, she chose three of her favorite photos.
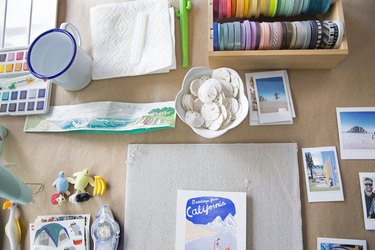
Add depth. It's all about the mix."We were able to include elements like a pen that Jack had picked out from the trip, and also a stick, and all the shells. That gives a lot of texture. If you're able to establish a few different levels in your shadow box, it makes it overall more appealing."
Don't be afraid of color. Tangerine loves all colors—and is not dogmatic about keeping one palette. "You don't have to stick with color scheme if you don't want to," she says. For this shadow box, she wanted a rainbow of colors, to mix and match with the more natural elements. "The collected memorabilia was very unique to the trip," she says.
Once pinned into place, Tangerine slipped the canvas inside the shadow box frame—a perfect memento of a unique trip. "We are not campers by any means," she says, "and [traveling via an RV] exceeded all of my expectations."