Whether you make planters as a gift for your favorite green thumb or are looking to add some personality to your own patio or porch, the process is easier than you may think. Rustic chicken wire planters require very few tools and materials, and you can sculpt them into any size that you like. Just don't forget your gardening gloves.
Materials Needed
Video of the Day
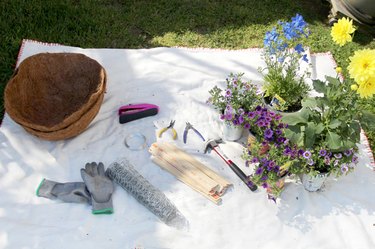
- Protective no-cut gloves
- 1-inch mesh chicken wire, 1 roll measuring 24 inches by 8 feet
- 12-inch wood paint stirrers, 8 to 12 (depending on how many planters you would like to make)
- Wire or tin snips
- Needle-nose pliers or similar jewelry wire manipulation tool
- Gardening wire, silver
- Stapler and staples
- Box cutter (optional)
- Large coconut fiber basket liners, 2 to 3
- Assorted plants and potting soil
Video of the Day
Cut the Chicken Wire
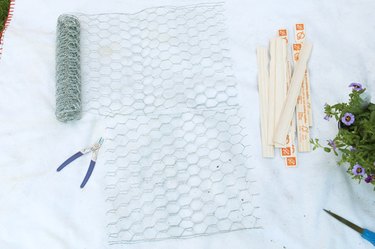
While wearing your protective gloves and working on a flat, clean surface, unroll the chicken wire mesh to match the length of two wooden paint stir sticks. (This project uses 12-inch paint stir sticks, so the chicken wire was unrolled to 24 inches long.) Use wire or tin snips to cut the length of chicken wire. Cut a second, matching piece of chicken wire.
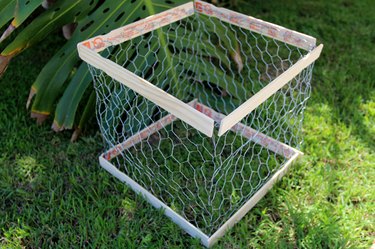
Form a Basic Box Shape
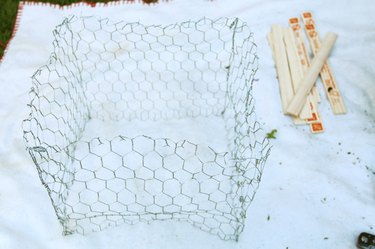
Fold both pieces of chicken wire in half to form a 90-degree angle at the center. Join the two pieces to form a box shape.
Add Wood Trim Around the Top
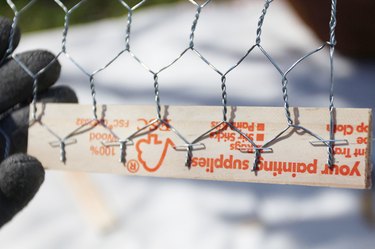
Protect yourself from the sharp, jagged edges of the chicken wire, and give your box some much-needed structure by adding wood accents. A simple office stapler is a surprisingly powerful tool for attaching wood stir sticks to chicken wire. Line the wood stir sticks (printed side facing inward) around the top outside rough edges of the chicken wire box. Use direct, strong compressions to staple the exposed wire bits to the printed side of the wood stir sticks.
Add Wood Trim Around the Bottom
Flip the box over and continue stapling the wood stir sticks along the bottom rough sides of the box.
Close and Tighten the Sides
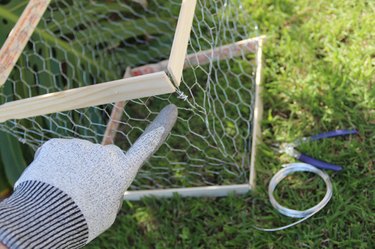
Transform the loosely shaped chicken wire box into a tighter box shape. Use wire snips to cut several 3-inch lengths of silver garden wire. Wrap a piece of wire tightly around each corner edge of the box to reinforce it. Use needle-nose pliers to help wrap the garden wire around the chicken wire. Wrap wire around any other areas that need reinforcement.
Optional: Make Smaller Boxes
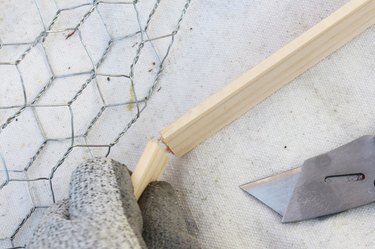
To make smaller boxes, cut smaller lengths of chicken wire to form the four side walls of the planter box. To shorten the paint stir sticks, use a box cutter and carefully score both sides of the sticks. Then apply light pressure with your fingers until the wood snaps cleanly. Staple the smaller segments of wood along the rough edges of the chicken-wire mesh as you did with the large planters, and reinforce the four walls with tightly wound wire segments.
Line the Boxes with Coconut Fiber Liners
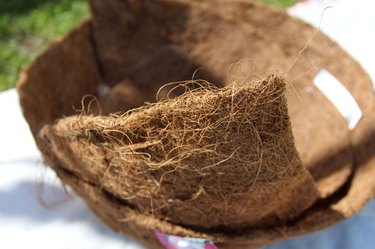
For a smaller planter box, cut one of the coconut liners down to size until it fits snugly inside the box frame. For the larger planter boxes, set the coconut mat directly into the chicken wire frame. If needed, cut segments from a second coconut liner to line the inside of the large planter box. As long as segments of the mat overlap, they will still retain potting soil and can be planted.
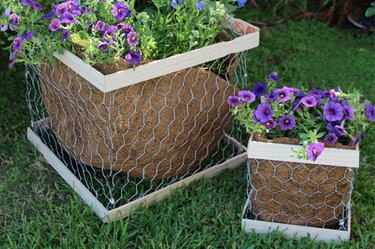
Plant Flowers in the Boxes
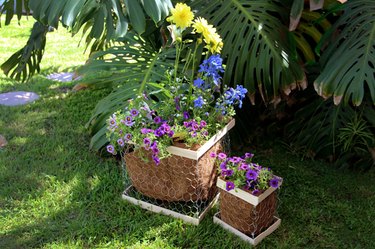
Place the large planters where you would like to display them. Add potting soil to the coconut mat and plant your flowers, or simply set an arrangement of potted plants, flowers, dried grasses and such inside the coconut liner within your wire planters. These planter boxes also provide a rustic backdrop for seasonal arrangements, if you'd like to switch up the plants each season.
Tips: These are very quick garden decor projects, and as they do not have wire bottoms, the large planters should be potted or arranged in the place that they will be displayed.
The smaller box sizes don't get as heavy when potted up and make for cheerful gifts.