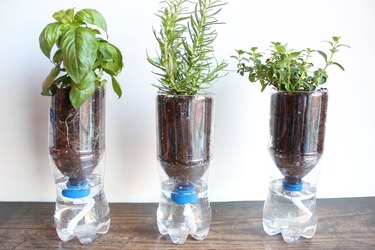
If your thumb is anything but green, join the club. Watering indoor plants, as easy as that might sound, isn't everybody's strength. Whether you forget to water them or overwater to compensate, there's an easy DIY solution that will help you water your plants reliably. DIY self-watering planters provide a constant supply of moisture, and they're so simple to make with used plastic soda bottles. Your plants will definitely thank you.
Things You'll Need
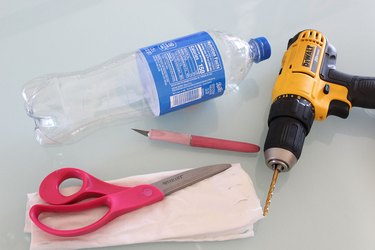
Plastic soda bottle
Drill and 7/32-inch drill bit
T-shirt scrap
Scissors
Toothpick
Seeds or plants
Video of the Day
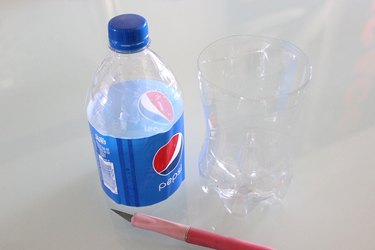
1. Cut soda bottle in two

With a hobby knife, otherwise known as an Exacto knife, cut a clean, empty 1.25-liter plastic soda bottle crosswise in half. The bottle does not need to be cut exactly in half, so don't worry about measurements — feel free to eyeball it. Plastic bottles usually have grooves in them, so follow along one of the grooves right under the label to cut a straight line.
Video of the Day
You'll now have two sections: the top half with the bottle cap and the bottom half. Remove the label from the top section so that you're left with a clean, clear bottle.
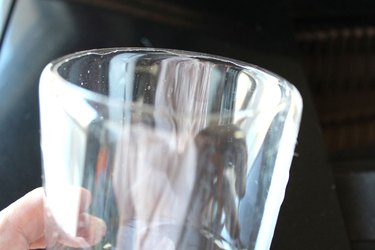
2. Smooth edge of the bottle
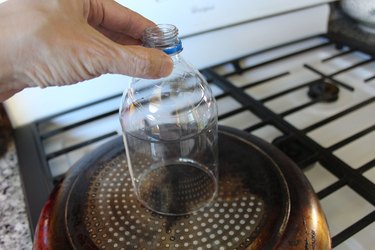
The top section with the bottle cap will be the top of the planter (it will be inverted and upside down). Smooth the edge where it was cut so it's not jagged or sharp and you don't accidentally cut yourself every time you pick it up.
To do this, heat a pan on the stove for a few minutes. Then, turn over the pan and hold this section of the bottle against the pan to smooth it out. This will slightly melt the plastic and create a smoother edge around the top of the bottle.
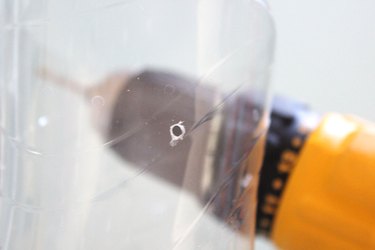
3. Drill hole in bottle cap
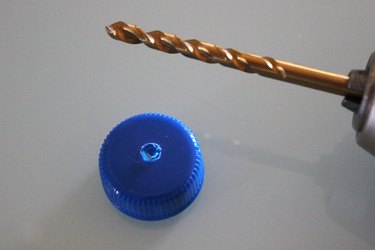
Drill a small hole in the bottle cap using a 7/32-inch drill bit.
4. Cut a strip of T-shirt fabric
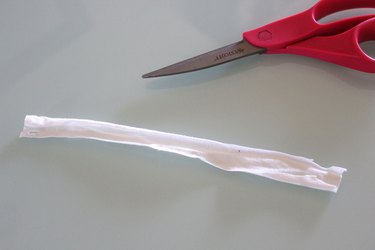
Cut a strip of a white cotton T-shirt to about 1 by 8 inches. If you don't have an old white tee laying around to cut up, feel free to use any other type of fabric scrap. Cotton works best for this project (and it doesn't have to be white).
5. Thread fabric through bottle cap
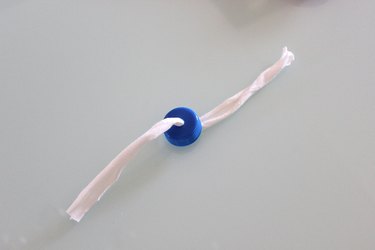
Thread the strip of T-shirt fabric through the hole in the bottle cap. It helps to use a toothpick to push the fabric through. Then, screw the bottle cap back onto the bottle.

6. Drill holes in bottle
The bottom half of the soda bottle will be the water reservoir in your DIY self-watering planter. Drill four to five small holes in this section for air holes to allow your plant to breathe. Make sure these holes are above the intended water line. so that water doesn't leak out constantly.
7. Fill planter with soil
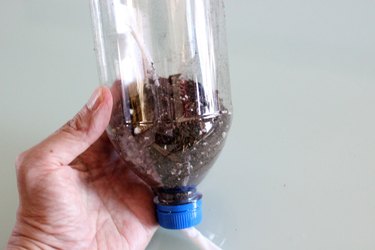
Fill the planter (the section with the bottle cap on the bottom) with soil. If you are planting seeds, fill it to the top with soil. If you are transplanting a grown houseplant, only fill it halfway (or less) to accommodate the plant. Make sure the cotton T-shirt strip extends to the top of the soil rather than getting buried at the bottom.
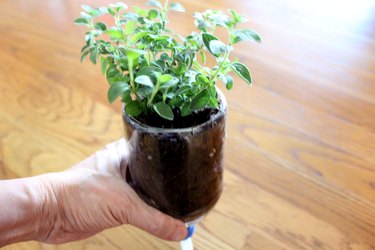
8. Add the plant
If you are transplanting, add the plant on top of the soil already in the planter. Three-inch potted plants fit perfectly in a 1.25-liter bottle.
9. Fill water reservoir
Add water to the bottom section of the plastic bottle, making sure you don't fill it above the air holes. Then, drop the planter into the water reservoir so the fabric strip sits in the water.
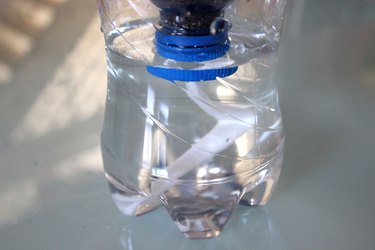
Water now travels from the reservoir into the soil as needed by way of the fabric strip, which is ideal for absorbing water. These self-watering planters are particularly helpful if you're going to be out of town for a few days and don't have someone to water your plants. Plus, they look quite elegant despite their humble origin as soda bottles.
