Things You'll Need
Surplus military helmet or bike helmet
Screwdriver
Camouflage fabric
Scissors
Needle and thread
Hot glue gun
Hook-and-loop tape
Craft foam
Plastic wrap
Old newspaper
1 cup flour
4-5 cups hot water
Large bowl
Spoon
1-2 tbsp. salt
Acrylic craft paints
Clear paint glaze
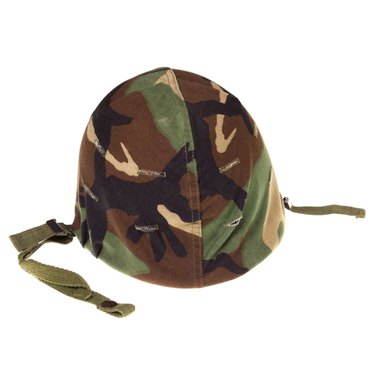
Make a military helmet for a costume or play. Military helmets generally cover the top, sides, and back of the head and are either painted or covered to match the uniform. To make a helmet, you basically have three options: You can purchase a helmet from a military surplus store or website; you can transform a bike helmet; or you can make a play helmet out of papier-mâché.
Surplus or Bike Helmet
Step 1
Remove the old covering from the surplus helmet, if still present. The helmet cover will be attached by straps that may be cut or unfastened. If desired, remove the old chin-strap to either clean or replace. To remove a chin-strap, you will need a screwdriver to unscrew the two screws holding it in place. Alternatively, use a bike helmet.
Video of the Day
Step 2
Place the helmet right-side-up on a hard surface, such as a table, and drape the fabric over the top. Cut the fabric around the helmet giving at least a 1/2-inch extra along all edges.
Step 3
Tuck the fabric in the back of the helmet by making two pleats about 1 1/2 inches from the center of the helmet. This is to help the fabric fit the round shape better. Fold the pleats inside the fabric and stitch in place with the needle and thread. If necessary, make small pleats at the front or near the sides of the helmet to help conform the fabric covering to the shape of the helmet.
Step 4
Apply a thin line of hot glue along the lower edge of the helmet and press the lower edges of the fabric cover into the glue to hold the cover in place. If desired, fold the lower edge of the fabric cover under 1/4-inch before pressing into the glue, to reduce fraying.
Step 5
Stick one half of the hook-and-loop tape inside the helmet in several places; use the softer "loop" side of the tape since this part will face the wearer's head. If the tape is self-adhesive, simply remove the paper backing and stick. If the tape is not self-adhesive, use the hot glue gun to stick it to the inside of the helmet.
Step 6
Adhere the other side of the hook-and-loop tape (the "hook" side) to the back of craft foam. Use the foam to line the helmet for comfort. The foam may be cut to fit the inside of the helmet. If using a bike helmet, there is no need to add the craft foam to the inside.
Papier-Mâché Helmet
Step 1
Wrap the entire bike helmet, including the bottom, with plastic wrap, covering it with several layers of plastic. Set the plastic-covered helmet on some old newspaper on a hard work surface, such as a table. Cut the newspaper into strips about an inch wide. For best results, cut up all the newspaper in advance so you don't have to stop later to cut more.
Step 2
Combine 1 cup of flour with 4 or 5 cups of hot water in a large bowl. Stir with the spoon for several minutes to form a paste. Stir in 1 tbsp. or 2 tbsp. of salt to prevent mold. Place the bowl with the flour-water mixture next to the helmet.
Step 3
Dip the newspaper strips in the mixture and begin forming the helmet over the plastic-covered bike helmet. The bike helmet helps keep the round form but you have some freedom to change the shape of your papier-mâché helmet as you build the layers. Start with only two or three layers of the papier-mâché, and overlap the paper slightly to build a supportive base for the helmet. When finished with the initial layers, allow the helmet to dry completely before continuing. For best results, let it dry for 12 to 24 hours.
Step 4
Repeat by adding another two or three layers of papier-mâché to the helmet once the first layer has dried. This reinforces the initial layers. Allow to dry completely and repeat until you have the desired shape and thickness for your military helmet.
Step 5
Paint the dried papier-mâché helmet with desired colors. Craft paints, such as acrylics, are inexpensive and dry in 12 hours or less, unless painted on very thick. Allow the paint to dry before using. Finish with a protective paint glaze, if desired.
Tip
If desired, leave a hole on the left and right sides of the helmet to attach a chin-strap later by tying string through the holes.
Warning
If using a surplus helmet and the helmet is going to a child, craft foam may be insufficient to keep the helmet on and comfortable. Shoulder pad inserts or thicker foam pieces may be used inside the helmet, also attached with hook-and-loop tape, to help keep the helmet in place so it doesn't slip on a child's head.
Video of the Day