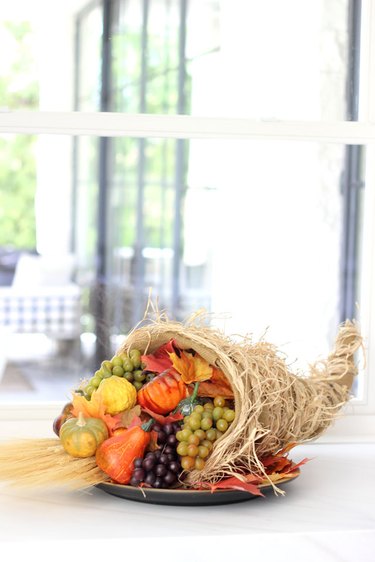
As you transition to fall decor, you can update your flower arrangements or go in a different direction with your table centerpiece and decor ideas. Typically filled with an overflowing variety of fresh or artificial produce and flowers, cornucopias make festive Thanksgiving centerpieces and tablescapes for a foyer, mantel or buffet table, especially for Thanksgiving.
Although you can purchase a ready-made wicker cornucopia, making your own is easy and more affordable—plus, you can make it any size you desire. This burlap-covered cornucopia, which hides a chicken wire base, is wrapped in ribbons of raffia so it looks fresh from the harvest. This fall centerpiece is a beautiful addition to your autumn home decor and a fun fall craft idea that requires only some basic supplies from Michaels or your local crafts or hardware store.
Video of the Day
Video of the Day
Things You'll Need
Chicken wire or poultry netting
Gloves
Wire cutters
Tape measure
Burlap
Scissors
Hot glue gun
Raffia

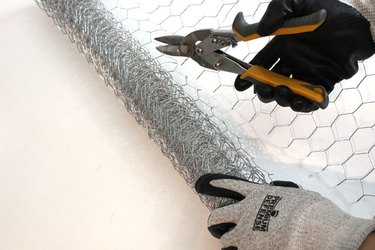
Cut the chicken wire
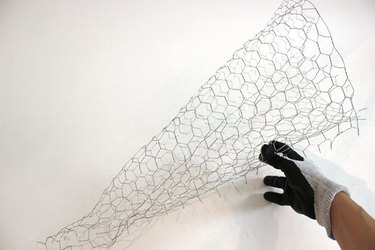
You can purchase chicken wire, or poultry netting, at the hardware store. The most common chicken wire that's available is 1-inch chicken wire, which has hexagonal openings of about 1 inch. Select a roll that is 24 inches wide. Put on your heavy-duty gloves and unroll the chicken wire.

Use metal snips or wire cutters to cut a piece that is about 24 inches long so you have a 24-by-24-inch square piece of chicken wire. Don't worry about measuring the chicken wire for an exact size—just eyeball a square.
Tip
Leave some wire ends where you cut. You will use them later to secure this side to the opposite side.
Flatten this square piece of chicken wire by bending it back where it curves.
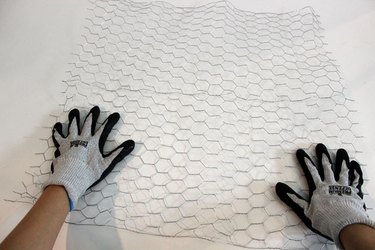
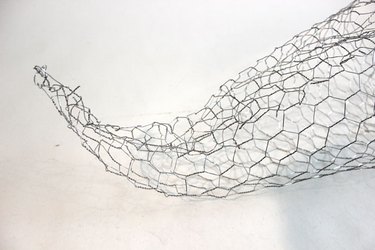
Shape the wire into a cone
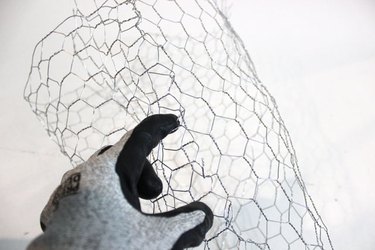
With one corner of the square piece facing you, roll the chicken wire into a cone shape, allowing the left and right edges to overlap so that the opening of the cone is about 12 inches in diameter.
To keep the cone from unraveling, hook the cut wire ends to the other side of the chicken wire. Twist the wire ends; the chicken wire will maintain its shape.
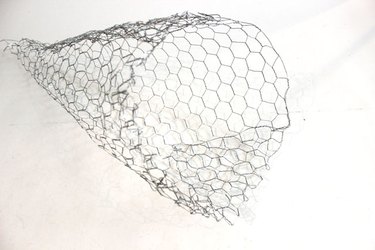
Fold in the extra wire
Because you started with a square, one corner of the chicken wire at the opening will be sticking out after you form the cone.
Bend this corner into the opening, using the loose wire ends to connect this flap to the adjacent chicken wire.
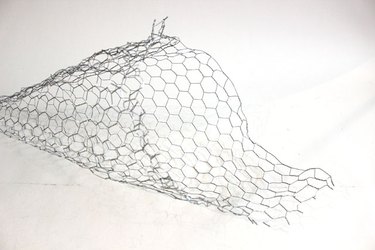
Bend the Thanksgiving cornucopia's tail
Bend the tail of the cone to form the curve of the cornucopia's tail. The chicken wire is very flexible.
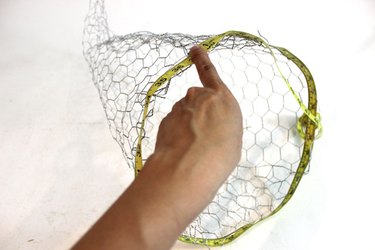
Measure the opening
Use a tape measure to determine the circumference of the cornucopia's opening. In the cornucopia pictured, the opening is 37 inches around.
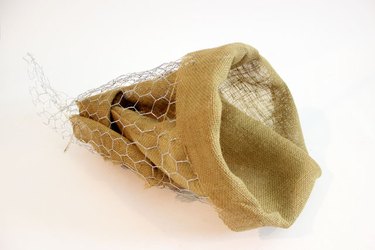
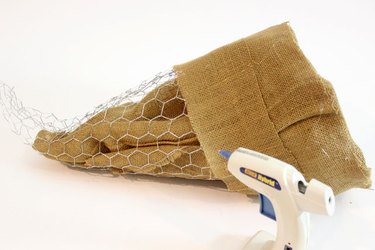
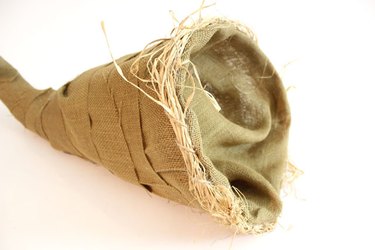
Attach a burlap lining
Cut a piece of burlap with scissors that is about 3 inches wider than the circumference of the opening and about 24 inches long. For example, because the opening of this cornucopia is 37 inches around, I cut a piece that was 40 inches by 24 inches.
Line the interior of the cornucopia with this piece of burlap, folding the burlap over the rim. Because the burlap is a bit wider than the circumference, you will be able to overlap the lining at the rim.
Hot glue the burlap on the rim to the burlap on the other side of the chicken wire. Because you will not be gluing solid pieces of fabric—the burlap has a loose weave—the hot glue can burn your fingers. To prevent burns, wear silicone tips on the fingers that will be touching the burlap. Silicone tips are available in the crafts store next to the hot glue guns.
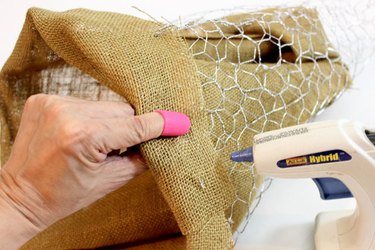
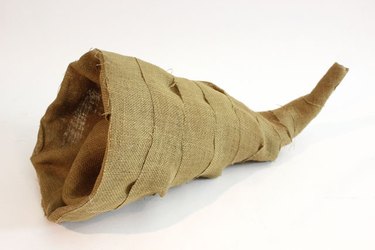
Wrap the exterior of the cornucopia
Cut four to five strips of burlap that are 4 inches wide by about 40 inches long. Wrap the first strip around the cornucopia, overlapping the burlap rim by about 1 inch, and hot glue this strip in place. Have the ends meet on the bottom of the cornucopia so they are not visible.
Continue wrapping the strips of burlap around the cornucopia, overlapping the strips and hot gluing them in place. As the cornucopia narrows, you will not need the entire length of the 40-inch strip of burlap. Just cut off any excess and have the ends meet underneath the cornucopia.
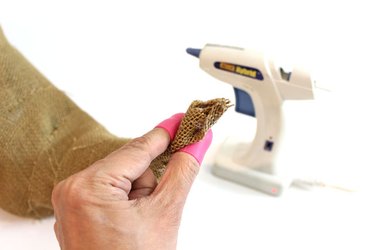
Glue the tail closed
Squeeze some hot glue in the tail end of the burlap and pinch it closed. Again, wear silicone tips to protect your fingers and thumb.
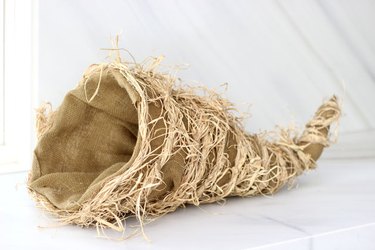
Tie up hanks of raffia
The body of the cornucopia is complete, but adding ropes, or hanks, of raffia gives the cornucopia a rustic look while hiding the seams of the burlap strips. Start by gathering a bunch of raffia that is about 1/2 inch thick and 40 inches long, and tie a knot at one end with a roll of twine. Do not cut the twine yet.
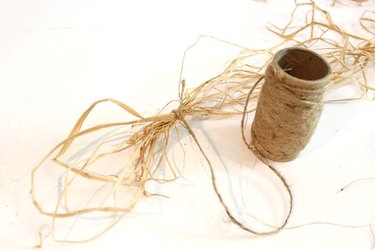
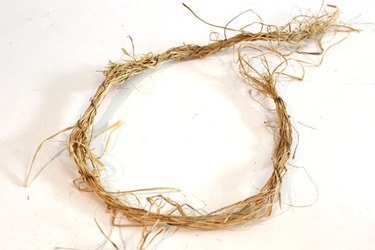
Twist the twine around the raffia at 2- to 3-inch intervals to form a rope.
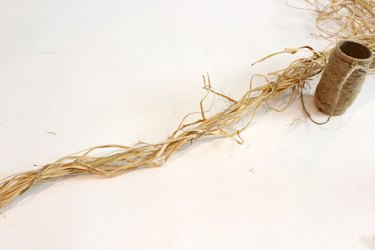
When you get to the end of the raffia hank, cut the twine and tie a knot with it. The messier your raffia hank is, the better it looks. All those loose, random pieces of raffia will make the cornucopia look more natural.
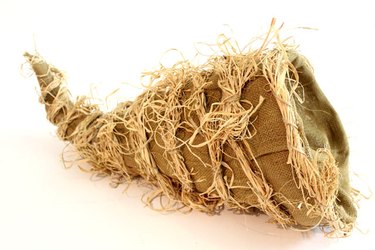
Attach the raffia hank
Hot glue the raffia hank to the rim of the cornucopia. If the raffia is longer than you need, just overlap it for thicker coverage.
Cover the seams
Continue forming raffia hanks for the remainder of the cornucopia, hot gluing them to cover the seams in the burlap. Even though the cornucopia narrows, continue making the hanks 40 inches long, as you can run them continuously around the burlap or overlap them wherever the raffia looks thin.
Decorate the DIY cornucopia
Decorate the cornucopia with fresh or artificial pumpkins, gourds, fruits, veggies or flowers, and make it the centerpiece of your Thanksgiving decorating and Thanksgiving dinner. There's plenty to admire with this horn of plenty.