Things You'll Need
Foam sheets
Measuring tape
Pencil or pen
Scissors
Glue
Markers (optional)
Stickers (optional)
Ribbon (optional)
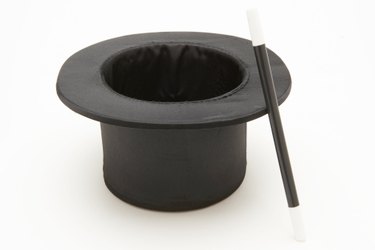
Top hats are a simple foam craft -- just a few cuts, a little tracing and some glue, and you're ready to be Abraham Lincoln or Uncle Sam for your next costume or Halloween party. Foam sheets are readily available at any craft store, and come in many colors; go with basic black for a classic top hat, or jazz it up a bit with a bright color. Once the hat is done you can further decorate it with markers, stickers or cut-out foam shapes.
Step 1
Measure the circumference of your head if you are planning to wear the hat. If you're not going to wear the hat, you can make it any size you like.
Video of the Day
Step 2
Lay a sheet of craft foam on a flat surface and draw a circle in the middle. This circle, which represents the inside measurement of the hat, should measure the same circumference as your head. Draw a second circle, at least 4 inches wider, around the first circle.
Step 3
Cut away the excess material outside the second circle. Then punch the point of your scissors into the center of the sheet -- inside the first circle -- and trim away the center until you have an unbroken foam ring. This is the brim of your hat.
Step 4
Roll another piece of foam into a cylinder, adjusting it until its inside edges line up with the inner edge of the hat brim you just made. Trim away any excess foam from the cylinder and glue its edges together. Hold until the foam is secure -- usually about five minutes.
Step 5
Squeeze a thin line of glue along one edge of the cylinder, then set it on top of the hat brim. Hold in place until the glue is dry -- usually about five minutes.
Step 6
Turn the hat upside down on another piece of foam and trace around the outside of the foam cylinder. Cut out this circle, which will be the crown of the hat.
Step 7
Squeeze a line of glue along the raw edge of the cylinder, then place the circle you just cut out -- the crown of the hat -- on top of it. Allow this piece to dry thoroughly, too.
Step 8
Embellish the hat -- if desired -- with markers, stickers and ribbon, or by gluing cut-out foam shapes on it.
Video of the Day