Things You'll Need
Canvas
Fine-grit sandpaper
Tack cloth
Water-based varnish
Tracing paper
Standard HB pencil
Graphite paper
Stylus
Bright blue acrylic paint
Medium-size paintbrush
Light blue acrylic paint
Dry brush
Paper towel
Black acrylic paint
White acrylic paint
Liner brush
Golden brown acrylic paint
Fan brush
Bright green acrylic paint
Dark blue acrylic paint
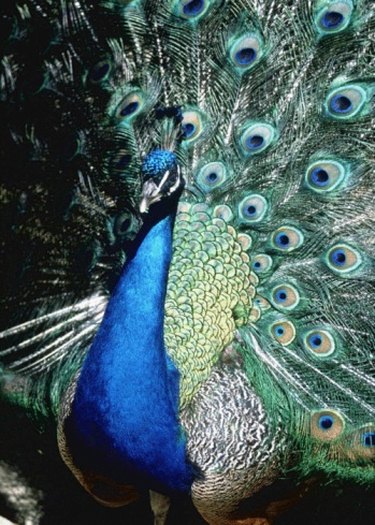
A brightly colored painting of a male peacock adds interest and beauty to any decor. Finding the perfect peacock artwork can prove difficult and expensive. You can create your own peacock painting by taking a step-by-step approach. Show off your artistic talents and impress visitors with the rich blues and greens of the male peacock in a painting you create all on your own.
Step 1
Prepare a canvas. Sand it lightly with fine-grit sandpaper. Remove all dust with a tack cloth. Apply two coats of water-based varnish with a sponge brush.
Video of the Day
Step 2
Draw the peacock onto the canvas. Find a picture or photo of a peacock. Trace the picture onto a piece of tracing paper with a standard HB pencil. Lay a piece of graphite paper onto the canvas face down. Hold it in place with a piece of tape. Place the tracing paper with the image of the peacock onto the graphite paper. Use a stylus to trace over the image, pressing firmly with uniform pressure. When the papers are lifted, the image of the peacock will be visible on the canvas.
Step 3
Apply two coats of bright blue acrylic paint to the body of the peacock with a medium-size paintbrush. Apply light blue acrylic paint to a dry brush; remove any excess with a paper towel. Press the paint onto the very center of the peacock's body to create shiny highlights where the chest of the peacock is most prominent.
Step 4
Paint the head of the peacock the same shade of blue as the body. Paint the eyes in small almond shapes using a liner brush and black acrylic paint. Use a stylus and a small amount of white acrylic paint to add a highlight to each eye. Use white acrylic paint to add white stripes on either side of each eye. The stripes should be fairly thick and set a small distance away from the perimeter of each eye. Use a liner brush and some black acrylic paint to add thin vertical lines coming out of the top of the head. Use a dry brush and blue acrylic paint to add medium-size circles to the top of each line. This will create the crest of the peacock.
Step 5

Paint the plumage or tail feathers. Add long vertical lines coming from behind the peacock in a fan-like formation using golden brown acrylic paint and a liner brush. Dip the ends of a fan brush in bright green acrylic paint and drag the paint out on either side of each line from top to bottom. This will create the look of long, soft feathers. Paint the signature "eyes" of the tail feathers in an egg-like formation with a golden brown acrylic paint. Paint several eyes all over the plumage coming out of the back of the peacock. Space the eyes a small distance apart. Paint a small circle in the bottom half of each eye in dark blue acrylic paint. Add a border of light blue acrylic paint to the dark blue circles.
Step 6
Paint the legs and feet of the peacock with a small paintbrush and golden yellow acrylic paint. Peacocks have three digits on the front of their feet and one coming out the back. Each digit has a small claw protruding from the tip.
Video of the Day