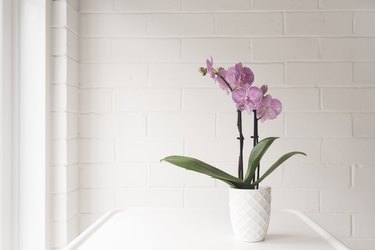
Phalaenopsis, Cattleya, Dendrobium and other orchid species (Orchidaceae) grown in the home are tropical epiphyte plants that use modified aerial roots to absorb moisture and nutrients, hardy in U.S. Department of Agriculture plant hardiness zones 10 through 12. Use horticultural charcoal for orchids or other coarse, well-draining growing mediums for successful orchid cultivation, since they are able to support the delicate roots of your plant without smothering them. Growing orchids in charcoal medium is an enjoyable task that can be completed by following several simple cultivation guidelines.
Things You'll Need
Clay or plastic planting container
Horticultural charcoal
Perlite (optional)
Cool mist humidifier (optional)
20-20-20 fertilizer
30-10-10 fertilizer
10-50-10 fertilizer
Video of the Day
Step 1: Prepare the Potting Mix
Prepare the orchid repotting mix. Use horticultural charcoal in place of standard orchid potting soil or mix equal parts charcoal, bark and perlite to create an even better-draining growing medium.
Video of the Day
Step 2: Pot the Orchid Plant
Plant your orchid in a well-draining clay or plastic planting container; for best results, select a container that has holes in the bottom and vertical slits in the sides to allow excess water to drain. Plant the orchid at the same level it was growing in the nursery container; the junction of the stem and roots should be positioned no deeper than 1/2 inch below the surface of the soil.
Step 3: Place the Orchid in Bright Light
Expose the orchid to four to five hours of bright filtered sunlight or fluorescent or grow lights each day to encourage healthy growth and bountiful blossoms. Place your orchid near a south-, east- or west-facing window that receives indirect or filtered sunlight. Avoid positioning the plant where it will receive direct sunlight, as this may cause its foliage to burn and its blossoms to fade prematurely.
Step 4: Water Orchids Weekly
Water your orchid weekly, but limit the amount of moisture that you provide to prevent wilting, root rot and other cultivation complications caused by overwatering. Pour lukewarm water over the surface of the growing medium until it drains from the bottom of the pot; distribute the water as evenly as possible. Allow the top of the growing medium to dry slightly before you water again.
Step 5: Provide an Orchid-Friendly Environment
Create an indoor climate that provides conditions that are similar to what your orchid would experience if grown in its native climate. Maintain an indoor temperature between 68 and 75 degrees Fahrenheit during the day; lower the temperature 10 degrees at night to stimulate healthy flower production. Move the orchid into the bathroom while you shower or run a cool mist humidifier in the room where the plant is kept to provide it with the 40 to 60 percent relative humidity levels it needs to thrive.
Step 6: Fertilize Orchids Regularly
Fertilize the orchid every two weeks, March through August, using a water soluble fertilizer; alternate between using a 20-20-20 and 30-10-10 formula each time you fertilize. Dilute the fertilizer to one-quarter the recommended strength and apply according to package directions. Provide your orchid with a single application of 10-50-10 fertilizer in November to give it the phosphorous it needs to set healthy buds.
Step 7: Monitor for Pests
Watch for pests. Orchids occasionally have problems with pests such as aphids, mealybugs, spider mites and scale insects. If you catch the infestation in its early stages, remove the pests from your plant by hand. If not, treat affected orchids with a houseplant insecticide, applied according to package directions.
Step 8: Repot Every Two or Three Years
Repot your orchid every two to three growing seasons when the roots and plant are crawling out of the pot. Remove the orchid from its container and rinse its roots under running water; use warm water to avoid shocking the plant's roots. Examine the root system and use a sharp, sterile gardening knife to cut away any brown or mushy roots. Repot the orchid plant in fresh charcoal growing medium.