Things You'll Need
Sticky note
Phillips or flat-head screwdriver
Needle-nose pliers
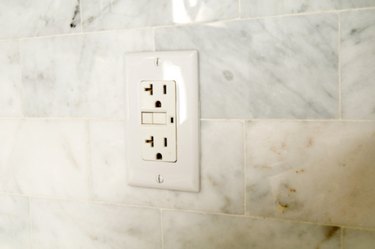
If you want to wire an electrical outlet so you can control it with a light switch, you have to remove the brass tab in between the two receptacles. This brass tab bridges the two receptacles so they stay "hot" all the time. When you remove the tab, the bottom receptacle stays hot, and the top receptacle can be controlled by a light switch. Instead of being one interdependently connected circuit, the outlet becomes two independently connected circuits.
Step 1
Turn off the circuit breaker that supplies electricity to the outlet you're altering. Place a sticky note on the breaker box to let everyone know that electrical work is being performed.
Video of the Day
Step 2
Remove the screw that holds the outlet plate to the electrical box, using a screwdriver.
Step 3
Remove the two screws that hold the power outlet to the electrical box. These are located above and below the two receptacles.
Step 4
Pull the power outlet out of the electrical box.
Step 5
Loosen the screws that hold the wires to the outlet. Remove the wires. The outlet should now be free.
Step 6
Grip the brass tab between the two screws on the power side of the outlet, using needle-nose pliers. Wiggle the tab back and forth until it breaks off.
Warning
If you fail to turn the power off prior to working on the outlet, you may electrocute yourself.
Video of the Day