Things You'll Need
Latex primer
Medium-grey latex paint
Light-grey acrylic paint
Glazing medium
Sea sponge
Large paintbrush
Stiff dry paintbrush
Stencil brush (optional)
Medium-brown acrylic paint
Large flat paintbrush
Palette paper
Dry brush
White paint
Paper towel
Water-based varnish
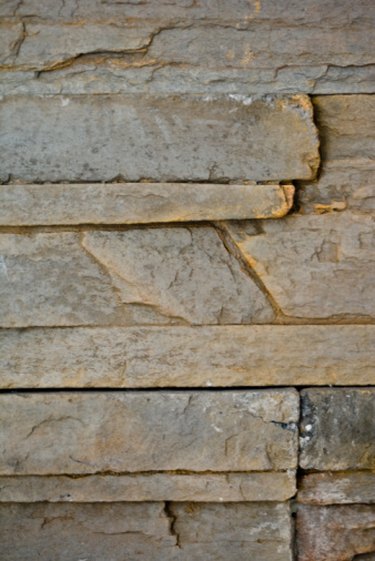
Creating a faux rock look can add depth and interest to any room or surface. A fake rock look can be used to make a wall or object appear to be something it is not. Paint can be used in various ways to create a rock finish. Using some basic tools and a little skill, it is possible to transform a boring and flat surface into a piece of art that will fool visitors and show off your creative side.
Step 1
Prepare the wall or surface by applying two coats of a latex primer. Allow each coat to dry thoroughly.
Video of the Day
Step 2
Base coat the wall or surface in a medium-grey latex or acrylic paint. Apply two coats, and allow time for each coat to dry.
Step 3
Mix a light grey acrylic paint with a glazing medium. Mix one part paint with one part glaze. Wet a sea sponge, and apply the glaze mixture to the sponge with a large paint brush. Press the paint onto the wall or surface with the sponge, creating a textured look.
Step 4
Use a stiff, dry paintbrush, like a stencil brush, to apply a medium-brown acrylic paint to the wall or surface. Dip the tip of the paintbrush into the brown paint. Hold the paintbrush straight toward the wall, and carefully press the paint on the brush tip onto the wall or surface. This technique will create tiny brown dots and a natural, stone effect. Repeat this technique over the entire wall or surface until it is covered.
Step 5
Define different rocks by adding shadows to outline them. Use a large flat-brush and side-load a dark grey color to the brush by dipping one corner into the paint.Use palette paper to blend the paint into the brush using a back and forth motion. Use the side-loaded paint brush to outline each rock. This technique will create a soft, blended shadow and add defined rocks to the wall or surface. Repeat this step for each rock. The rocks can be as small or large as you like.
Step 6
Apply highlights to the rocks using a dry brush and white paint. Apply white paint to the tip of the dry brush. Remove all the excess paint with a paper towel leaving only a small amount of paint on the paintbrush. Pick an imaginary light source and paint a highlight on each rock according to that source. All the highlights should be in the same position on each rock. Work the white paint into each rock in a circular motion with the dry brush.
Step 7
Apply one coat of water-based varnish to the surface to protect the finish.
Video of the Day