Things You'll Need
1. Large Sheet of Glass
2. A 4x8 sheet of heat treated particle board
3. A 4x8 sheet of RMAX insulation
4. Three 2x6 boards (8ft)
5. 208 aluminum cans (Any Kind)
6. PC fans (Or Solar Fan)
7. One tube of silicon caulk or high heat mortar.
8. One can of hi-temp black spray paint
9. Nails
10. Drill with 3/4 Wood Boring hex shank drill bit
11. Edging
12. Duct Tape
13. Patience!
Do you want FREE HEAT from the sun without the added expense of spending a ton of money in start-up costs? The Soda Can heat box is not a new thing! It's been quite popular among residential owner's in the northeast part of the United States!!! Mainly, because of how CHEAP and INEXPENSIVE they are to set-up and run!!! Try it out!!
Step 1
First, I must give credit to Brian Smith, Soros and Rich Allen. They gave me the much needed information, so that I could finish this article. Thank you gentlemen!
Video of the Day
Step 2
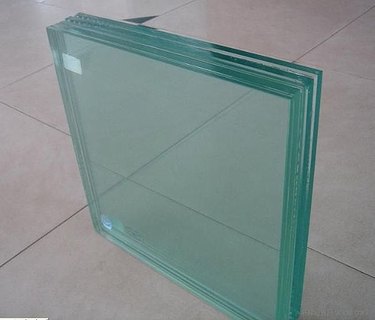
When making a solar pop can heater, it is important to find a cheap, but large sheet of glass. Do not use plexi-glass, as it WILL melt overtime. Build your box based on the dimensions of the glass that you find. All of our measurements (and the number of cans you use) will be different because of this.
Step 3
Measure your sheet of glass and make your box the same exact dimensions. 2X6's work excellent, with temperature treated particle board as the premier backing, with the reflective side of the Rmax insulation as the secondary backing (cans will sit on this). Your Rmax reflective insulation should be 2 foot shorter in height, so that you can fit a footer and header in. When you have your box nailed together make sure to add 2 strips of molding to the inside of your box on the lateral sides to hold the glass off from your cans.
Step 4

Make a 1 foot header and a 1 foot footer on the box. You can achieve this by measuring the 12 inches and inserting a 2x6 across the width. Depending on how many cans you will be putting across the width, use a 2 1/8 holesaw bit; and drill holes across the length in the footer and header 2x6 that you are inserting. Put RMAX insulation in the footer and header. In the footer, install a small fan. I recommend buying a small cheap solar fan off eBay. Also drill a hole in the back wall through the Rmax and backing in both the header and footer. You will want the diameter of the hole the same size as the piping (I used dryer vent piping which is 4") into your house. I just traced the dryer vent piping diameter on the back and used my compact palm router to make the hole.
Step 5
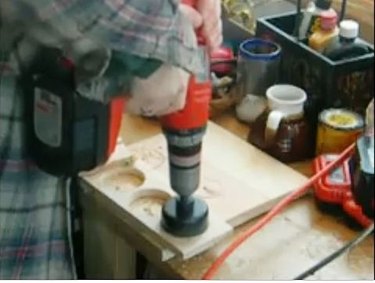
Picture of drilling holes that the pop cans will pop into at the footer and header.
Step 6
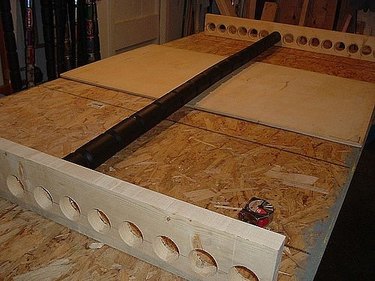
Picture of Header and Footer holes for cans.
Step 7

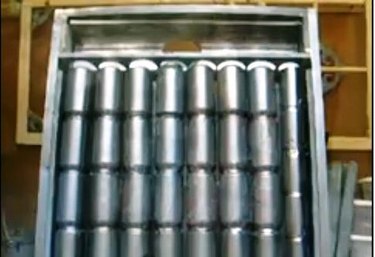
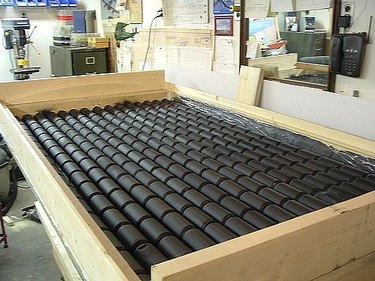
Find a bunch of empty cans. Cans can be any brand. Take each can and drill a hole in the bottom of them. When you connect the cans together (top to bottom) this will allow heat to flow continuously. Take the high heat mortar and put a bead around the top and bottom of each can. (caution: Using silicone caulking will leave a bad smell). It is a good idea to put continuous pressure on the cans, until the high heat mortar drys (up to 2 days). The 2 1/8" holes you drilled previously now come in handy! Just pop the TOP of the can in the hole (might need to use a flathead screwdriver). If you come up short and cannot fit a full can in somewhere, just cut a can in half! :)
Step 8

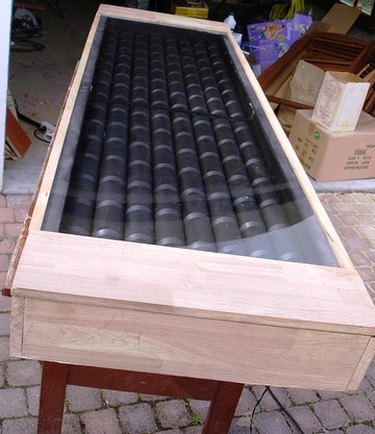
After you have all of your cans in the box and snapped in, take your black spray paint and paint all of the cans, its okay that you get paint on the RMAX insulation. Let paint dry. If you have a thermometer that you want to install, now is the time. Take your sheet of glass and install.
Step 9
You can secure your glass sheet many different ways. Some people use edging and some people use silicone caulking, or high heat mortar. I personally used both. I've seen some people use just duct tape. However you do it, make sure your glass is flush and secure and air tight!
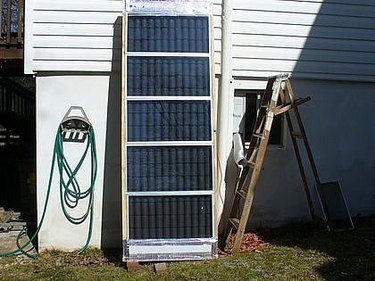
Step 10
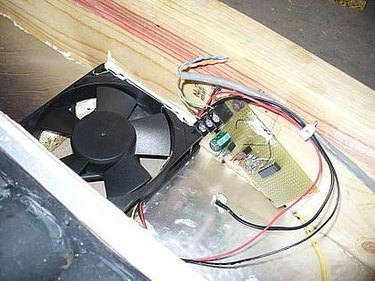
Now you will need to attach your new box to your house and pipe it into your house. (I leaned mine against my house) Like I said before, I used dryer vent hose. At the footer hose, inside your house, position a 4 inch fan toward the dryer vent hose, blowing your cold air in your house or garage into your box. The solar fan inside your box keeps this air flow current going. The header hose should be piped into the area you want heated. If your current is strong at this end, then you are all set!!! Good job! If not then your box has air leaks, possibly around your glass, or wooden frame. Caulk any cracks and try your fan again. When you have it sealed perfectly then you are done, CONGRATS!!!
Step 11

PLEASE VISIT THE LINKS IN THE RESOURCE BOX BELOW! THE LINKS ARE VERY HELPFUL! RICH ALLEN'S IS VIDEO, AND BRIAN & SOROS HAVE SOME GREAT IDEAS! PLEASE RATE THIS ARTICLE 5 STARS FOR MY EFFORTS, THANK YOU! AND PLEASE COMMENT ANY PROBLEMS THAT YOU HAVE, OR ANYTHING THAT YOU HAVE FOUND USEFUL!
Tip
Using a solar fan is very smart. It eliminates you from having to turn the fan in your box on and off. When the sun comes out, it turns on, and at sunset it turns off, allowing you to use your heater only when the sun is out! Make sure your box is caulked around the edges!
Video of the Day