Things You'll Need
Drop cloth
Painter's tape
Base coat of paint
Paint tray
Paint roller (3/8-inch nap)
Faux glaze
Sponge paint roller
Small sea sponge
Trowel (8 to 10 inches wide)
Glaze squeegee

A sponge paint roller is used in faux painting to create a unique wall finish. It provides a way to hide wall imperfections and gives the wall a three-dimensional look. Many sponge techniques use a small, handheld sea sponge; however, when covering large walls, sponge painting walls with a roller speeds up the process. The different techniques take a little practice, but it is a satisfying project that most do-it-yourself homeowners can do.
Sponging-On Technique
Step 1: Clear the Room
Remove all furniture, wall hangings and electrical outlet coverings. Cover the floor near the work area with a drop cloth. Apply painter's tape to the baseboards, ceiling molding, window casings and other areas where you do not want the paint to be applied.
Video of the Day
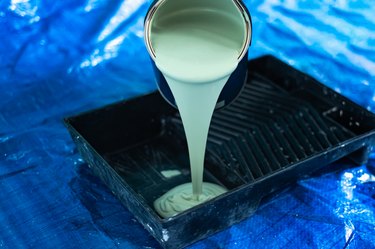
Step 2: Apply the Base Coat
Pour the base coat of paint into the paint tray and roll it onto the wall's surface using a 3/8-inch nap roller. Cover the entire area and remove the painter's tape. Allow the wall to dry overnight.
Step 3: Add New Tape
Apply new painter's tape to the same areas where you do not want the finish applied.
Step 4: Apply Glaze With the Sponge Paint Roller
Pour the faux glaze into the paint tray. Saturate the sponge paint roller with glaze, squeeze out the excess and roll it onto the wall. Change the direction often to create a random pattern.
Step 5: Glaze Small Areas
Take a small sea sponge and apply glaze in small, tight areas and corners. Remove the painter's tape and allow the wall to thoroughly dry before hanging pictures and reinstalling electrical outlet covers.
Sponging-Off Technique
Step 1: Repeat the Procedure
Follow Step 1 through Step 3 of the sponging-on technique section.
Step 2: Jigsaw the Glaze
Pour the faux glaze into the paint tray and roll on a thin layer using a 3/8-inch roller. Make a random jigsaw-like pattern with your strokes. Make each section no larger than 2 to 4 feet in width. Make the edge of one section butt up against the edge of a new section. Do not overlap the glaze.
Step 3: Roll Over the Glaze Randomly
Take the sponge roller and with light strokes randomly roll it over the glaze before it dries. Alter the direction of your strokes for a random finish. Rinse the roller often, as the process of removing the glaze saturates the roller.
Step 4: Remove Glaze With the Sea Sponge
Take a small sea sponge to remove the glaze in small, tight areas and corners. Remove the painter's tape and allow the wall to thoroughly dry before hanging pictures and reinstalling electrical outlet covers.
Tuscan Faux Finish
Step 1: Repeat Site Preparation
Follow the site preparation instructions in Step 1 of the sponging-on technique section.
Step 2: Apply Paint With the Nap Roller
Pour the base coat of paint into the paint tray and roll it onto the wall's surface using a 3/8-inch nap roller. Cover the entire area and allow the wall to dry overnight.
Step 3: Add the Second Coat
Apply a heavier second coat of base paint using a sponge roller. Make the strokes go in different directions for a random look.
Step 4: Trowel Over the Second Coat
Run a trowel over the second coat immediately. With light pressure, drag the trowel across the wall in different directions, flattening out the peaks that were created by the sponge roller. Let the wall set for two hours.
Step 5: Add a Coat of Glaze
Apply a coat of glaze with a 3/8-inch nap roller. Immediately start to remove the glaze using a glaze squeegee. Start at the ceiling and pull the squeegee vertically to the floor. Wipe the squeegee after each stroke.
Step 6: Remove the Tape
Remove the painter's tape and allow the wall to thoroughly dry before hanging pictures and reinstalling electrical outlet covers.
Tip
When applying two coats of different-colored glaze, apply the lighter shade last to soften this first coat. Test your technique on a sample piece of board before sponge painting the walls with a roller.
Video of the Day