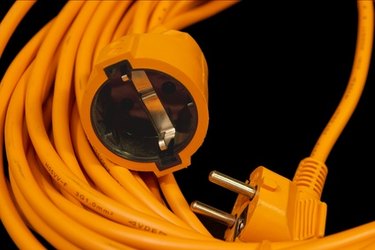
Things You'll Need
Knife
Electrician's screwdriver
Male and female extension cord plugs
Heavy-duty outdoor extension cord

Generators burn fossil fuels such as gas or diesel to produce electricity. Used in emergencies and in locations without a wired supply, they are often noisy and produce dangerous carbon monoxide exhaust fumes. For safety reasons, the generator is often located at a distance from the appliances it powers. (Reference 1) Transmitting power to the point of usage necessitates the use of an extension cord. Wiring your own cord enables you to select the correct length and electrical characteristics for the location where the generator is used. It may also cost less than buying a ready made cord.
Step 1
Determine the maximum load your appliances will place on the generator. Every appliance draws current from the generator, so add together the sum of the loads of all the appliances connected to the generator supply. Every appliance should have a plate attached to it, giving its load in kilowatts, or kW. For example, to power a 5-kW heater, a 2-kW drill and a 100-watt light bulb, the total load will be 5000 + 2000 +100 watts, or 7,100 watts. (Reference 2)
Video of the Day
Step 2
Calculate the minimum current rating for the cable by dividing the load by the voltage. North American homes are supplied with 120- and 220-volt feeds. Generators may offer either or both voltages. For example, a generator supplying 120 volts to a group of appliances placing a 7,100-watt load on the circuit will require a cable rated for (7,100 / 120) amps, or roughly 60 amps. (Reference 3) Use an outdoor rated cable that exceeds your calculated current rating.
Step 3
Disassemble the plugs you will attach to the cord. Feed sufficient cord through the housing in each of the plugs for you to work on the end of the cord without the plug housing getting in the way.
Step 4
Position each plug base so the insulated part of the cord is level with the cable grip. Trim the ends of the wires so they reach the terminals. Do not stretch or bunch up the wires. If the wires are not the correct length, trim them to size or remove more of the outer insulation to expose a greater length of wire. (Reference 4)
Step 5
Use a knife or wire strippers to bare the final quarter of an inch of each wire. Twist together each bundle of exposed wire filaments to create a stiff wire rod. (Reference 4)
Step 6
Attach the wires to the plug terminals. Generator cords must use polarized wiring so connecting the wires to the correct terminals is essential. Attach the "hot" black or red wire to the brass terminal and the "neutral" white wire to the silver terminal. Attach the bare or green covered grounding wire to the terminal marked as GND. (Reference 5)
Step 7
Protect the cord against being pulled loose from the plugs by fastening it firmly in the cord grips. Make sure the terminals are tight, then replace the housing on each plug. The cord is ready for use.
Tip
Read all local and national electrical regulations relating to the production and use of generator extension cords. Some areas may have specific guidelines on permitted types of cords and plugs.
Check extension cords before use, and replace or repair damaged parts.
Warning
Electricity can cause fires, injury and death. If you have any doubt, consult a qualified electrician and do not undertake "do-it-yourself" electrical projects.
Always ensure the cord you use exceeds the maximum current rating of your generator. Never overload the extension cord. It will overheat. It may then catch fire. (Reference 6)
Video of the Day