Things You'll Need
Sheet of plexiglass
Large work table or workbench
Grease pencil
2 to 4 C-clamps
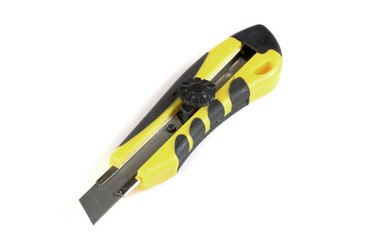
Box cutter or sharp utility knife
Carpenter's square or T-square ruler
Translucent vinyl graphics
Vinyl cutter blade, 30-degree angle (optional)
Masking tape
Isopropyl alcohol
Lint-free cloth
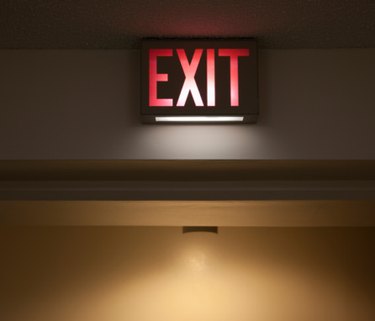
Sign holder or illuminated light box (optional)
Plexiglass is a lightweight acrylic transparent polycarbonate sheet used in the construction of some vinyl signs. Plexiglass is durable and 20 times stronger than glass and can be used in light-box type signs as an alternative to glass panels, or used as a stand alone substrate. Because of the ease of making a sign with plexiglass, simple tools will help you complete the process in no time at all.
Cutting
Step 1

Remove the protective covering from the acrylic sheet. Lay the plexiglass on a large table or work bench. Measure the sheet of plexiglass horizontally and vertically. Mark with a grease pencil for guidelines. Cut materials for two signs.
Video of the Day
Step 2

Keep one edge flush with the table. Lay a metal straight edge on the pre-measured cut line. Use a carpenter's square or a T-shaped ruler, a T-square, aligning of the line. Clamp the plexiglass to the table with two to four large C-clamps.
Step 3
Score with a box cutter or other heavy duty knife. Repeat scoring until you are one-third to one-quarter of the way through the material. Unclamp the plexiglass from the table.
Step 4
Position the plexiglass with the score line flush with the table edge, with the excess hanging over the table edge. Reposition the clamps and tighten. Snap off the waste by pushing downward on the plexiglass. Don't apply excessive force.
Step 5

If the plexiglass does not break easily off, score again and repeat. Lightly sand any rough edge areas. Do not sand the face of your sign.
Production
Step 1

Create or buy vinyl graphics and text for your sign. Use only translucent vinyl film if making the sign for a light box. If you are making your own vinyl graphics, use a 30-degree angled cutter blade.
Step 2
Remember that plexiglass is transparent so in most cases, unless you use primer or lay opaque vinyl over the sign, the text and graphics will be visible through the back.
Step 3

Make two exact sign faces for the sign, because even if you line up the letters exactly, shadows behind the letters may cause readability issues.
Step 4

Apply an image-only graphic if background transparency is desired. Apply vinyl graphics on one side only and make sure the sign will be the same no matter which side faces the viewer.
Step 5

Remove any initial grease pencil lines with Isopropyl alcohol and a lint-free cloth. Clean the entire sign with the rubbing alcohol removing dirt. Allow to air dry.
Applying Graphics
Step 1

Clamp the cut plexiglass to the table. Measure the area and make new guidelines with a grease pencil. Line up your vinyl graphics on to the plexiglass. Secure the vinyl graphic to the plexiglass with masking tape creating a hinge. Apply masking tape the entire length of the graphic.
Step 2
Flip the vinyl graphic upward so that the white paper backing is facing you. Remove the backing paper. Hold the non-taped edge of the graphic in one hand. Don't let the vinyl graphic adhere on the sign just yet.
Step 3

Seal the edge of the graphic, just below the tape line with your finger or a sign making squeegee. Angle your stroke to 45 degrees. Slowly attach the vinyl decal to the plexiglass sign substrate. Move the squeegee across the graphic in a horizontal and vertical stroke. Removed any trapped air bubbles with the corner of the squeegee. Pop stubborn air bubbles with a pin, then smooth releasing the trapped air.
Step 4

Starting at any edge, slowly peel away the pre-mask tape, keeping the pre-mask as close to the graphic as possible. Do not pull upward or tug on the pre-mask or the decal may release from the surface of the plexiglass.
Step 5

Clean the sign with isopropyl alcohol removing any grease pencil marks. Place in the holder of your choice.
Tip
If translucent vinyl is not available, remove the vinyl sections of the letters and leave the background, allowing the light to shine through.
Some home improvement stores will cut plexiglass free of charge.
Warning
Use only translucent vinyl when making a lighted sign.
Some plexiglass is combustible. Always consult the manufacturer before applying a heat source to plexiglass.
Never clean a plexiglass sign with harsh or abrasive chemicals.
Video of the Day