Things You'll Need
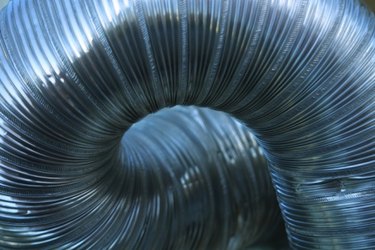
Flexible duct
Metal hanger straps
Hammer
Hanger nails
Tin snips
Heat-resistant tape
The design of ductwork is as important to a home heating and air conditioning system as the unit that powers it. Ducts that are improperly sized, installed with crimps or tight bends, have leaks or are not balanced between supply (conditioned air) and return ("used" air) will cause the system to operate inefficiently. Over time, such small problems may damage the unit. Ductwork is installed at the same time as the heating/air conditioning unit. If done properly, ductwork should last a lifetime.
Step 1
Determine the size of ductwork needed to match the air flow from the unit, measured in cubic feet per second. The unit should have that marked on it or it will be in the owner's manual with the unit. The size of the pipes coming in from the unit also should indicate the size duct needed to handle output from the unit (supply) and necessary return of air from the house. Main ducts will be larger; branches to individual vents will be smaller.
Video of the Day
Step 2
Map routes for ducts through the house using a central duct with branches off to individual areas. Run the main duct through the center of the house, if possible, with forks to vents on outside walls. House design will affect this routing; in some houses, it may be necessary to split supply systems at the unit and run parallel ducts along walls, through an attic. Locate return ducts in areas where air will flow naturally, such as hallways; put return openings on inside walls.
Step 3
Install ducts in a basement between or around floor joists; in a ceiling, place ducts between ceiling joists; in an attic, lay ducts over joists. Fasten ducts with metal strap hangers nailed to joists, about every 6 feet in basements and ceilings and less often in attics. Don't stretch ducts; keep them secure but flexible. Avoid any obstructions that would require sharp bends or would crimp the ducts.
Step 4
Avoid any areas subject to heat, such as water heaters and hot water lines, and don't run ducts over electrical boxes. Add extra insulation to ducts in areas such as attics, where cold wind might blow in. Use metal connectors to join duct sections; slide connectors inside the duct on each end. Secure all connections and seams air-tight with heat-resistant tape recommended by the duct manufacturer.
Step 5
Connect supply and return ducts to the unit once all of the ductwork is laid throughout the house. Test the system by forcing the blower to turn on and look for leaks, indicated by blowing insulation or whistling air around a seam. Force the blower on with a switch if the unit has a separate blower switch, or by adjusting the thermostat until it comes on.
Warning
Don't use duct tape to seal ductwork seams; despite its name, the adhesive will deteriorate over time and cause leaks.
Video of the Day