Things You'll Need
Screwdriver
Painter's tape
Plastic drop cloth
Cloth
Trisodium phosphate (TSP)
Varnish remover
Stripping brush
150 to 180 grit sandpaper
Vacuum cleaner brush attachment
Dry cloth
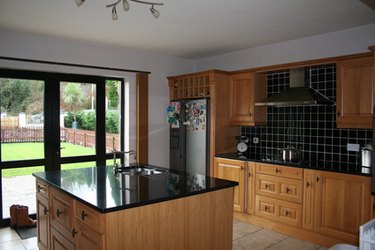
When you are refinishing your kitchen cabinets, removing old varnish is essential to getting a professional finish. According to Scott Gibson in his article "Painting Kitchen Cabinets", "Stripping cabinets to bare wood eliminates a potential adhesion problem between the old finish and the new paint." So even though it may take extra time and effort, the results that come from doing the proper varnish removal are well worth the long-lasting finish it can help create.
Step 1
Remove cabinet doors at the hinges using a screwdriver. Then remove the cabinet drawers.
Video of the Day
Step 2
Label each drawer and door according to where it goes with painters tape. For example, if the cabinet door was the first door from the upper portion of the cabinet, label it "U 1", then label the next door on the top "U 2" and so on. Numbering each piece will expedite replacing the cabinet doors.
Step 3
Take off cabinet hardware and drawer pulls. Using a screwdriver, unscrew each piece of cabinet hardware from the cabinet doors and drawers.
Step 4
Lay the cabinet doors and drawers on top of plastic drop cloth to protect the ground under it from chemicals.
Step 5
Remove dirt build up on the kitchen cabinets with Trisodium phosphate, also known as TSP. Wipe the TSP on the cabinets with a cloth to remove grease and dirt. Then let dry.
Step 6
Spread a varnish remover liberally on the cabinet according to the directions on the package. Leave the chemical on the cabinet for approximately 30 minutes or as stated on the label.
Step 7
Scrape off a small section of varnish remover with a stripping brush to ensure the process is done. Reapply varnish remover and check again every five to 10 minutes if the varnish is not easy to remove.
Step 8
Remove any remaining varnish remover with a stripping brush after a successful test section. Then wipe clean with a wet cloth to remove any remaining residue and allow to dry completely.
Step 9
Sand each kitchen cabinet lightly with 150 to 180 grit sandpaper. Smoothing out flaws and removing any stubborn varnish as you sand.
Step 10
Remove any remaining material left over from sanding with a vacuum cleaner brush attachment. Then wipe with a dry cloth to ensure the wood is free of debris.
Tip
Place hardware in a plastic bag for safe keeping. Be careful not to change the shape of the cabinet when sanding.
Warning
Only work in a well ventilated area. Wear safety glasses and a dust mask while sanding. Protect hands from chemicals with rubber gloves.
Video of the Day