Things You'll Need
Steel ruler
Object to measure
Pencil or pen

The accuracy and durability of steel rulers make them the ideal measuring tool for making crafts, drafting and performing household tasks. They provide more reliable measurements on small projects than tape measures or wooden rulers. Steel rulers are available in either U.S. customary units (inches) or metric units, or both. They come in a range of lengths and widths, and vary in accuracy and quality. Steel rulers most commonly come in one-foot, 18-inch, three-foot (yardsticks) and four-foot lengths.
Step 1
Place your ruler against the object, making sure that the first line of the ruler's gauge lines up exactly with your object's leading edge. Some gauges don't start right at the edge of the ruler, so make sure this slight gap is not included in your measurement.
Video of the Day
Step 2
Since rulers measure left-to-right, you will normally start at the object's left edge. But if the object is fixed in a place that won't accommodate the ruler, it may be necessary to flip the ruler around and read it from right to left. Make sure to place the unit gauge you're most comfortable with (e.g., inches) against the object's edge.
Step 3
Read the gauge carefully. If you are measuring to determine the object's overall length, record the closest graduation marking that lines up with the end of the object.
Step 4
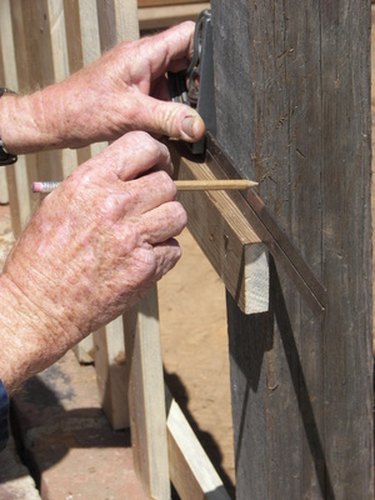
To measure an object for cutting, mark the edge of the object with a fine pencil line at the desired dimension. Remember that sloppy marks will decrease accuracy, so avoid wide, slanting lines that obscure your measurement.
Step 5
Inches are shown by the largest graduation markings along the ruler's edge and are numbered consecutively. Half-inches are indicated by the second-longest markings along the ruler, and quarter-inches, by the third-longest markings. Eighth-inches are shown by the fourth-longest markings, and sixteenth-inches are the shortest markings on the ruler. To keep it simple, just remember each unit is half the size of the next largest unit. So, if your desired piece is to be 6 1/4 inches long, mark your object at the first, third-longest marking, beyond the sixth inch. Or, if 6 1/16 inches is required, mark the object at the first, shortest marking, after the sixth inch.
Step 6
Metric rulers work the same way, but are divided into centimeters, indicated by large, numbered markings along the edge. Each centimeter is further divided into 10 millimeters, shown by smaller markings. So, an object that measures to the fifth small marking past the first centimeter would be 1.5 cm (or 15 mm) long. There are 100 centimeters in a meter, which is about three inches longer than a yard.
Tip
Steel rulers also provide the best straightedge for trimming your material, if it can be cut with a knife. Carefully line up the ruler’s edge with the measurement you have marked and score the material along the tool’s smooth edge.
Warning
Double-check that your fingers are not in the way before you cut, to prevent injury.
Video of the Day