
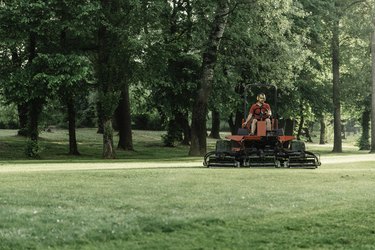
The Craftsman lawn tractor may be one of the mainstays supporting low-end farmers and rural citizens with larger tracts of land. The ability to remove the mower deck of the Craftsman lawn tractor can be a challenge for the uninitiated.
Deck Removal Safety Basics
Video of the Day
There can be a number of reasons to remove the cutting deck of a Craftsman riding lawn tractor, but most of them will be centered around either maintenance or switching between new components. There are a number of attachments for which you need to remove the cutting deck from a Craftsman riding lawn tractor, including snow-management tools and turf tillers.
Video of the Day
A few important points should be reviewed before you perform any work on the cutting deck. First, the lawn tractor should be parked on a level surface with the engine off, the key removed and bricks or wheel chocks behind the rear wheels. Be sure that the parking brake is engaged and the mower blades are disengaged before beginning work. It is only in this starting position that you can safely and reasonably begin working on the tractor.
Removing the Mower Deck of a Craftsman

To remove the cutting deck, approach the vehicle from the left side when facing the vehicle from behind. Maneuver the deck lift lever to its lowest position, putting the cutting deck as close to the ground as possible. Lie under the machine facing up and use your hands to remove the drive belt from the engine pulley and pliers to remove the cotter pins from the left underside connecting the clutch and clutch rod.
If you're having trouble identifying components, the owner's manual provides some helpful diagrams. Using pliers, remove the cotter pins from the anti-sway bar and chassis bracket, the suspension arms from the deck brackets and the front links toward the front of the tractor as regarded from behind the vehicle. Place all of the cotter pins in a cup or other container to avoid losing them and raise the lever arms to their highest setting, carefully sliding the cutting deck out from under the machine.
Reattaching the Cutting Deck
This process is mostly the same process performed in reverse, but there are a few calibration points you must ensure before beginning operation of the vehicle. First, you must ensure that the cutting deck is as level as the vehicle's cutting blades.
Measure the distance from the front lower edge of the cutting deck to the ground as well as the distance from the rear lower edge to the ground. The difference between the front and back lower edges should be between zero and one-quarter of an inch. More than this will result in potential damage to the tractor and the blades, though less than that is acceptable.
If you discover an imbalance, you can use the flange lock nut at the PTO (or blade engage lever) to loosen and then adjust the angle to favor a fore or aft angle, tightening the nut once you have a desirable pitch. Once you've successfully installed any attachments and/or replaced the drive belt, you can reinstall the cutting deck, lifting the PTO lever toward the upper rear position to raise it. Before operation, ensure that all components are secured and lubricated as necessary.